
Security, Weather Protection, Minimal Bed Loss and More
When you purchase a truck, one of the first questions you may ask is, how do I protect the items in the bed?
Some people use tarps; others may go the camper shell route. I decided to give a hard shell retractable cover a try. I wanted to ensure that I selected one that would be secure and protect my items from the elements.
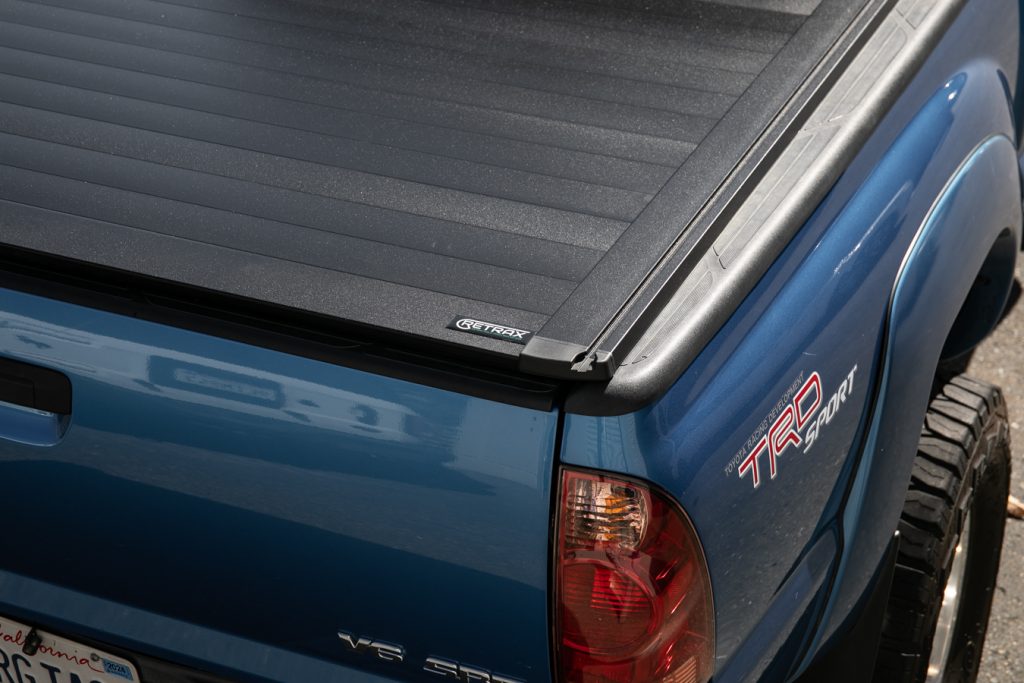
There were several different styles to choose from. There are tri-folds, one-piece, and retractable versions, to name a few. I decided to go with the Retrax PRO XR. I wanted security, weather protection, minimal bed loss, and the option to use while retracted.
The Retrax Pro offered all the essential elements I wanted for my truck. I have never owned a cover on any of my trucks in the past, and I was excited to try this one. You can install it in several different styles of vehicles. One of the main differences was the hardware needed to install it on a particular truck with the same bed size. I installed this on a 2006 Toyota Tacoma with a 5ft bed. But it is compatible with all 2005-2023 Tacomas.
In this article, I wanted to comprehensively review several categories we all experience when ordering and installing a product. I’ll go over the shipping condition, install process, and how it all performed. Performance was tested in wet conditions, retracted while driving, and while in the fully extended and locked position. I also wanted to see how easy it was to get a hold of anyone if I had issues with the installation process or needed warranty information.
Find It Online
- RetraxPRO XR Tonneau Cover: Check Price
Tools Needed
- Phillips screwdriver
- 9/16″ wrench or socket driver
- 6mm Allen
- 1/8″ Allen
Table Of Contents
Shipping & Packaging

When I received my items, I noticed how well they were packaged for shipping. Most of us have experienced ordering something, and when we receive it, it appears that someone shipped it using a sledgehammer.
The items were shipped using high-quality boxing materials, excellent protection inside the boxes, and extreme care for the items themselves. I was highly impressed with the packaging. If this was any indication of how the installation would be, I was excited, to say the least.
Unboxing

The first step is unpacking your items when they are ready for installation. This includes removing any shipping materials to secure the items from receiving any damage during shipping. Most of the shipping materials are used on the main canister. These consist of 2 plastic shipping brackets on either side. These brackets must be retained since they are used as a shim later in the installation. Once removed, you will remove the sticker on top to remove the inner protection tubes. These tubes are not reused and can be placed in your recycling area.
The other items can be left in the box or removed if you have a protective area to place them. I used a large tarp to ensure I did not scratch any items and they remained clean with no foreign substance intrusions.
Installation

After unloading all the items from the box and inspecting them for any damage or issues, I placed them in an orderly fashion for preinstallation. I read the instructions to ensure that I followed what they said precisely without deviating. I found that the instructions were just as good as the packaging. My only issue was ensuring I found the correct installation for my 2006 Tacoma. There are pre-instructions on the front, then in-depth instructions on page 20 for my Tacoma. Following the red highlight instructions detailed further in this review is essential.
Before starting any installation and only after reading the instructions did I call the 800 number listed on the back to see how easy it would be to get help if needed. I was on hold for less than 2 minutes. Tyler answered the phone and was extremely helpful. He said the instructions should be very accurate and the estimated time to finish the installation should only take 1 hour. Again, I was impressed with the overall quality and help I was experiencing.
Step 1. C-Channel Rails & Front Cover

I found one minor issue with the instructions during this step. They wanted you to lift the lock cover and press the release button. You can not do this without using the supplied keys to unlock the release button. It was not a significant issue and was easy to figure out; however, it was not in the instructions and was missed.
Once unlocked, you must pull the cover out at least 8 inches. The instructions want to ensure its in place and does not roll back into the canister. It wasn’t tough keeping it extended 8 inches. While extended, you will guide the C-channel rails onto the cover slides and into position to be mounted to the canister. Stickers identify the rails. The right side rail (passenger rail) has a green sticker, while the left side rail has a white sticker. Instructions 2a and 2b on page #2 detail this process and illustrate installing the necessary hardware.
Once the rails are installed, you will be installing the front portion. The instructions are concise regarding how to install the front cover and the hardware to be used. I found that the screws I removed from the shipping materials are the same as the screws needed to secure the front. I did not need the screws; however, if you were to lose one somehow, you would have an extra.
Step 2. Mounting Canister & Rails

Before starting this process, it is essential to note you will need two people to place the assembled canister and rails onto your truck. Although it may be possible to do this alone, you risk injury to yourself and damage to the unit, and it is not recommended.
This was one of the more significant issues I had with the instructions. Page #3 instructions have you positioning the canister and rails on the truck. The instructions should have you go to the appropriate page for your vehicle to ensure you have completed the necessary preparation work. If I did not pre-read the instructions, I would have missed this. The other Tacoma instructions were located on page 20.
Do the proper prep work before placing the canister and c-channel rails on the bed.

For my Tacoma, I had already ensured I had the correct hardware when reviewing the instructions and the included parts. I noticed the red highlight on page #20 when I reviewed the instructions. It states, “Follow the standard instructions through step 3, (pg.2) then refer back to this guide on how to install mounting hardware”. This is important to follow before placing the canister and rails on the truck bed.
The first steps on page #20 have you placing the included weather stripping on the front of your truck bed. This is pretty easy, and make sure you do not go over the sides of your truck, or the c-channel rail will not sit properly. Refer to the photos on page #20 for a more in-depth view of this step.
Step 4 on page #20 asks you to prep the mounting cleats to mount the rails to the truck bed. You will want to remove the plastic endcaps on the deck rail system already mounted to your truck. You will want to remove any tiedown cleats you may have installed by loosening them and sliding them out of the deck rails.
You can insert the mounting cleats into the rack system. This is step 5 on page #20. You will want to slide one in from the front and one from the back on each side of your deck rail. Once these are inserted, you can replace the plastic end caps.
Once the prep work was completed, two of us picked up the canister and rail assembly following the instructions provided in step 6 on page #20. We carefully placed it on the truck bed, ensuring both c-channel rails were seated securely on the bed sides with no interference.
Step 3. Adjusting C-Channel Rails

This may seem complicated; however, it was relatively easy to complete. This is an instruction extension under step 6 on page #20. It is much easier with two people, and adjustment can be done by tapping the rails with the palm of your hand.
You are using the plastic shipping material (now the spacing shim) you removed from the canister at the start of this process. Place it firmly against your tailgate when completely closed and latched. Use the small end of the spacing shim, which measures 1/8 ” thick, to determine the proper C-Channel Rail spacing.
Step 4. Tightening C-Channel Rail

Placing the spacers between the c-channel rails and the mounting cleats was probably the most challenging area of the installation. This is step 7, page #20. The c-channel rails were too close to the mounting cleats to insert the spacer block without moving the rails. By moving the rails, I changed the distance needed with the shim measurements. I found that mounting the spacer blocks to the mounting cleat loosely, using the four supplied bolts, made it possible to readjust the proper shim measurement required for proper operation.
Once I confirmed everything was to the specifications required and ready to be secured, I referred to step 5 on page #3 per the instructions. I opened the cover fully and tightened the four bolts supplied with the spacers using a 9/16 socket and ratchet with an extension. You can use a 9/16 wrench if desired. I ensured I was pressing down on the rails while tightening.
If the rails are not sliding correctly, please refer to the instructions in step 5, page #3, to adjust for proper operation. I had no issues with my installation, and the slide operated with no issues.
There are no bolt sizes for the bolts used anywhere in the instructions. I double-checked and only found them on page #20, already inserted into items B and C. I also found the installation instructions for the drain tubes in step 9 on page #6 and removed the protective film.
Installation is now complete. Let’s review how everything works.
Comprehensive Review

Once everything was installed, I confirmed nothing was missed. I checked the operation of the cover to ensure it worked properly and met the expectations I was hoping for.
Sliding the cover was relatively easy and should get easier with more use per the instructions. Some things that had me select this option were the security, weather protection, minimal bed loss, and use while retracted. Lets discuss these items in depth.
Security

The RetraxPRO XR has a key to lock a well-built latch system. The keys worked very well in locking and unlocking the top key latch. I was also impressed with the cover for the critical latch to protect it from the elements. This is essential for any vehicle that may be exposed to the weather.
The underside of the latch worked very well and had no issues opening, closing, or locking. It appears well-engineered and will provide a good deterrent for thieves looking to enter your bed. With over 20 years of law enforcement background, thieves will always find ways to steal items from your locked truck. However, providing a good deterrent with no access to know what’s in your truck is vital to storing items more safely.
Weather Protection

To say I got lucky checking this category is an understatement. After I installed everything, it decided to rain overnight. What better test was that? I opened the tailgate to find my bed was dry!
I also noted that the cover had excellent protection, causing water to bead on top like it had fresh wax. My only concern was the drains in case the water was inside the canister. The drain hoses provided are placed well, but the Tacoma has nowhere to put the drain hoses, and I did not want to drill holes.
Minimal Bed Loss

Any bed loss on a short-bed Toyota Tacoma can be significant. The canister housing measures 57″ long X 9″ deep X 16″ wide. This reduces your bed size over the wheel wells on the front of your bed.
The canister partially covers the two storage areas that the Tacoma has on the sides up front. These are still usable but more challenging to access and are limited by the size of items you can place inside the storage. I was still pleased by the access area under the canister since I primarily used this for my skis and boots.
Use While Retracted

I looked at a couple of things while I had the cover retracted. Would driving be noisy, and could I transport items too big to fit under the cover? At the posted speed limit, I drove over bumpy roads and on the freeway. I heard no noise with the windows closed and open.
I also found there to be plenty of room to store items. The nice part is the option to install a rack system as an accessory. I did not receive a rack system with this application, so that review must wait.
Final Thoughts

Overall, the the XR is a very well-built product. There is a lot of care and thought that went into this product. I liked the ease of installation. I was also happy that it met almost all the goals I had looked for in a cover. It was weatherproof, secure, quiet, and provided minimal bed loss, considering the size of the Tacoma short bed.
I enjoyed installing this product, which gives my Tacoma a very usable and lovely accessory. I was impressed by the availability of the tech support and warranty personnel.
The instructions were pretty easy to follow, with a couple of issues I discussed below. The parts were minimal, and everything was pretty much plug-and-play. The shipping and packing were extraordinary! I was very impressed with the packing and shipment of this item. The support you receive for this item will be better than most products you will find on the after-market.
Some minor issues that I found were the instructions should just be placed into a category for each vehicle. Looking for the red writing to ensure you were going to the correct area to follow the correct instructions could be daunting for some. The instructions never provided a size for the four bolts to mount the c-channel rail to the mounting cleats. Although the size may not be needed if you lose or damage one, finding the right size will be easier if identified.
Overall, the RetraxPRO XR is an excellent product with a high-quality design. The instructions are well done and could use a little adjustment to make them better. This is one of the better tech support companies I have used recently. They are located in South Dakota, which was also a plus for me.
Curious, first those that have had the Retrax Pro a couple of years…how is the weather proofness after 2+ years? Have the seals held up and still keeping the bed pretty dry??
Bought one a couple years back. It’s a great cover and works easily. Good purchase.
It works great! Still loving this one