

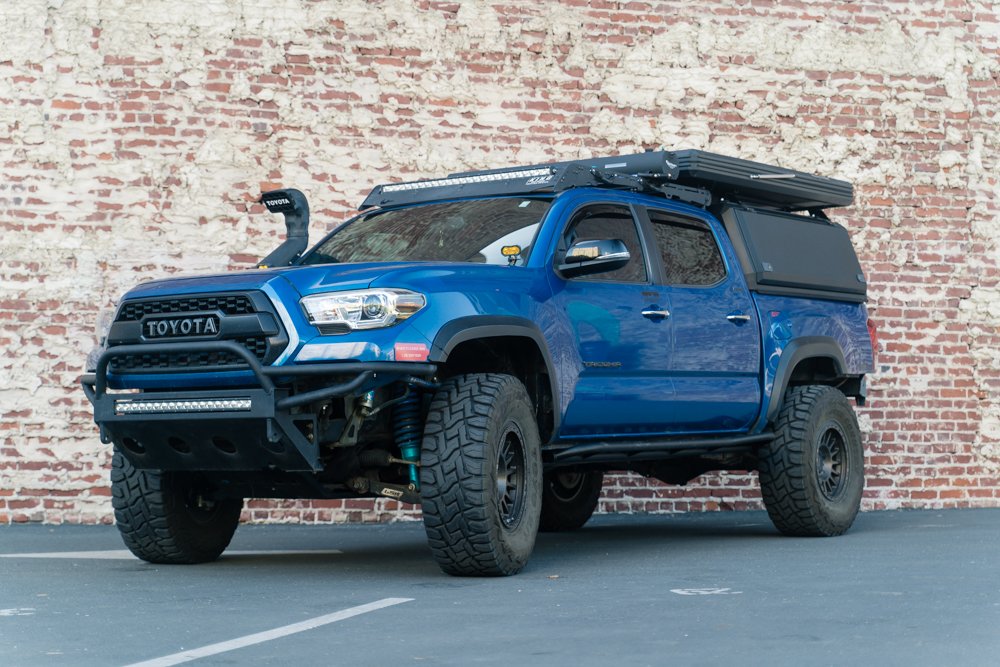
RSG Offroad makes a seriously bulletproof rock slider for your 3rd Gen Tacoma.
They have a wide range of bolt-on offerings for the Toyota Market. 4Runners, Tacomas, and Lexus all get their options. There are a lot of different rock slider options to choose from but I finally decided to go with RSG Metal Works, based out of Colorado.
RSG’s attention to detail and build quality is top-notch. This is my third pair of sliders on my truck, so I have plenty of experience. There are also the countless other sliders that I have helped friends put on.
I’ve had great sliders and not so great sliders in the past, so I knew what I was looking for.
I also liked the fact that RSG stocks their sliders and has them ready to ship. A lot of other fabrication companies are made to order and you could wait up to 3 weeks to 3 months waiting for your sliders.
Table Of Contents
Why I Chose RSG

Let’s be honest, there are not a lot of ways to stand out in the slider market since they all look very similar and perform the same function.
Rock sliders are not rocket science, they are there to protect your rocker panels from being dented and the sides of the vehicle from getting damaged. They also work as a great step for people who are looking for something to help them get into the cab with ease.
There’s a ton of options to choose from – with and without kick out and varying degrees of angle. There are a lot of great companies out there to choose from, but ultimately, I chose RSG.
Why RSG Sliders?
- Rear kick out is a standard option
- 2-inch main tube (stronger)
- 1/4-inch mounting plates (many other companies only use 3/16-inch)
- 4 leg design
- Bolts to factory mounting locations (additional holes for added strength)
- 180lbs per set
- Optional grooved dimpled steps for additional grip when entering the vehicle
- Stainless steel logo
RSG also gives you the option of leaving the sliders bare-metal, or have them powder-coated at an extra cost.
I decided to go with angled sliders and with the kick out. The angle of the sliders helps when you’re actually on rocks, so it’s less likely to get hung up. The kick-out is subjective, the term “kick-out” is there because the extra width helps the back of the vehicle swing out or avoid rocks/trees on tight turns. Some say that it might push you towards an object on the other side of the truck, but this is something you must consider when purchasing your sliders.
Find Them Online
- RSG Toyota Tacoma Rock Sliders: Check Price
DOM vs HREW
The main difference between the metals is strength.
HREW (Hot Rolled Electric Welded) metal is milder steel that is still very strong. Yields 40KSI strength steel. KSI stands for kilopound per square inch and is a non-SI unit of stress or pressure.
DOM (drawn over mandrel) steel is the same material which does not have a welded seam and yields about 70KSI.
DOM is more expensive to use, so any DOM orders are usually made to order.
Customer Service

I called RSG and spoke with Jason (the owner) to see what would best fit my needs.
I ordered my sliders, and in less than 10 days they were at my house. This is great because I ordered DOM tubing which they made to order. This is a real testament to the productivity and capacity that RSG has as a company. Many other fabricators take months to produce a rock slider.
I can receive large orders at my office so I shipped them there. If you plan on shipping to your house, I would suggest having it shipped to a FEDEX facility where you can pick up at your convenience. I am not too keen on having two huge boxes sitting in the front of my doorstep if I’m not at home.
RSG uses the Shop App to track their orders. This was a great app to use because it gave me ticker updates of where my sliders were and even a map guide. Everything went seamlessly and I was very happy with the shipping process.
Hardware Summary

RSG packed some very nice grade 8 bolts in the packaging.
The most important part is to start organizing these bolts from the start. RSG has instruction notes that show where the bolts all need to be. I found it much more efficient to set the bolts up the way they need to go into the frame rails.
Once you organize the bolts per the photo above, then you are ready to start.
Disclaimer: This is my third set of sliders so there are parts of my frame rails that I had already modified or removed before getting the RSG Sliders. This should be my last from what I have read and heard from others running RSG. If you are looking for a stout slider option, these might truly be top of the line.
Passenger’s Side

Let’s get started!
Step 1. Line Up Slider

To begin, line up the slider to the frame rail, the plate is shaped the same way as the frame rail so it will be very easy to jack into place.
Pictured above is the passenger-oriented slider will go from the rear of the truck. As you can tell, we already had some fun with the sliders before deciding to redo them for the Trail Tacoma install! Use the photo above as a reference on where some of the bolts will go.
Start by popping off the plastic covers from the frame. If your truck did not come with OEM Steps, you may have more plastic plugs to remove on the frame. I just used a screwdriver to pop these out. If you plan to reuse them at a later date, try to remove them as carefully as you can.
Once again, my frame rails were already modified beforehand, so if you are starting from scratch, here are RSG’s detailed instructions on their website.
Let’s get started!
Step 2. Remove Cover/Module

Use a socket wrench to remove the 12mm bolts from the outside of the covering.
Once the bolts are removed, you can take off the cover.

After the cover is removed, you will be able to access the two bolts to remove the module from the frame rail.
Note: This step is essential for a snug fit and worry-free installation. The cover will come off and give you more working room.
Step 3. Position Slider

Once you remove that module and you have popped off all the plastic frame covers off, you can position the slider underneath the vehicle. I highly suggest hiring one of your friends to help you position the slider as you mount it on the truck.
Before installing, line up the slider frame plate to the frame and position it so that the holes are lined up correctly. The holes are adjustable, they are not sized exactly to the diameter of the bolt. This allows you to adjust the slider up and down accordingly. I used my Pro Eagle Jack and a 2×4 to help me position the slider.
Bolts go in this order:
BOLT > LOCK WASHER > WASHER > TRUCK FRAME > WELDED NUT and/or Washer > NUT

Pictured here is the front passenger side slider. As you can see, I have loosely placed the bolts to allow for adjustment after the bolts are secured. Try not to tighten anything yet, use this time to position the slider up and down for optimal positioning with the frame holes.

It isn’t necessary but I highly recommend using Loctite on the bolts!
This will ensure they won’t loosen from any vibrations you might experience on the trails.
I placed my first bolts in the front, rear and middle of the slider, just to hold it firmly in place. In my opinion, that is the easiest way to mount the slider.
Step 4. Secure Module

Once the slider is held into place by a couple of bolts, use the provided bolts in the packaging to secure the module back into place.
You will not be able to use the OEM Bolts because they are shorter, these two bolts (provided) still act as mounting bolts for the whole slider.
Step 5. Tighten Module

Using the provided longer bolts, tighten the module back onto the frame/slider.
Step 6. Reinstall Cover

Reinstall plastic cover onto the module.
Step 7. Use Snake Magnet/Stick

Use a Snake Magnet or a long stick to reach the farthest bolt.
Tape the welded nut onto whatever you’re using so that it is easy to slide into the channel. This can be frustrating, so take your time.
Step 8. Install Two Forward Bolts

The hardest part of the slider install is the two bolts towards the front of the vehicle.
They are inside the c-channel which makes regular, adult-sized arms a hassle to get through. I was able to reach the first one with one hand and thread from the other side. The farthest one to the top I taped the welded square nut to a magnetic snake and put it through the channel.
My buddy directed me while he threaded the bolt into the nut. It took a couple of tries but we were able to thread the bolt and nut several tries later.
Step 9. Ensure Slider Is Even

Once you have achieved secure bolt and nut placement on all of the bolts, make sure the slider is even.
As you can see in my photo the Sliders are about a quarter-inch above the frame and I used that as my guide to keep it straight. If you are having trouble adjusting, loosen some of the bolts (be careful not to loosen them all the way) till you get it even enough and tighten.
Step 10. Rear Bolt (Optional)

This is the optional (to be drilled) section of the slider, as you can see in the photo above the slider has one lonely hole in the back.
It is up to the user if they want to drill this hole out or not to put in one more bolt (on both sides). Totally optional, the sliders are pretty stout without it so I decided not to drill into the frame just yet. If you decided to do this please be careful, on the driver side, you are very close to the gas tank, so you have to make sure not to accidentally drill into the gas tank while installing.
Now, have a cold beer before starting the driver’s side.
Driver’s Side

Here is the orientation for the driver’s side install.
This side is a little bit trickier because you will have to play with some brake lines to get some of the bolts/ nuts to fit correctly. You also have to use the “short” bolt provided by RSG to mount the module in the back of the frame rail.

There is one main cable and bracket on the outside of the driver side frame rail you will work with and the inside of the frame rail has a brake module you will work with.
Step 1. Remove Plastic Clips

On the inside side of the frame, you will see a wiring harness. The picture of mine above may look different due to some other cables being attached to it.
You will notice two white holding clips that hold the cable together if you’ve never removed them. Remove the clips with a flat head or blade and remove the material holding the harness in. You may also have some black plastic frame plugs to remove on this side as well.
Step 2. Unbolt Metal Hanger

You also want to remove this bracket from the front side of the driver’s side frame and the two silver OEM bolts holding the rear module on.
Once you put the slider plate on the frame, remember to make sure this bracket is in front of the plate to save yourself the headache of smashing it and having to redo everything.
Step 3. Remove Brake Module

There are two OEM silver bolts on the outside of the frame holding the module in, use a socket to remove those, and then remember that the shortest grade 8 bolt provided by RSG will be lined up with the module.

Above is the short bolt, this will be held on by one of the welded nuts into place.
You can now position the slider into place and bolt them in to adjust. Make sure you have the bracket on the outside of the frame rail to ensure a good fitment.
Once you have tightened all the bolts on the driver side you will be able to use the OEM nuts to secure the module back into place once the slider is against the rail.

Pictured above is the bracket after the slider has been slid and mounted into place.
Step 4. Clamp For Cables

There is a bolt welded onto the driver’s side slider.
When you slide the slider up into place, this will be used for the clamp RSG provides for the cables. Secure the provided clamp with a nut once the slider is properly mounted.
Step 5. Bend Lines Carefully

There will be some sections on the driver side where you need to bend the brake lines to gain some clearance, do this carefully and just enough to slide on the welded nuts.

Just like the passenger’s side, once you have positioned the slider to your liking, start tightening up the bolts.
You will also have the two bolts towards the front of the vehicle inside the channel. I recommend getting the slider in the position you like it, as long as the holes line up before attempting the last two bolts.
Check All Hardware

Once you are happy with the level of the slider, go ahead and tighten the bolts up.
Be sure to go over the bolts twice to ensure they are all tight against the frame rail. It should look a lot like this when it’s complete.
Review
I’m extremely happy with how the sliders are built and even happier with how they are holding up on the trail, I have not even drilled the rear optional bolt in either.
A couple of things that I am happy with: both slider angles match each other well (might sound odd, but I’ve had problems in the past), quality work, great powder coat, clean welds, a solid CNC plate and overall, a super sturdy construction.

These sliders have already saved my truck on my first time out, they are stout and extremely strong.
Everything installed as needed and I felt that it was a pretty easy install as long as you have a second hand helping with positioning the slider.
Final Thoughts
You don’t have to be a master mechanic to do this install. A basic mechanic toolset, open-ended wrenches and a couple of beers are all you need. I will do a 3-6 month follow up review once I give it some more real-world testing this summer. A big shout out to RSG for such a sweet product! I will follow up with a post review after I have taken them through some more trails!

Thanks for the detailed write up. Only question I have is: does the front mounting plate near the front tire leave enough room for a pretty significant cab mount chop? I’ll be installing on a stock Tacoma initially but will be lifting and doing 35s down the road and don’t want to have to mess with the slider mounting plate if it’s close to where the CMC will be. Thanks in advance!
Great write up!! ?
Thanks for the kind words. Happy to help the community!