
A small and subtle mod that packs a punch! We all know factory Tacoma lighting could use an upgrade.
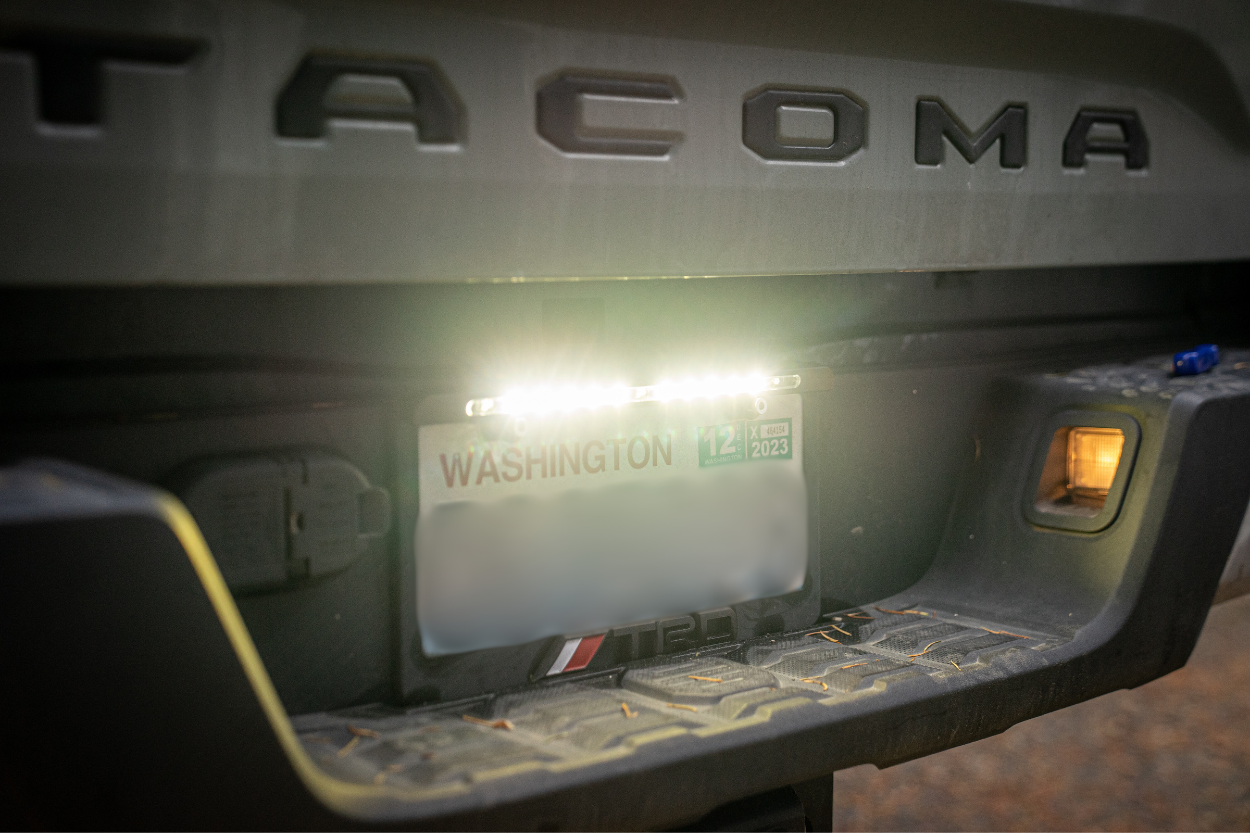
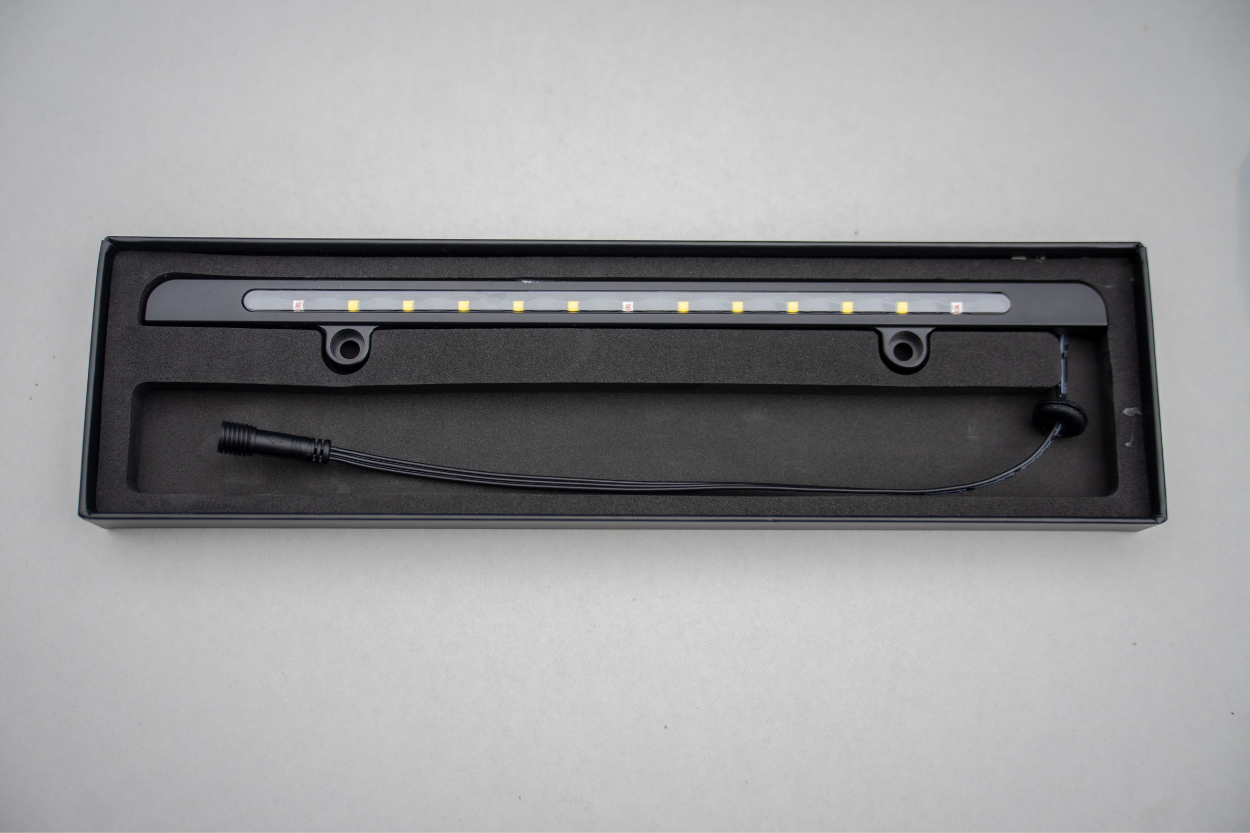
If you’re ready to enhance your rear visibility at night without sacrificing quality or style, this upgrade might be perfect for you. The VLEDS LPX reverse light bar is pretty self-explanatory. It’s an easy to install light bar that seamlessly integrates over your license plate.
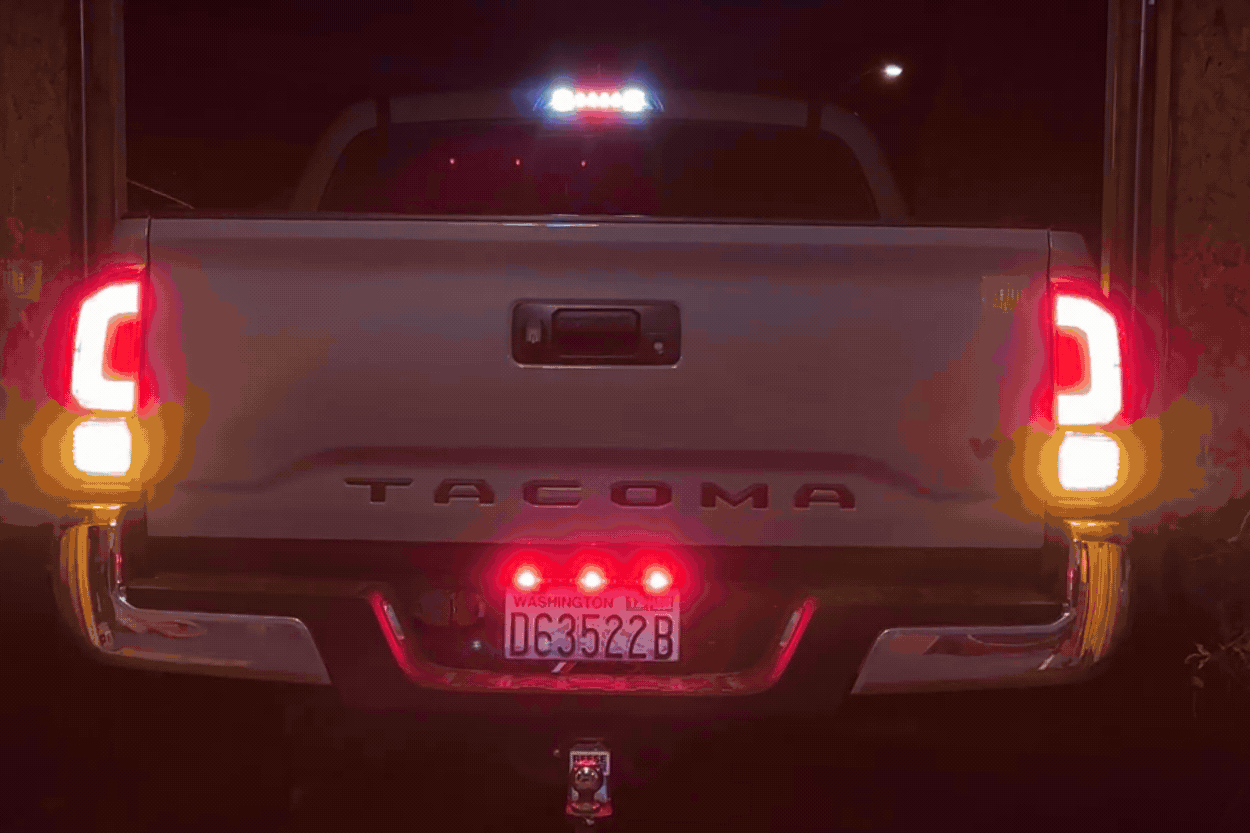
The added light helps to illuminate the darkness when reversing at night. A significant improvement over stock. It also has red lighting that activates when you brake, and a lower output when your truck is in park and your foot is off the brake.
Feature packed, solid construction, and simple to install. This one is made specifically for the 16-23 Tacoma, due to the wiring harness and adapters. But they make them for several vehicles. Let’s check it out in more detail.
Table Of Contents
What’s LPX?
The LPX bar redefines both safety and style for your vehicle. This innovative solution seamlessly integrates with your license plate, adding extra braking, parking and reverse lights. It’s designed to be easily installed in minutes (roughly 15-20 min) without requiring extensive wiring knowledge.
Features
- 3 functions – reverse (2000 lumen), brake (180 lumen), park (10 lumen)
- Cree LED chips
- 6061 aluminum
- Powder coated
- 5500K pure white output
- Sits flush against plate
- Plug and play (no tapping/splicing)
- Years of development and design (in house, established brand)
- 3-year warranty
- Nothing out there like it!
Tools Required
- Screwdriver
- 10mm Socket
- Ratchet Wrench
- Zip Ties
- Wire Cutters
Let’s go over how to install this kit below. VLEDS also provides instructions on their site.
Step 1. Remove Tail Light
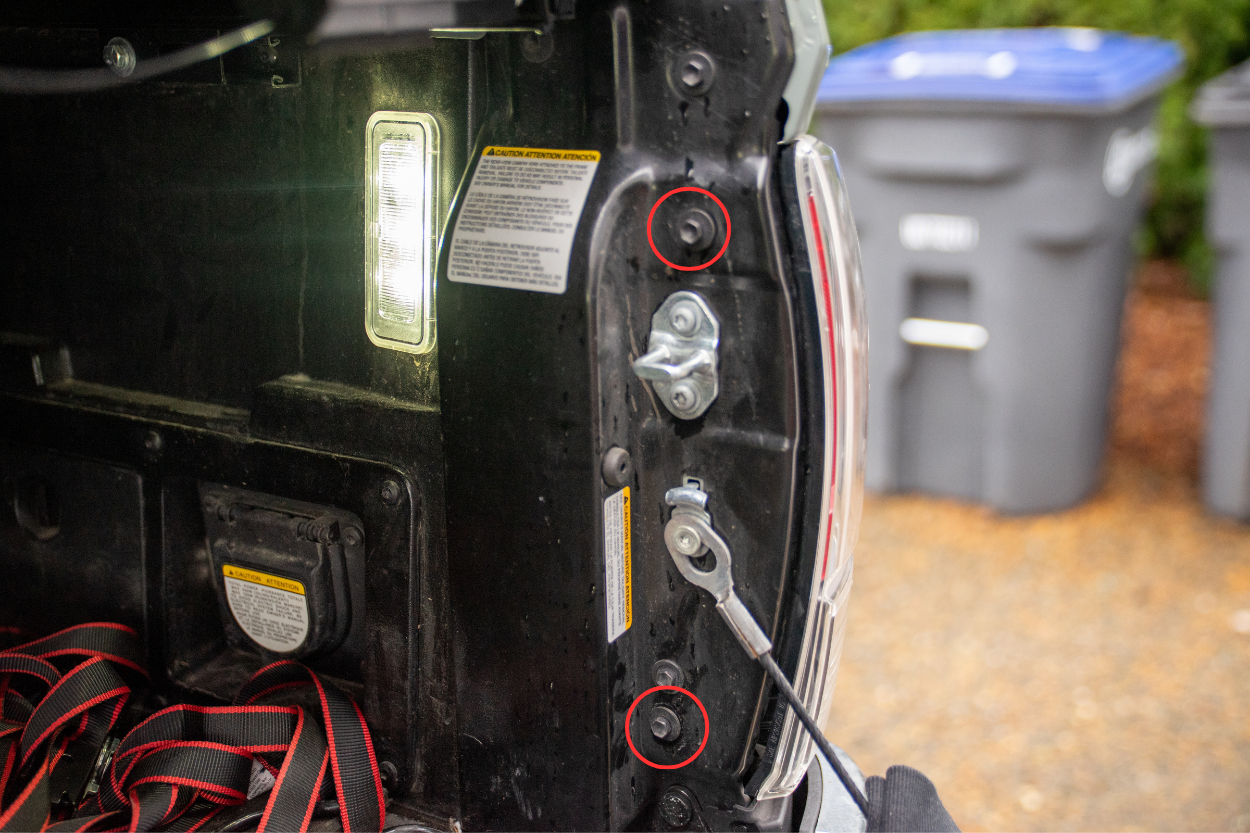
Use a 10mm socket to remove the (2) outer bolts on the tail light. Then, gently pull the tail light housing backward to remove it. This may take a bit of wiggling to remove but be patient.
Make sure you lay your tail light on a towel or cloth to avoid it getting scratched up.
Step 2. Install New Wire Harnesses
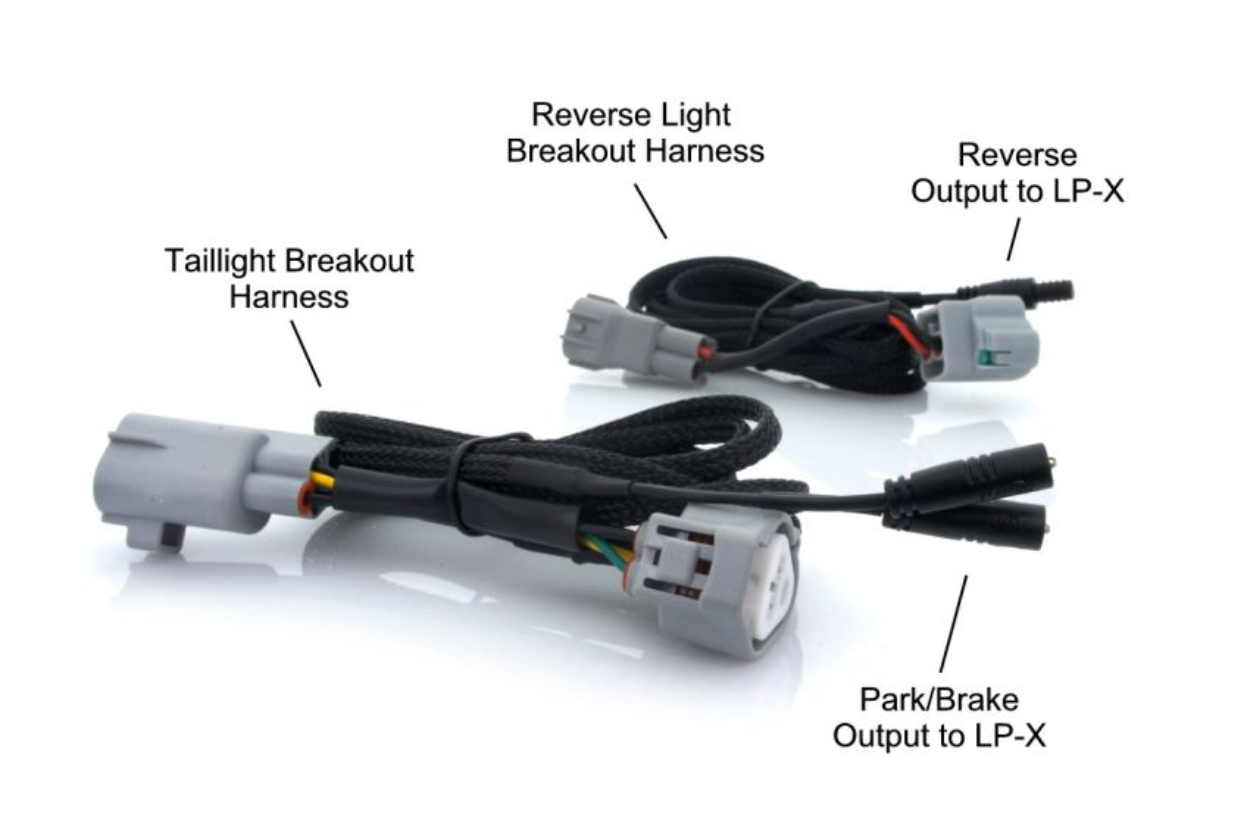
Start by installing the Reverse Light Breakout Harness and Taillight Breakout Harness. Your installation may look a bit different as I have the VLEDS tail light conversion kit installed.
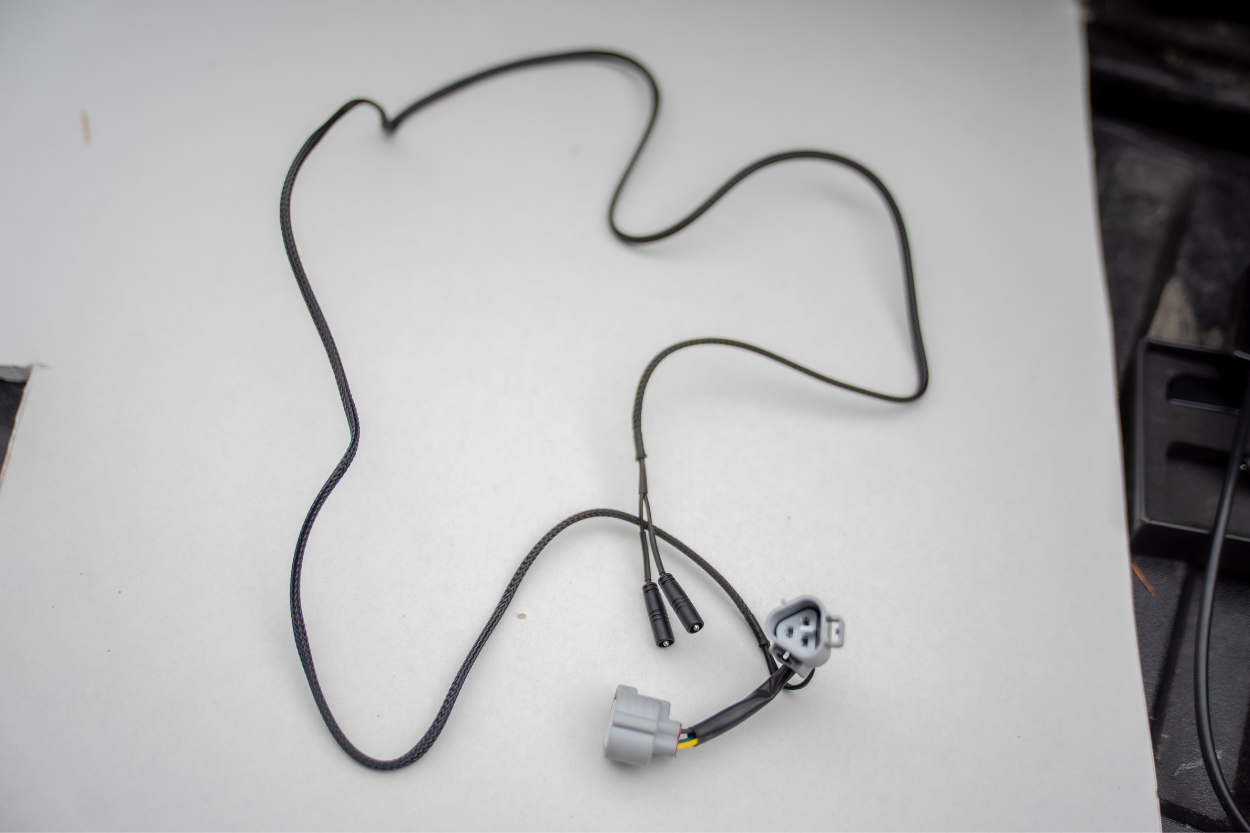
To install the tail light breakout harness, remove the reverse bulb, which will be the bottom bulb. Twist the bulb counterclockwise to remove it from the socket. Then, release the bulb holder from the harness by pressing down on the tab.
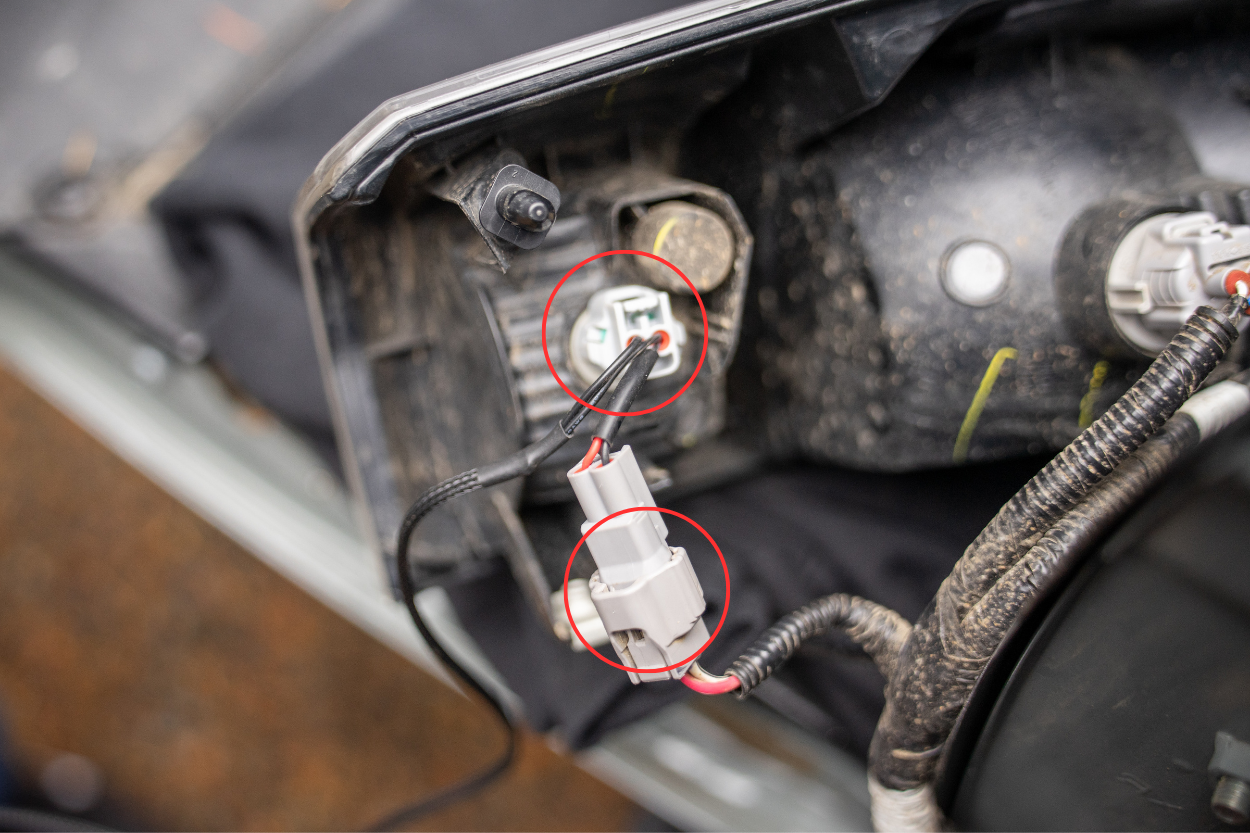
Next, disconnect the reverse light harness from the tail light. You will find the new wire harness that will fit between the bulb and the factory harness. Attach the 2-pin connector to the factory harness and connect the bulb holder to the 3-pin (triangle-shaped) side of the new harness. Then, reinsert the bulb into the tail light socket.
Next, grab the reverse light breakout harness and install it on the remaining connectors.
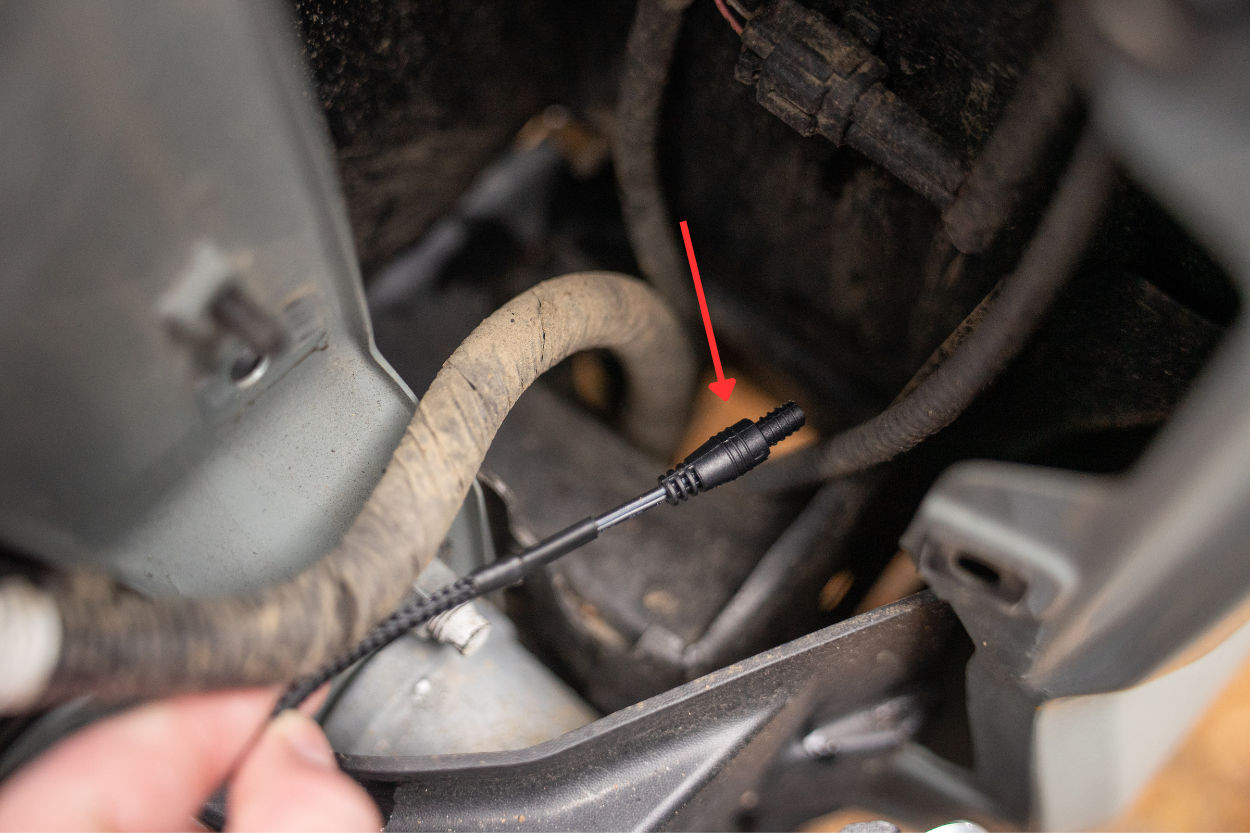
After everything has been attached, guide the black wires through the opening behind the tail light, and pull them down underneath the truck. Now, you can reinstall the tail lights.
Step 3. Remove License Plate
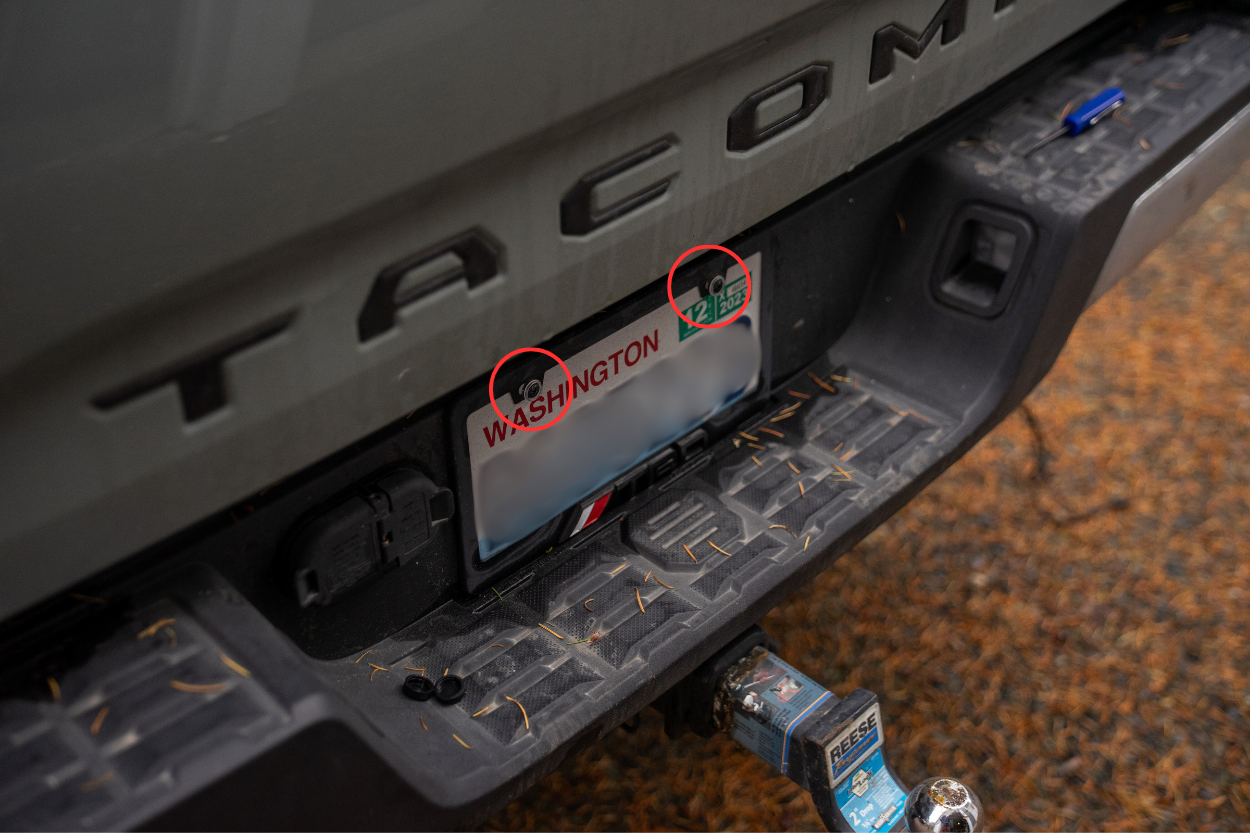
Using a screwdriver, remove your license plate and frame (if you have one).
Step 4. Secure Black Wire
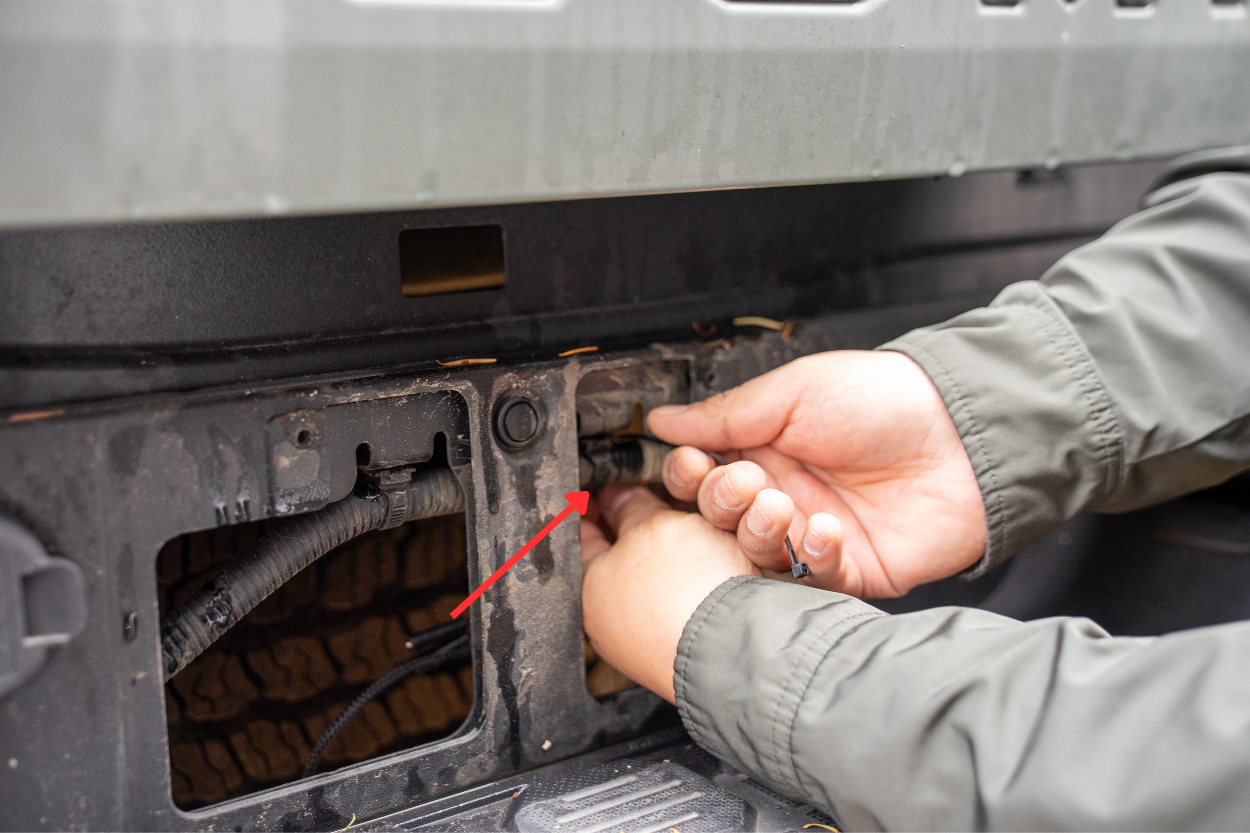
Pull the wires from the wire harness up behind the license plate area. Then, secure them to the wiring loom behind the license plate using zip ties. Once secured, leave the wires in place as they will remain safely fastened there.
Step 5. Install Controller
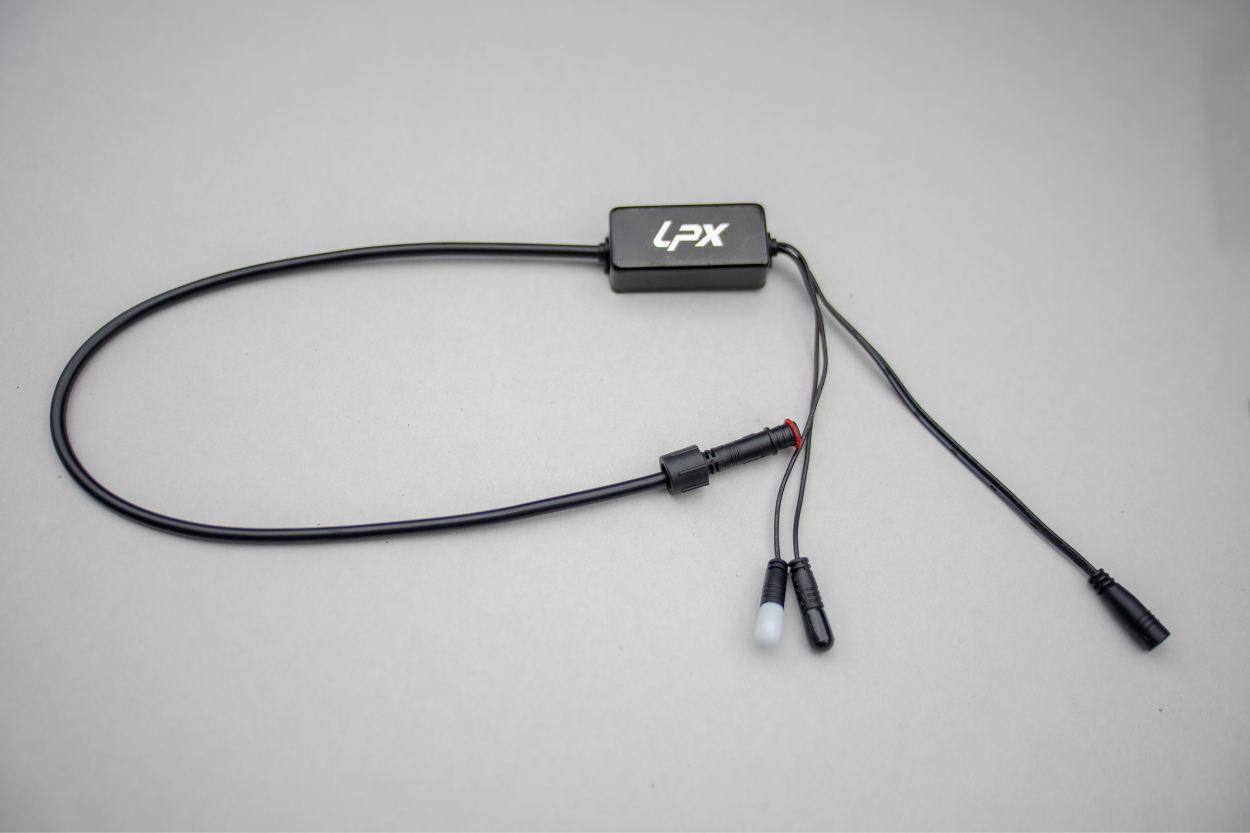
Now we will be installing the controller module and wires.
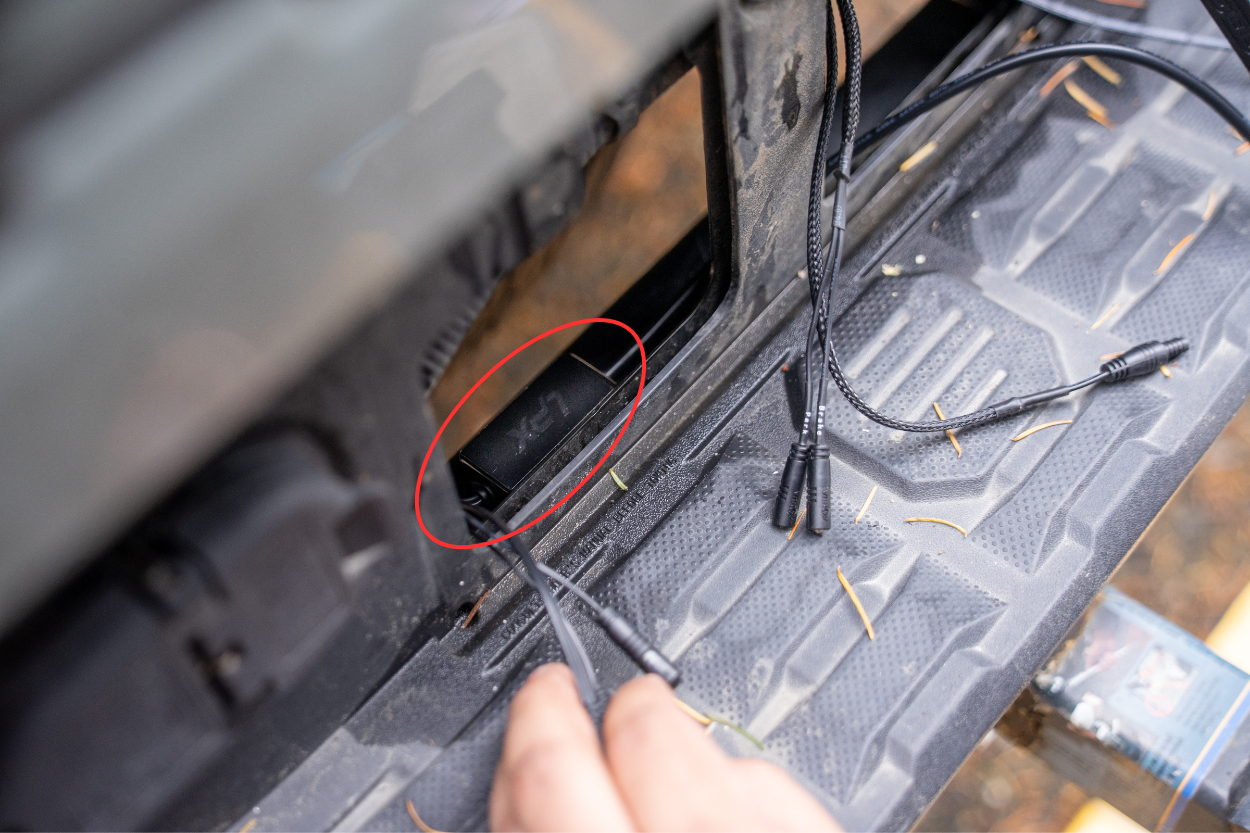
Find a spot behind the license plate to install the controller. We used the provided 3M tape to affix it to the ledge behind the license plate.
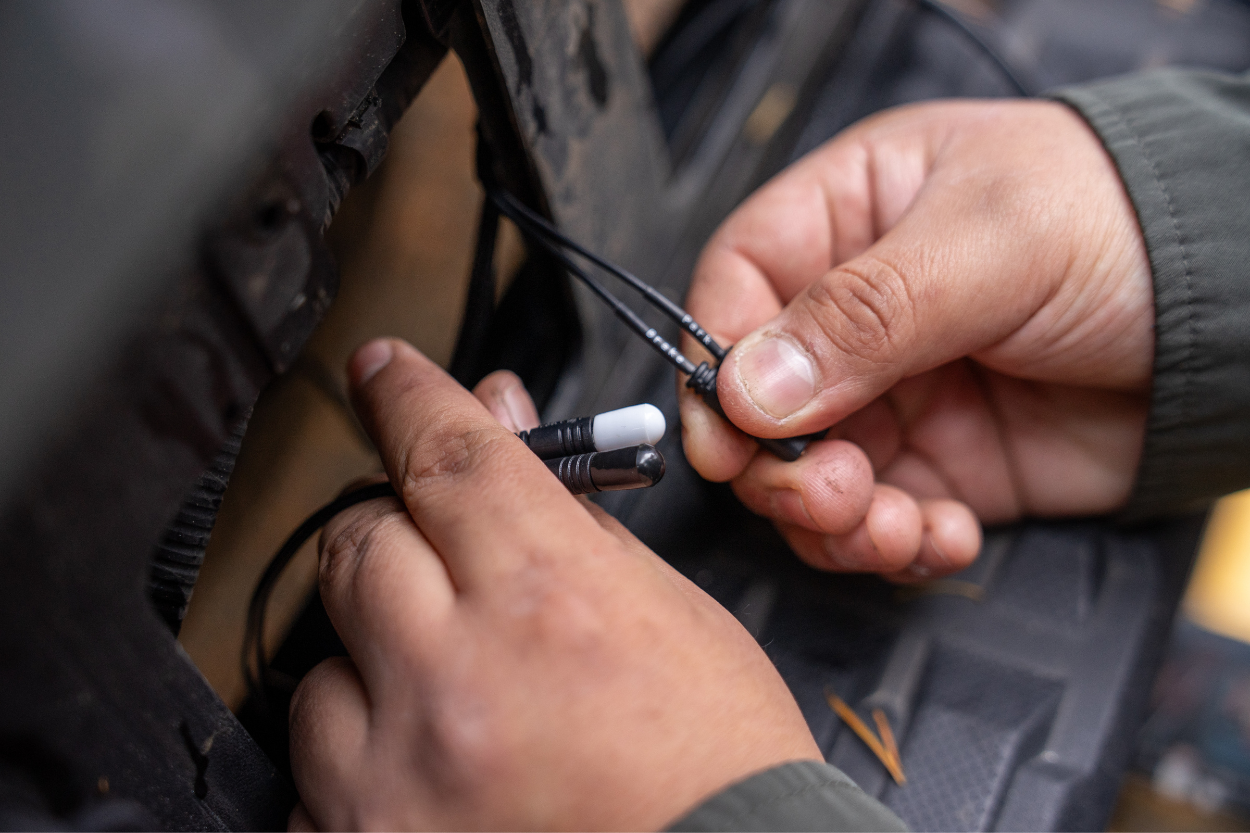
Next, connect the wires starting with the wire labeled ‘brake’ from the wire harness to the tail light. Connect that to the wire with the black vinyl cap from the LPX controller. Repeat this process for the ‘park’ wire, securing it to the wire with a white vinyl cap from the controller.
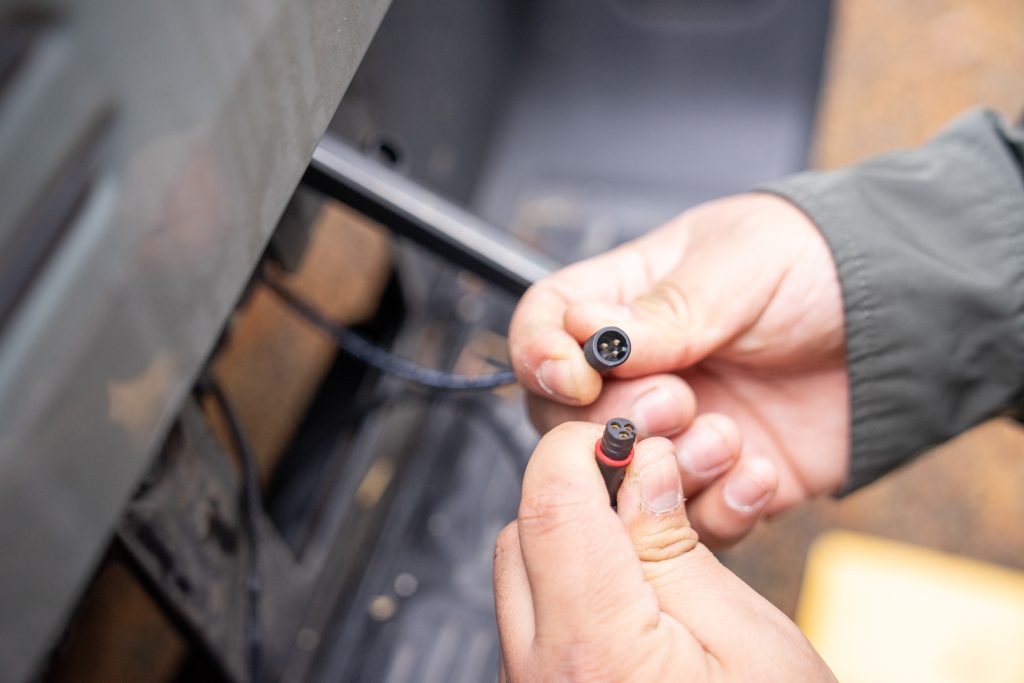
After completing the connections, attach the light bar to the black 3-pin connector from the controller. Ensure a secure connection by twisting the cover on top. To prevent the wires from pinching, we ran them through the small opening between the frame and the back bumper.
Step 6. Mount Light Bar
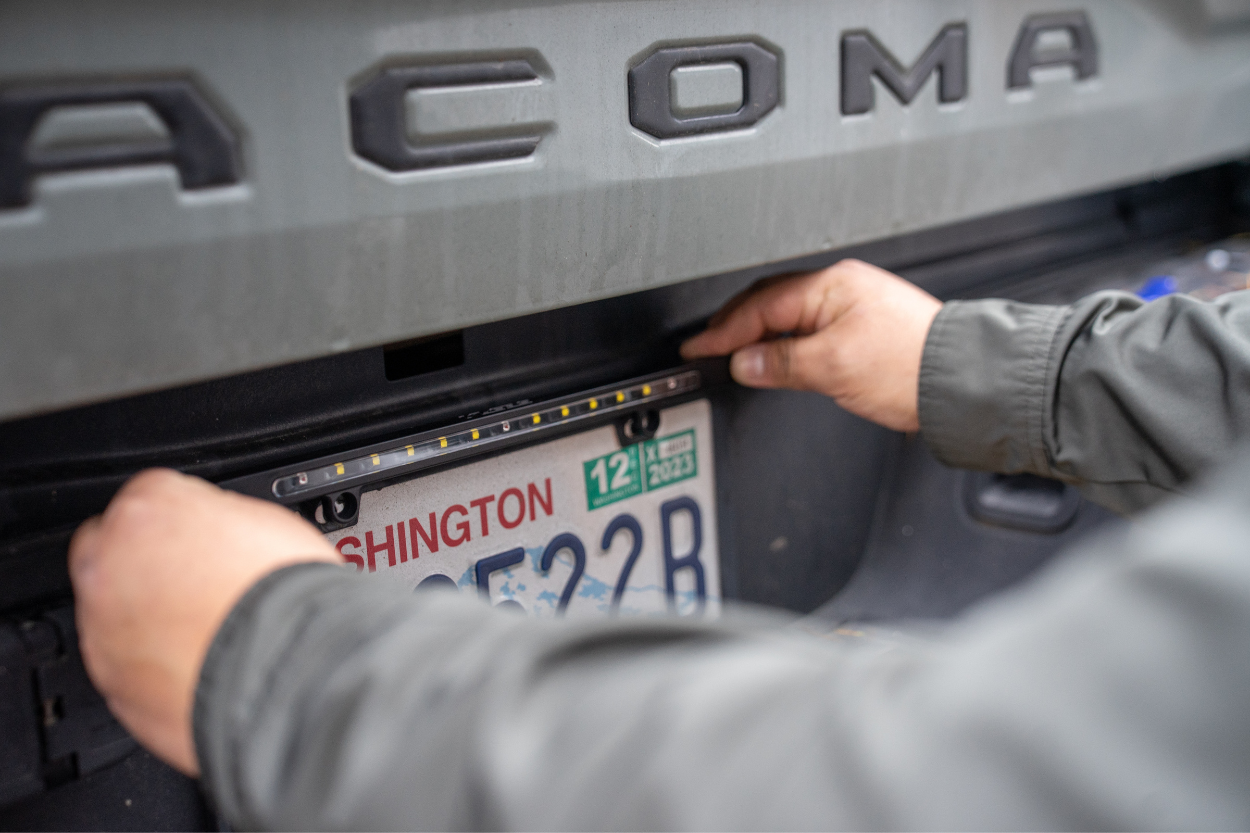
Next, place the light bar over the license plate and frame (if applicable). Technically, the design is made to fit over the plate for a perfectly contoured fit.
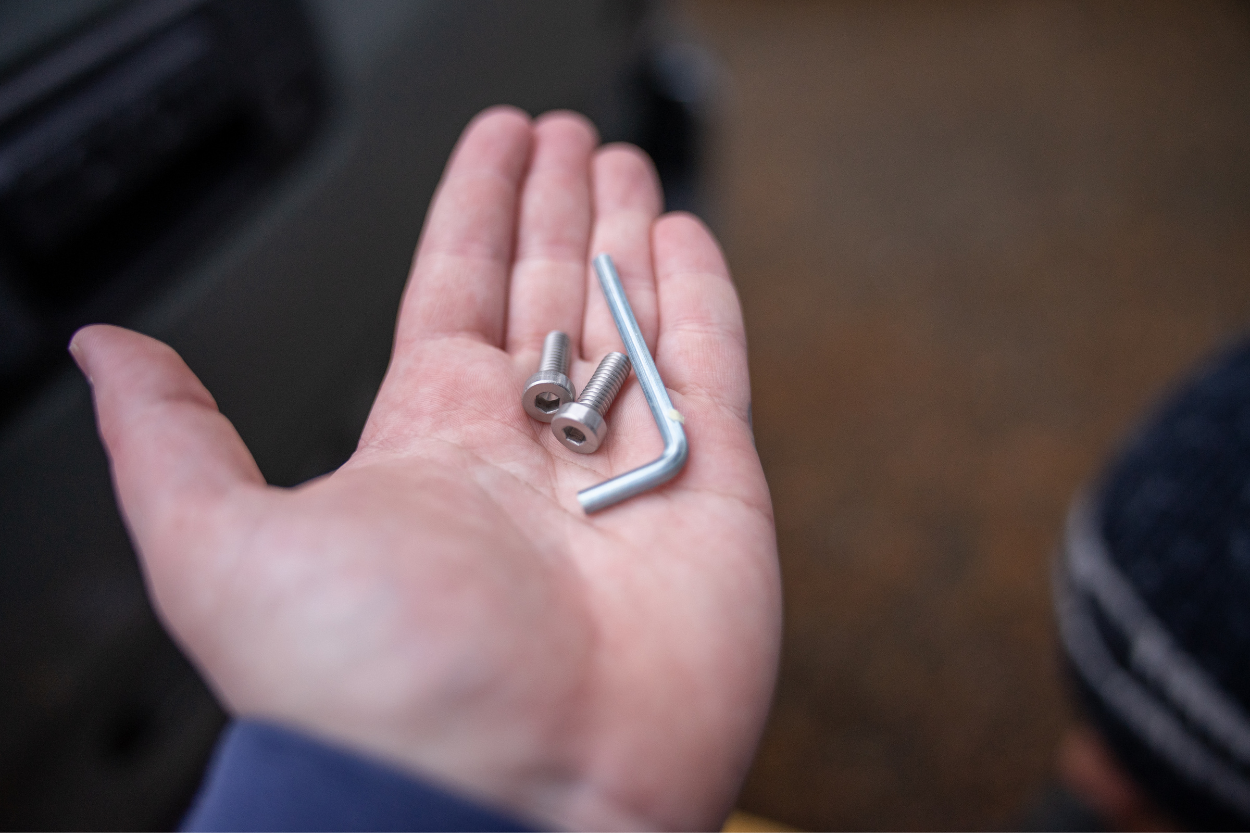
Using the screws and Allen key provided, securely fasten the light bar onto your license plate. After installation, turn on your vehicle to test the lights. Verify that the lights work as expected.
Final Thoughts
Once we installed the LPX bar and fired it up for the first time, I was seriously impressed by how bright it was, especially given its size. It’s not just a pretty addition, there is a real big difference when backing up in the dark.
Before this upgrade, we relied solely on the tail lights for visibility when reversing; which could only do so much. This light bar makes a night and day difference! Once installed, you’ll wonder how you ever did without this level of visibility! Bonus points for being a straightforward upgrade, too.
Overall, I’m very impressed. Combined with the other rear facing VLEDS light I have, there is little more I could ask for. While this kit is a bit more costly than just upgrading bulbs, it’s well worth the money and provides added function.
