
Are you looking to upgrade your factory taillights and avoid spending hundreds on whole new housings? The new standard VTAILS conversion kit may be just the product for you. This newer version offers a more affordable price point compared to the V6 Triton version. The kit provides more output than factory, but with reduced output compared to the more expensive variant. They also offer an ultra bright version, the V6 Extreme.
This is a great way to give your taillights an updated look with bright and modern LEDs. Not only does it give you more illumination when reversing and turning, but it’s also a breeze to install. In just a few minutes, you can transform your lights and the truck’s overall appearance.
Table Of Contents
What Exactly Does It Do?
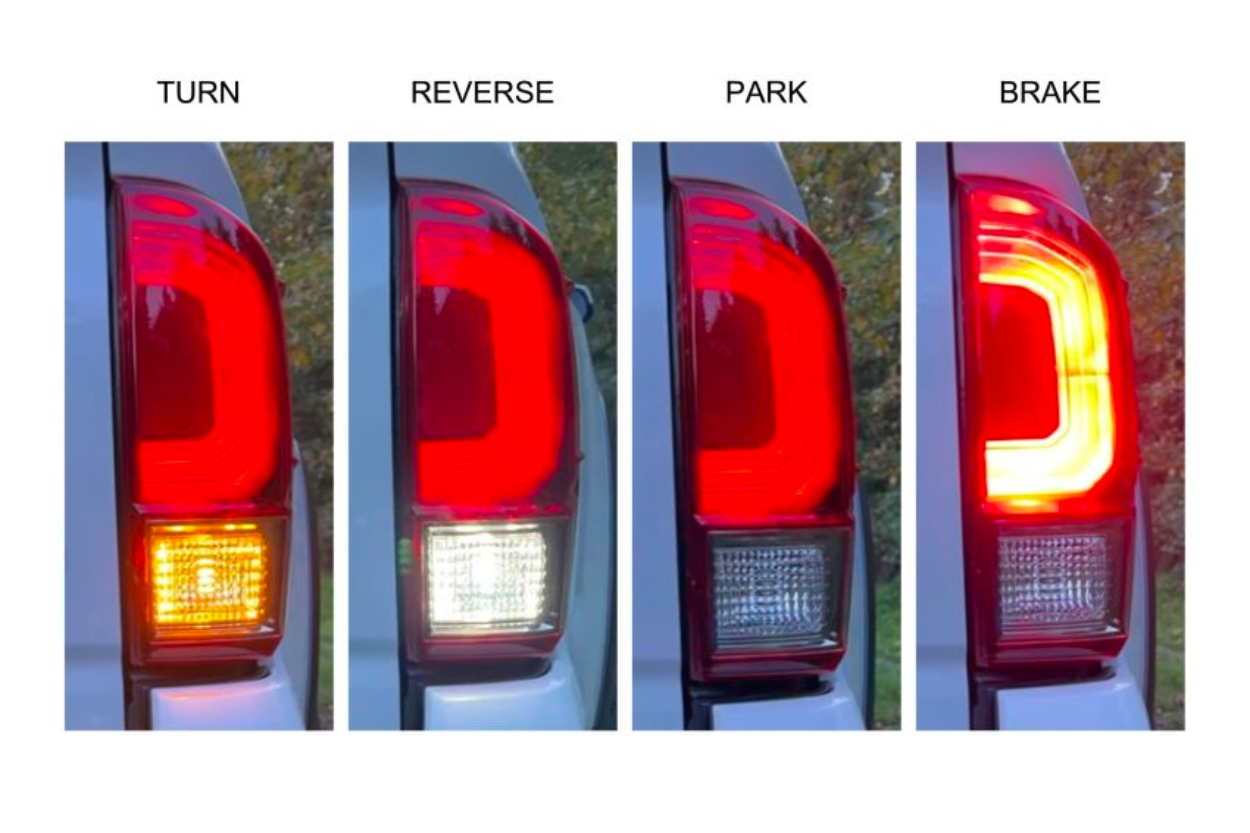
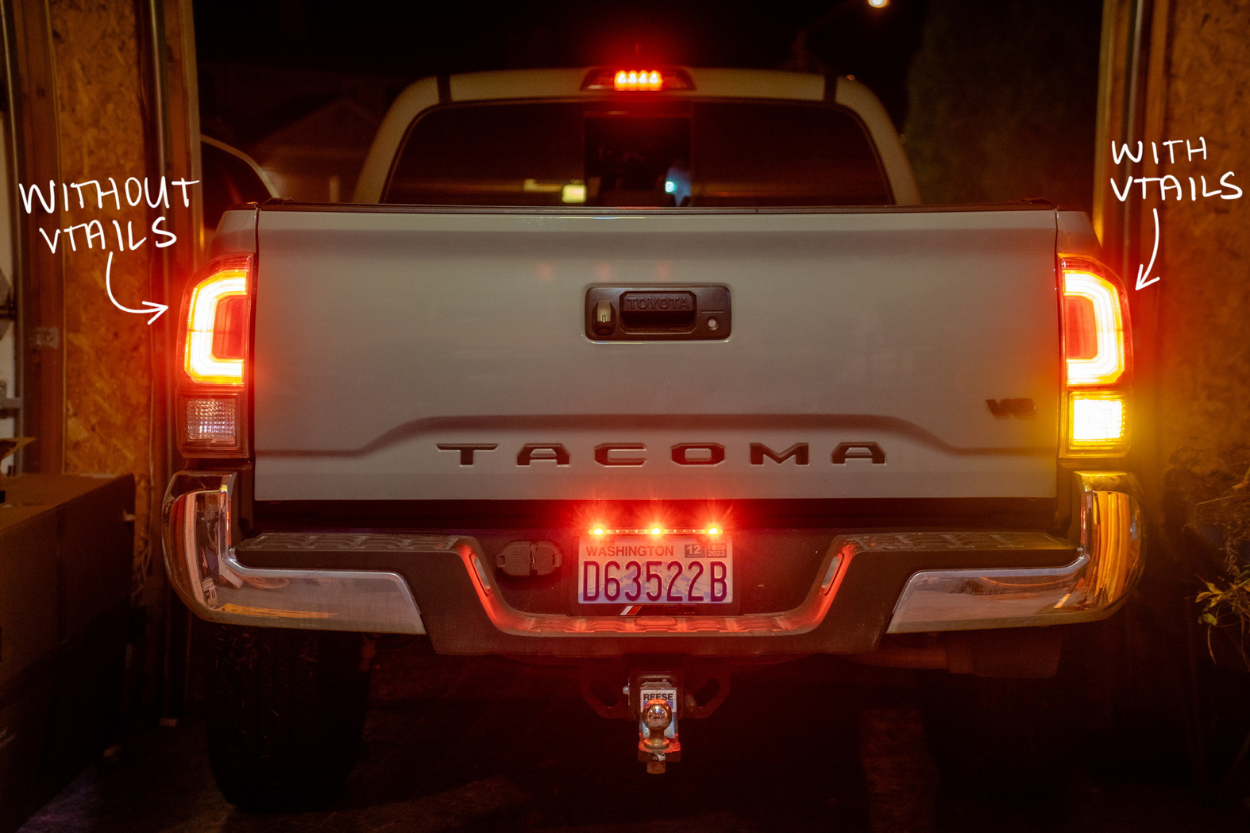
The VTAILS comprise dual red LED park/brake lights, amber turn signals, and a much brighter white reverse light. There’s no need for cutting, splicing, or tapping into your vehicle’s wiring, making this a super beginner-friendly mod.
Installation
Before diving in, I strongly recommend watching the installation video. Take a moment to get familiar with the various wire harnesses and bulbs. We ran into a bit of a challenge because the products weren’t labeled and had to reference the video a few times – it was very helpful.
Tools Required
- 10mm Socket
- Ratcheting Wrench
- Towel or Cloth
- Pry Tool (Optional)
- Zip Ties (Optional)
- Electrical Tape (Optional)
1. Remove Housing
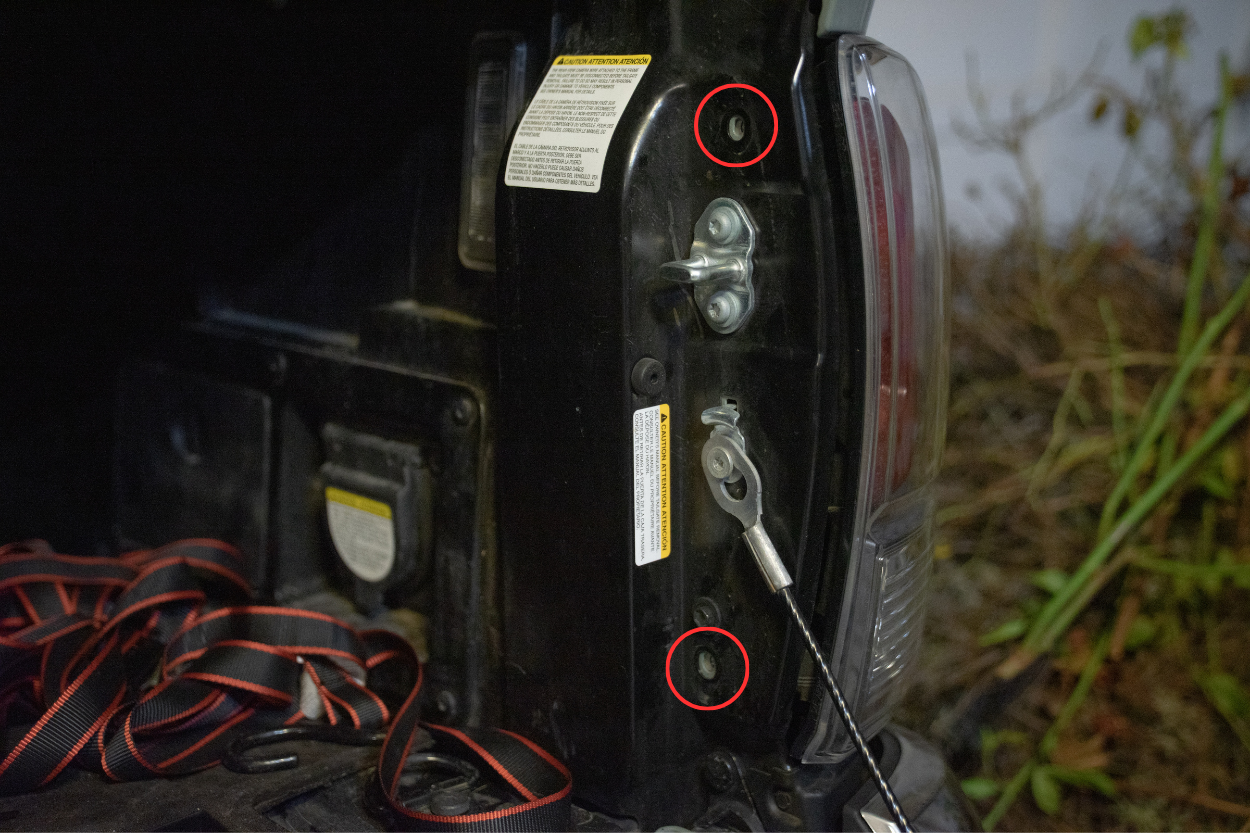
Use a 10mm socket to remove the two outer bolts on the taillights. Then, gently pull the taillight backward to remove it. If you’ve never removed them before, it may take a bit of wiggling, so be patient.
Make sure you lay your taillight on a towel or cloth to avoid it scratching it up.
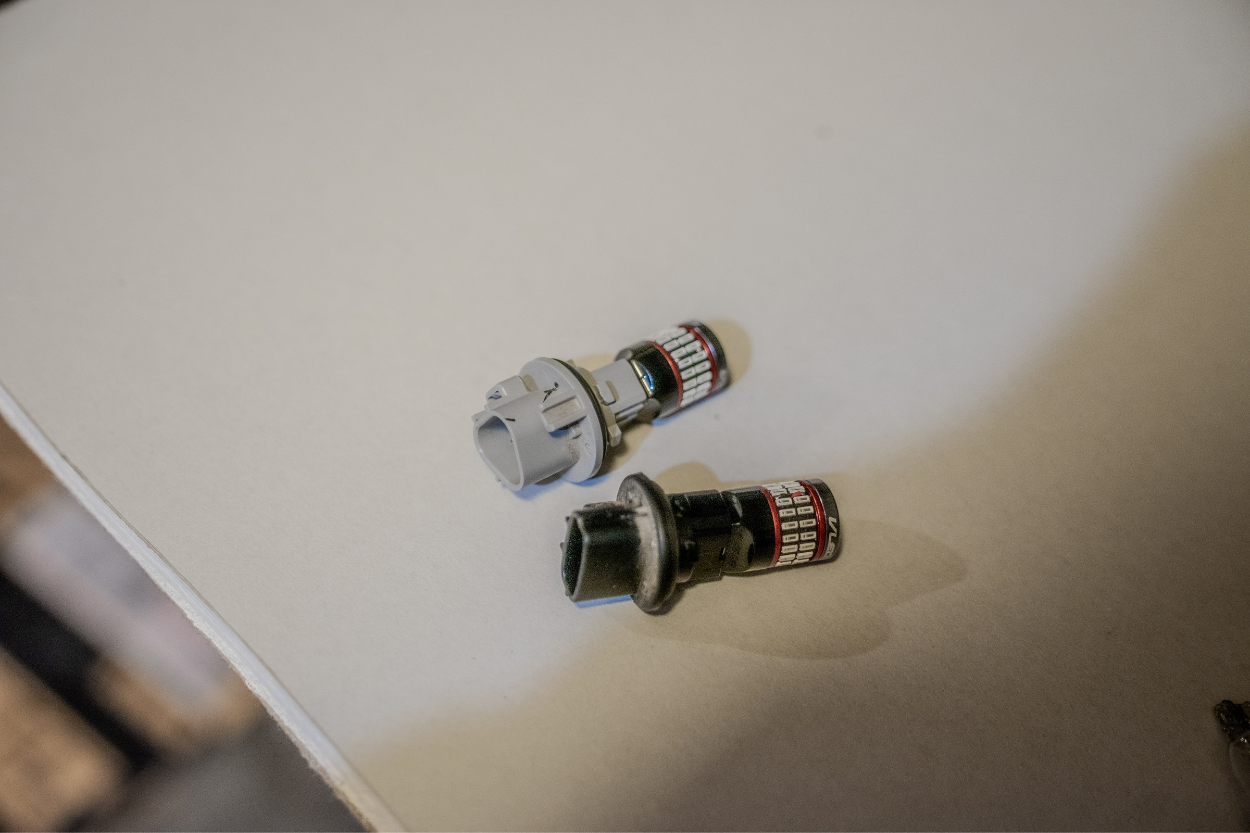
2. Remove OEM Bulbs
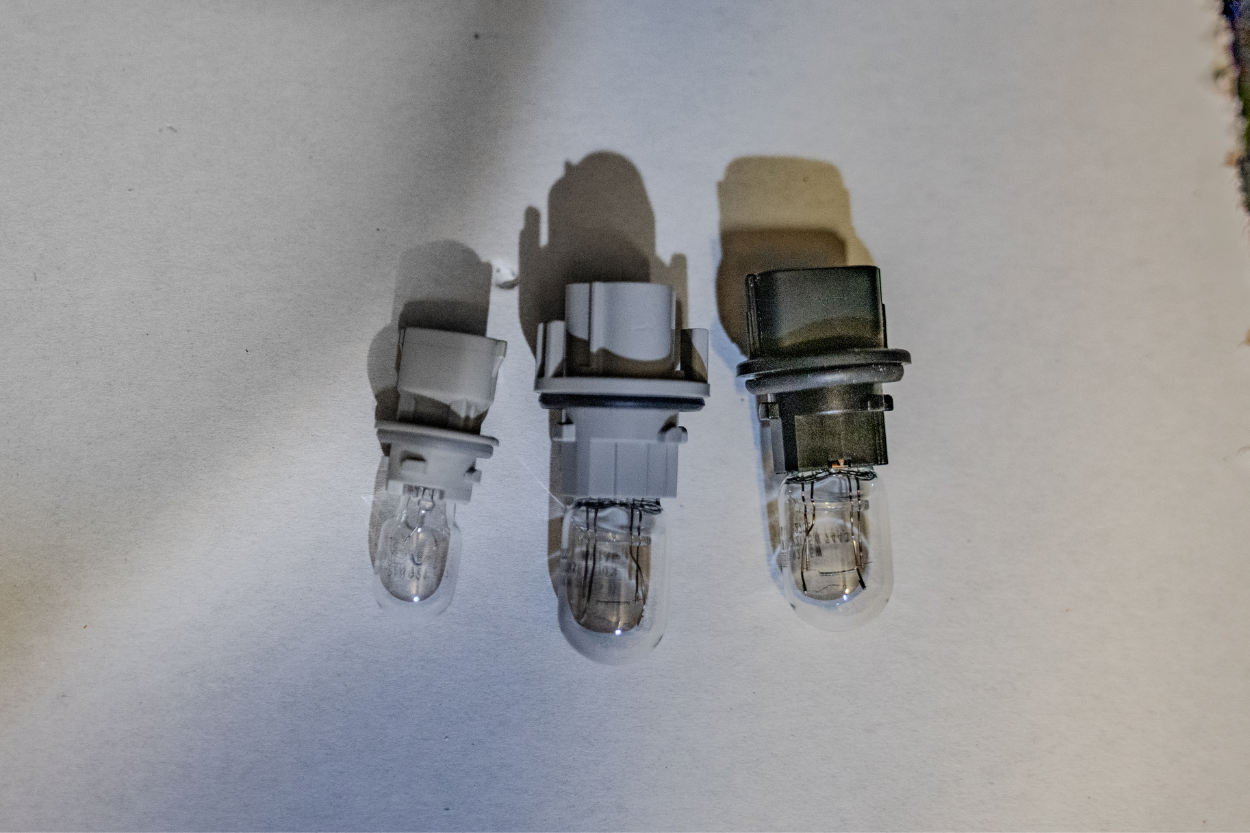
Once you have the light removed, remove the three bulbs from their sockets by twisting the bulb sockets counterclockwise and pulling them out.
Then, remove the socket from the wiring harness by pushing down the tab and pulling it out. You can use a pry tool if you have trouble removing the tab. Lastly, gently pull the bulbs out of the socket.
Note: You will only be reusing the two larger bulb sockets. The smaller one can be tossed, along with the factory bulbs.
3. Connect Brake Light Splitter
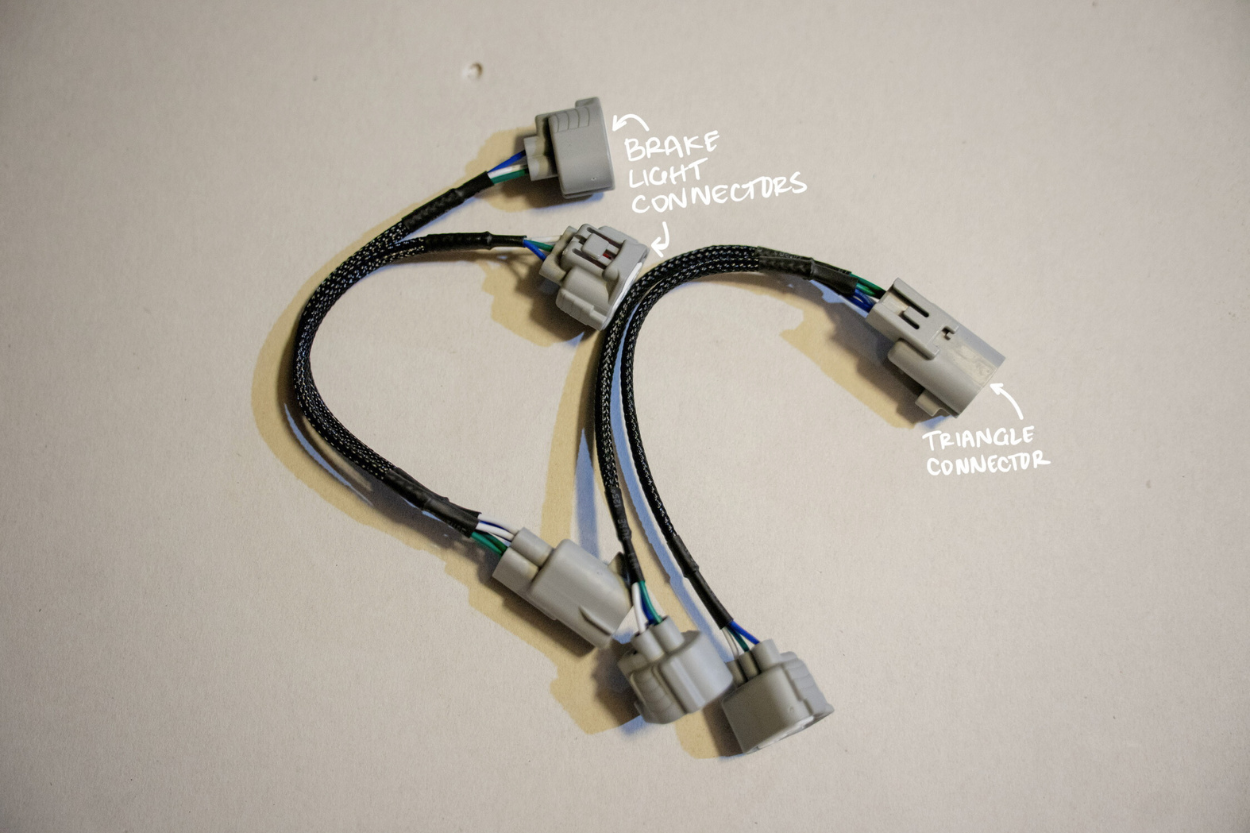
Next, connect the brake splitter harness. This will be the harness with the triangle-shaped plug on the end. Locate the corresponding triangle-shaped plug attached to the factory harness on the Tacoma.
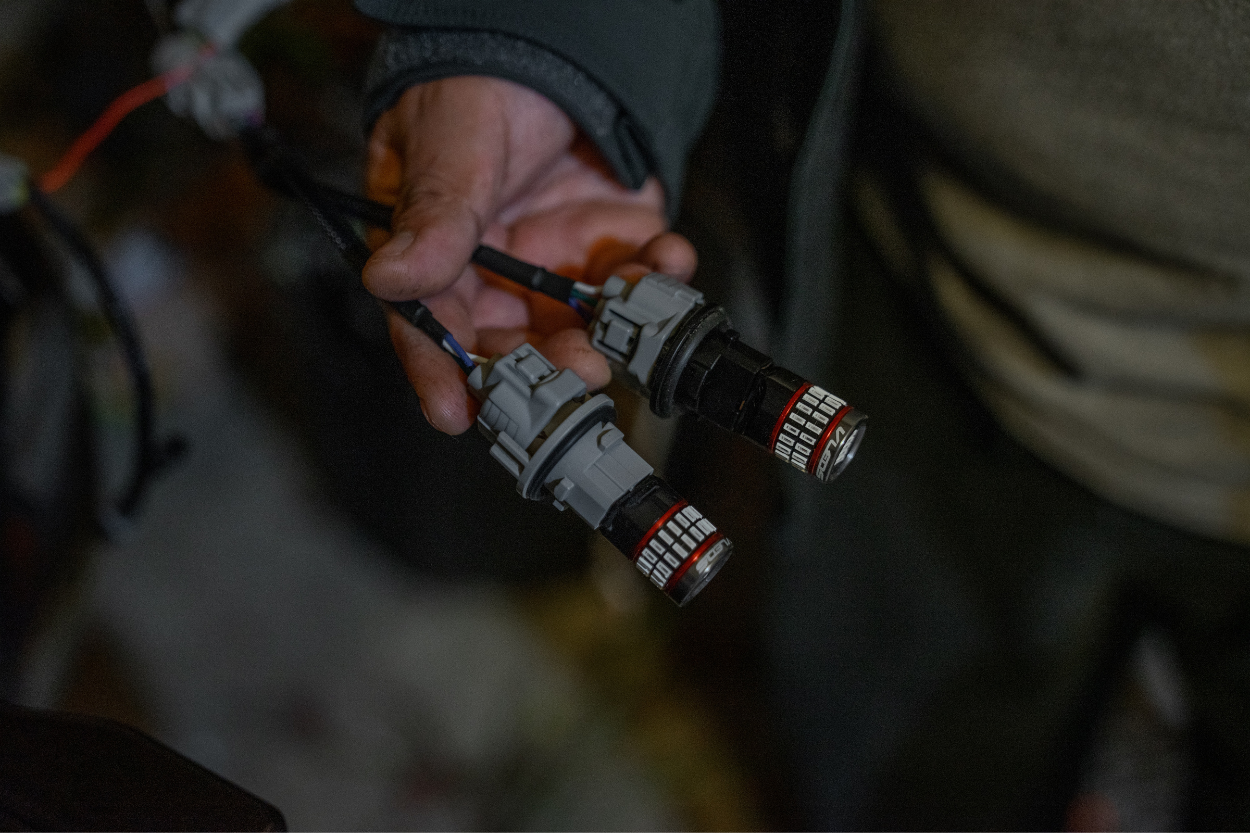
4. Connect Second Wire Harness
Grab your second harness with two grey connectors and one smaller black connector and connect the two grey connectors to the new brake splitter harness. They should only fit one way.
You will also see a smaller back connector coming off of the main connector where the switchback bulb will go. The kit now includes a VLR-15 resistor to prevent hyperflashing. Some vehicles need it, some don’t. We did not have any issues and chose to tape it off.
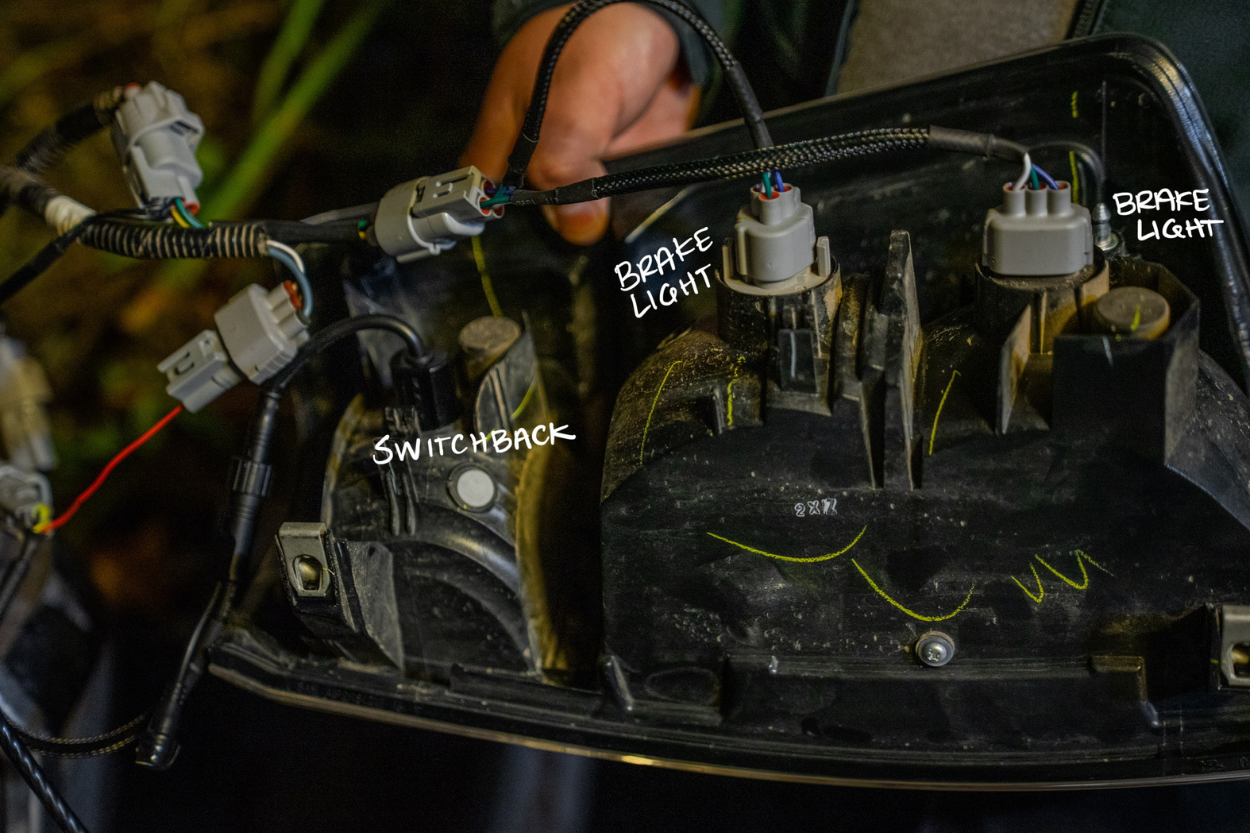
5. Connect Bulb Holders To Harnesses
Once you have the harness connected, install the new brake lights into the bulb sockets.
Once you’ve installed the bulbs, reattach them to the grey connectors. Align the bottom of the bulb sockets with the correct connectors and make sure they’re securely in place.
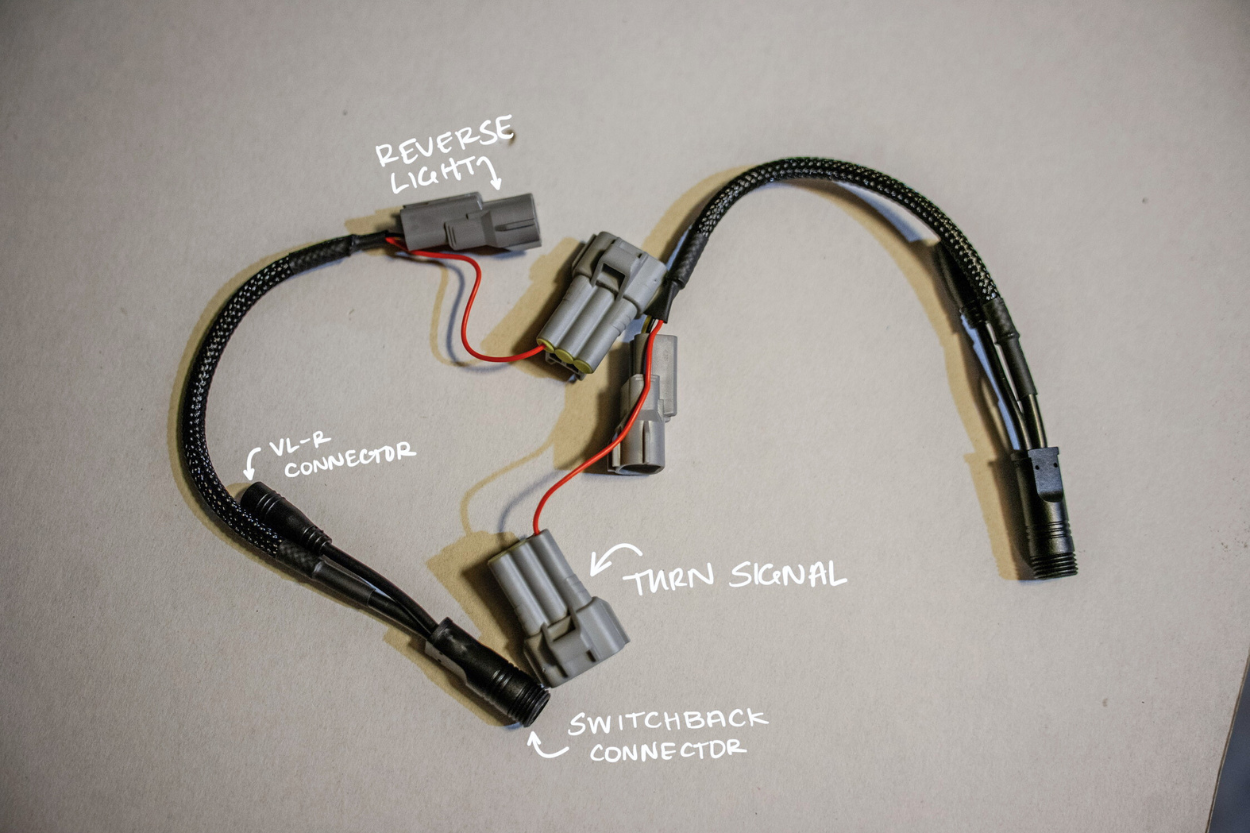
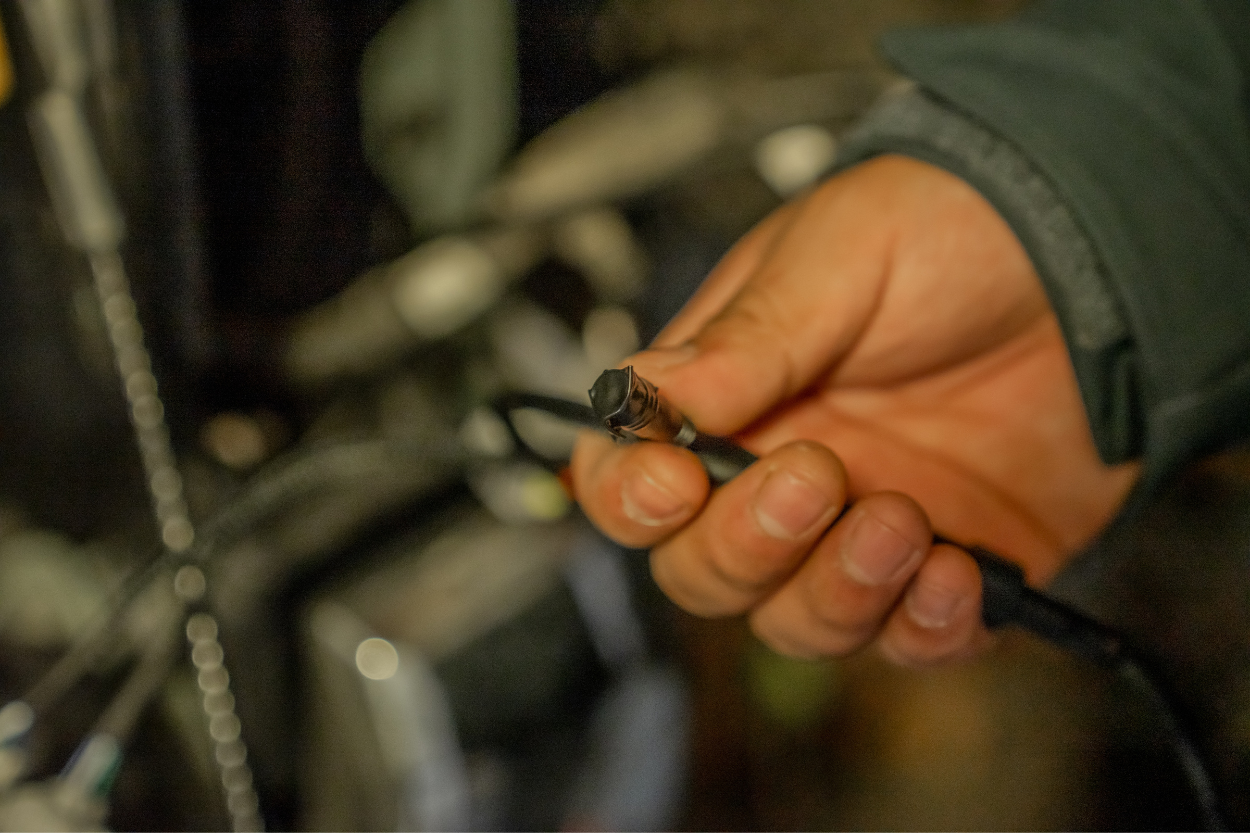
6. Connect Switchback LED
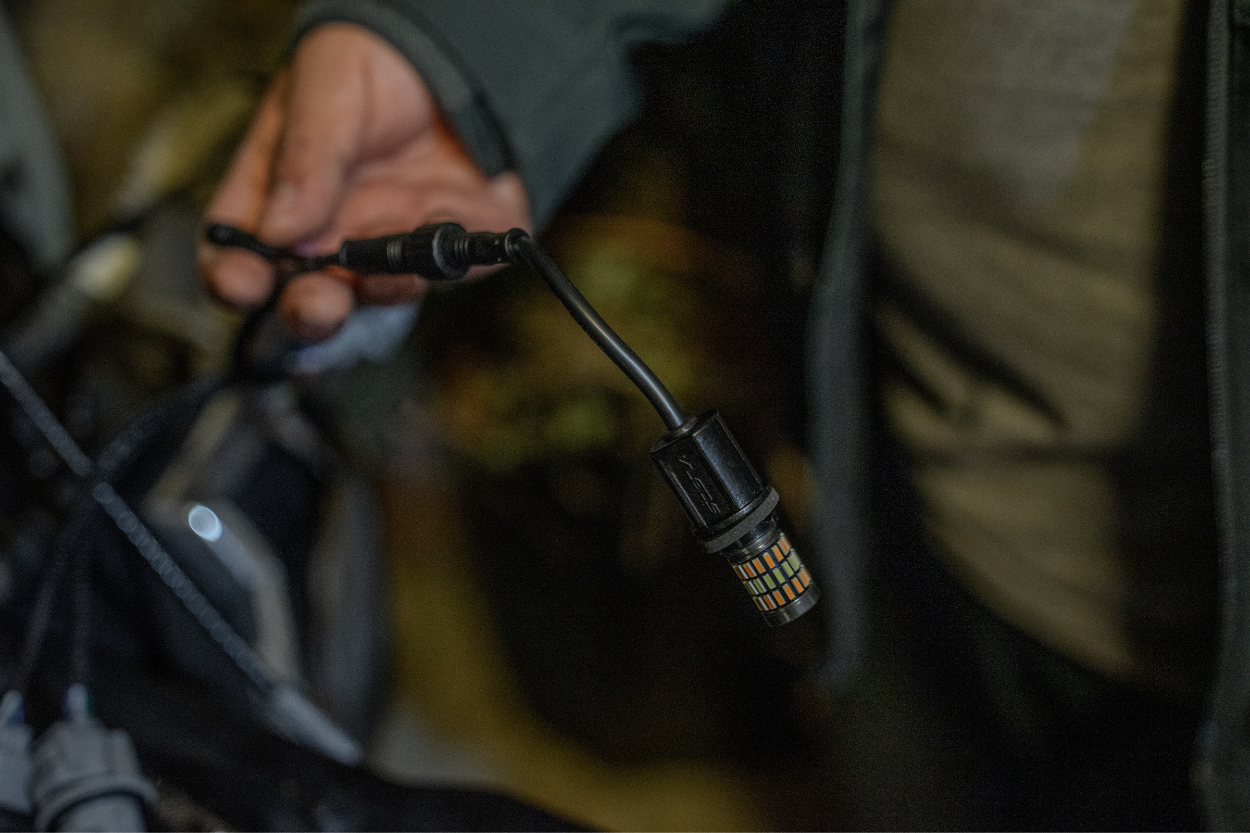
Next, connect the switchback bulb socket to the last black connector. Then, install the new switchback bulb into the socket. Don’t forget to fully tighten the weather-protecting cover.
7. Reinstall Lights
Now that you have everything connected, reinstall the light sockets into the housing. I highly suggest that you test the lights out before reinstalling the housings.
The lower square light serves as the turn signal, flashing in a yellow/orange hue. Additionally, this same light should turn bright white when you’re reversing.
Once everything is working, reinstall the light into the truck with the two 10mm bolts. This is optional, but we zip-tied the wires together and neatly tucked them behind the taillights.
Repeat on the opposite side.
Initial Thoughts
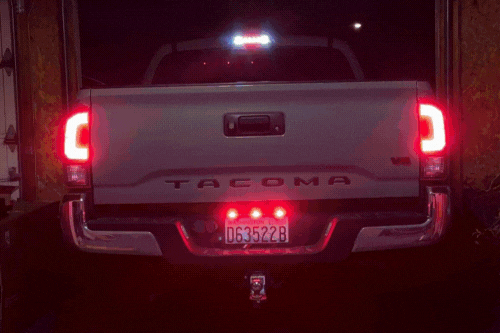
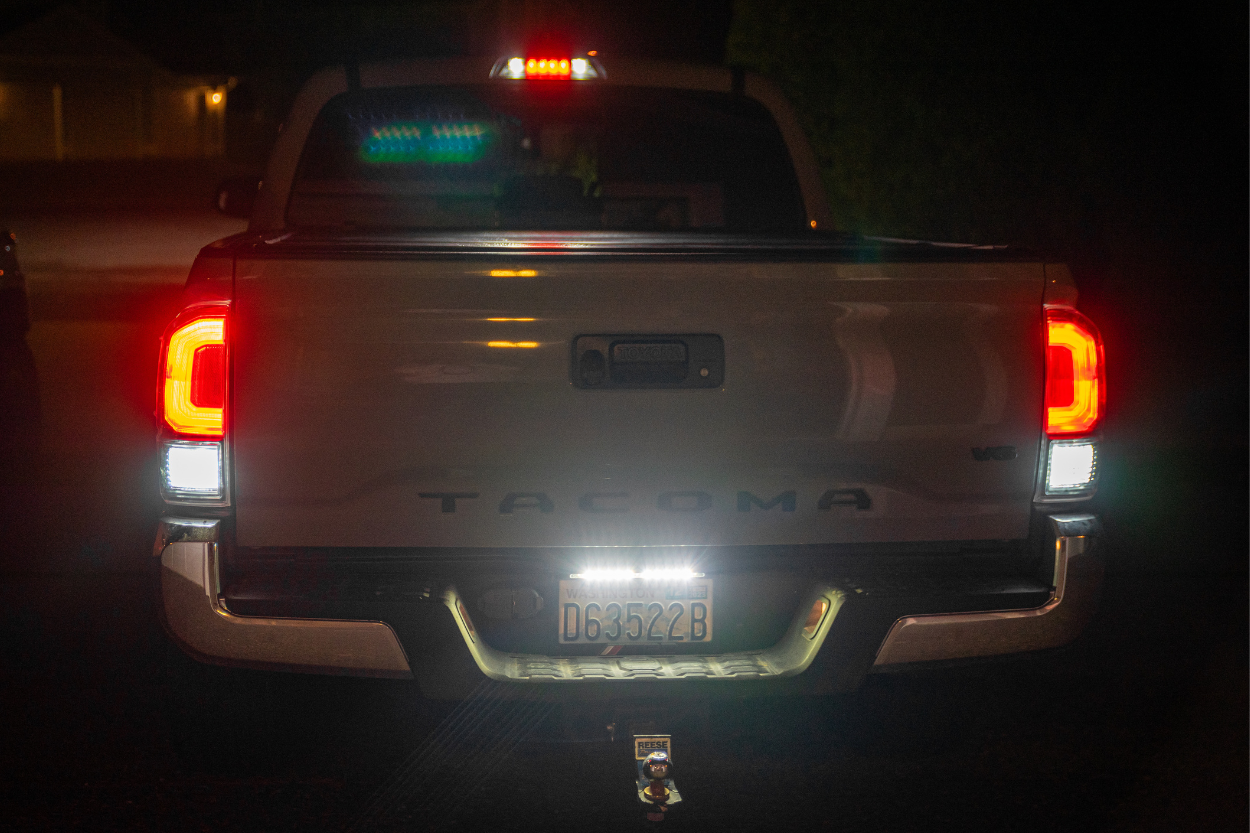
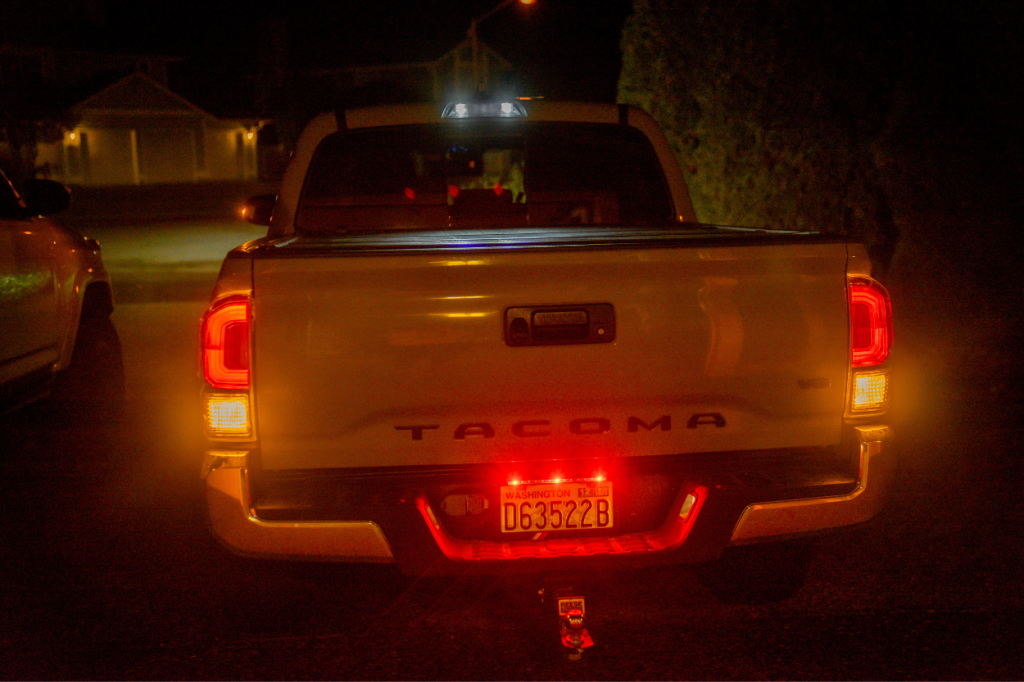
Once we finished installing the VTAILS kit on the passenger side, we fired up the Tacoma to compare it against the factory lighting. The difference was night and day!
It not only illuminated rearward visibility much more effectively but it also looked a lot better. We were thoroughly impressed by the simplicity and the overall quality of the components.
Final Thoughts
I understand if you’re wondering about the value here. Let’s face it, if you’re outfitting an off-road or overlanding truck, this might not be your first upgrade choice, and you might prefer investing your money elsewhere.
Is this a bit expensive for a small lighting upgrade that you won’t even really see since you’ll be driving? Yes. But is it worth it? Absolutely, and here’s why:
- Distinctiveness: You don’t see many Tacomas with this conversion kit. It’s also a cheaper alternative to new lights.
- Brightness: Seriously, these bulbs are blindingly bright. For those transitioning from halogen, the difference is a game-changer for reversing.
- Quality: I’ve tested various aftermarket lighting, and VLEDS stands out for its top-notch quality. Their bulbs are designed to be long-lasting and built for optimal performance. Plus, their harnesses are sealed for waterproof connections.
- Safety: Compared to other kits out there, the red 50 LED units in this kit boast an 8:1 brake/parking light ratio, so you can be easily seen.
If you’re seeking an upgrade that won’t break the bank and improves visibility, especially in dark or dusty conditions, this is for you.
In conclusion, it’s a pretty neat upgrade. Paired with the LP-X License Plate light bar, it’s brightened everything up significantly and deterred us from buying entirely new housings. The cohesive illumination, with all the white lights matching in color temperature, adds a nice touch. We’re genuinely impressed with the quality and the outcome.
We’re definitely looking forward to decking out the truck with more VLEDS products in the future!

Looks awesome! I have the Meso kit that does the same thing. Our tail lights should have come from the factory like this.
Anything like that for second gen?
Nice work! Detailed with all the right photos. I really like the gif at the end. Stuff like this is easiest to understand with an aid like that. The final thoughts photo is extra crispy too.