

You might be considering upgrading your OEM fog lights. There are several options on the market. You may have stumbled upon the Baja Designs Squadron Kit for the Tacoma. You might be wondering, should I upgrade my fogs? Is it worth it? How big of a difference will you see?
For starters, the stock ones on the Tacoma are a single bulb halogen light that produces output that’s underwhelming. They come in handy in overcast, dusty, and, of course, foggy conditions. Not only are the fog lights good for those specific scenarios, but they can also be used in tandem with your headlights at night to increase visibility.
The kit checked off all the specs I was looking for. They’re brighter, have excellent build quality, greater longevity, and a clean look, especially when compared to the OEM that came with the truck. The Baja Designs LED option blows the stock fogs out of the water. If you choose to purchase the amber lenses, the light is also less fatiguing on the eyes and improves visibility.
Yellow and amber light is much less reflective than other color options, this means less glare at night. Our eyes also see the yellow part of the visual spectrum well and that increases clarity. If you want a budget alternative to the Baja Designs LED lights, check out our install of the Xenon Depot H11 Pro Yellow Fog Light Bulbs.
The Baja lights also have a wider and farther reaching beam pattern which makes your drive safer than ever. On top of all that, this kit is a direct replacement for the factory fogs. The install process is simple, straightforward and includes all the wiring and everything you need to make this kit truly plug-and-play.
Let’s get started!
Find It Online
- Baja Designs Squadron Sport Amber Fog Lights: Check Price
Tools & Materials
- Phillips + flathead screwdriver
- Plastic Trim Removal Kit
- 10mm Socket and wrench
- 4 mm Allen wrench
- Catch tray for loose screws
- Gear-aid Work Light (optional)
Table Of Contents
Step 1. Bracket & Light Assembly
We will be starting with the driver’s side.
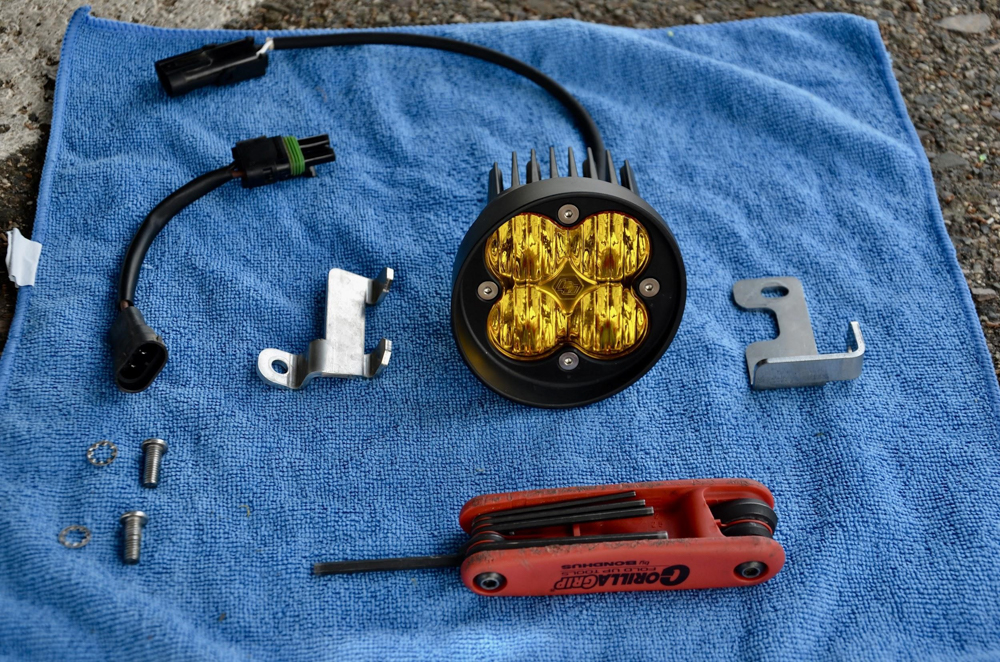
Grab your Baja Designs light that has the raised bezel as shown. You will also need one of each of the brackets sent with the kit as well as the wiring harness and two 4 mm Allen bolts and lock washers provided in the kit, as depicted in the photo above.

Rotate the light in the orientation as seen above and grab the bracket with the two tabs and your 4 mm Allen bolt and washer.
Line up the bracket as seen above and feed the bolt through the hole with the washer on the backside of the bracket up against the light. Start screwing it in with your Allen wrench, being cautious to not cross-thread the bolt. The bolt screws into a nylon locking nut. The types of nuts will have a bit of resistance when you first screw them in. This is meant to help secure the bolt from loosening.
Tighten the bolt down till it’s snug but you can still move it. Now line up the leading edge of the bracket and the light housing like the green lines depict above. While holding down the bracket, tighten down the bolt until it is snug, so the bracket doesn’t move.

Moving onto the other side of the light, we are going to use the other bracket we pulled out and another 4mm Allen bolt and washer.
Just like the first bracket, insert the bolt and the washer on the backside of the bracket up against the light. Proceed to tighten the bolt taking the same precautions as previously mentioned. Once snug, line up the leading edge of the bracket to the light bezel making sure it’s straight like the picture shown above. Now tighten it up making sure the bracket is secure.

This is what the final product should look like with both the brackets installed properly.
On the other side, it is the same process except the two brackets are swapped meaning the bracket with the tabs will be on the right side of the light if you’re looking at it directly. Just a reminder, the above images are for the driver’s side.
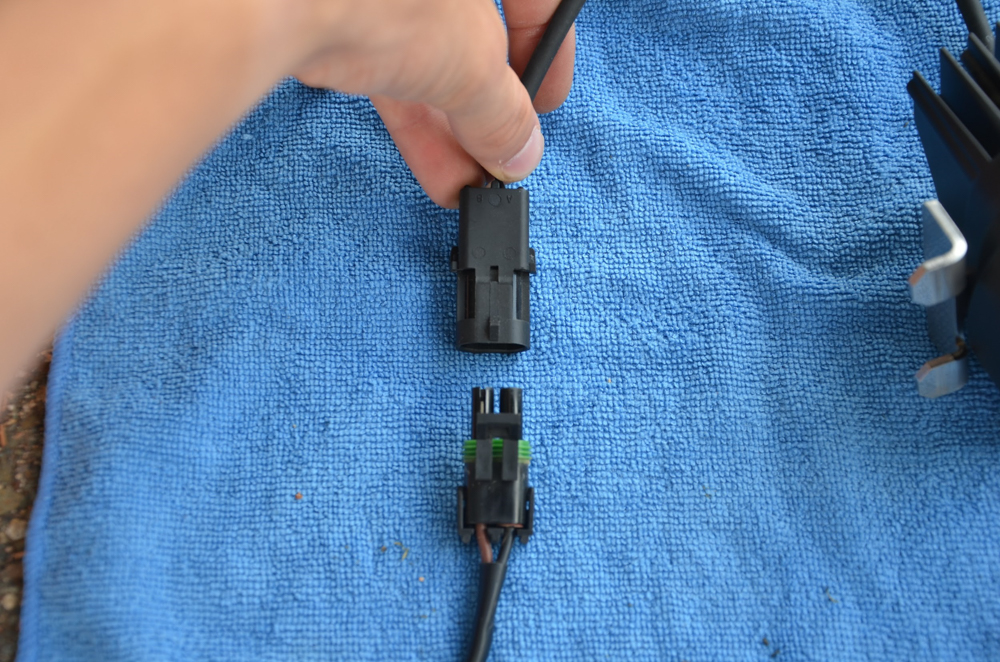
Now take your short harness that came with the kit and insert it to the light harness.

Make sure you get the orientation correct, as shown above. The two ends will click and lock together.
Step 2. Fender Liner

There are a handful of screws and clips to remove to pull back the fender liner. Start by turning the wheel to the right to help with access to the inside of the liner. The picture above shows the fasteners you need to remove. You can use a 10mm socket or a Phillips screwdriver. A compact screwdriver helps in this spot or you can just tilt your passenger/driver tire out of the way.
Once those are removed, take your flathead screwdriver and work your way under the black clip, the one on the bottom, and pull it enough out for you to get your fingers in there and pull it out. Make sure you have a safe place to store these screws and clips so they don’t get lost or mixed up with others.
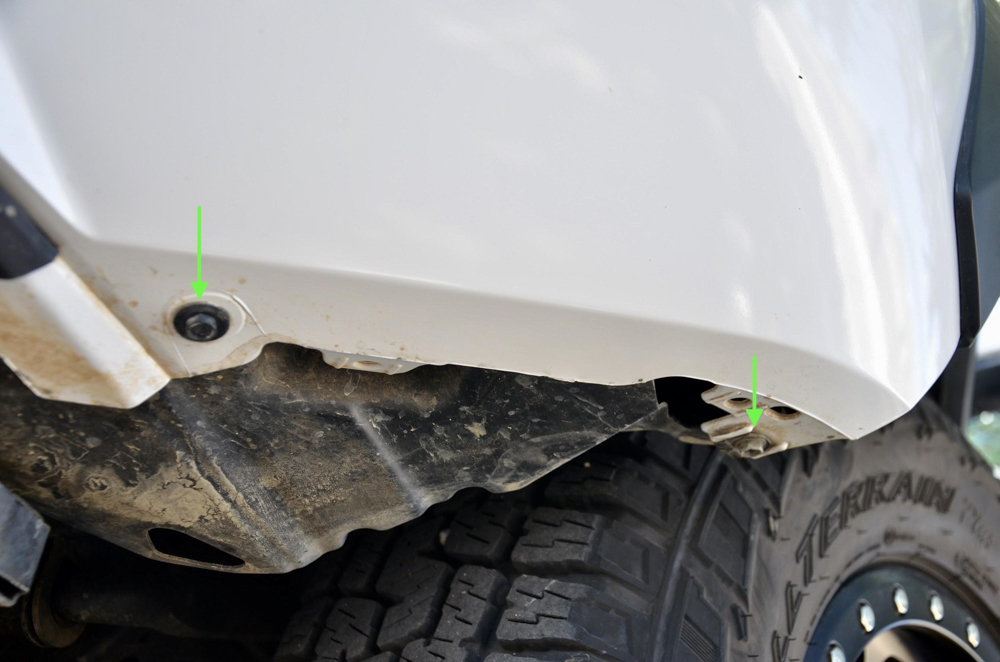
The last two are located as shown above.
Both require a 10 mm socket to remove. With those removed, you can pull back the liner back revealing the fog light.

The fog light sits directly behind the liner, you can’t miss it.
Step 3: Removing Stock Light

Now that you have access to the fog, reach in and remove the harness attached to the fog.
Press down on the grooved tab shown in the photo while pulling down to detach the harness.

With the harness removed there is one screw holding the fog in.
Grab your Phillips head and unscrew it. This will allow you to angle the fog and remove it from the tabs that are holding it in.

These female tab inserts are going to be where the male tabs on the Baja fog light bracket will slide into, securing the light.
We are going to be using the same screw that we removed from the stock fog to mount the new lights.
Step 4. Installing New Light

Insert the light through the fender and reach in to insert the male tabs on the light bracket into the female openings, making sure both are seated securely.

Grab the screw and Phillips screwdriver that you removed when removing the stock fog.
You are going to secure the light down by screwing the screw back into the top slot on the bracket. Make sure the screw doesn’t cross-thread when tightening and leave it a little loose in case you need to adjust the light.

Next, go to the front of the truck. Since you left the light a little loose, you are going to adjust it so the bezel sits flush with the bezel on the housing.
This is where another person would come in handy. Having someone run their finger along the edge as seen above to make sure it’s flush while the other person is tightening the screw inside the liner. Make sure it is snug and the light doesn’t slide back and forth.
Step 5. Connect Harness

Start by opening your hood and locating the harness on the Baja fog light and the stock harness that is resting down by the fog light. Fish them up so it is easier to see and connect them until they click like shown in the photo above. Secure any excess wiring with a zip tie for a cleaner install.
Proceed to go into the cab and start your truck and turn on your lights. Walk around and check to see if the light is on. If it is, fantastic! If it is not, check the connection from the harness to the factory, you might have to flip it 180 degrees. If that didn’t fix it then check the connection on the harness to the short adapter harness. Make sure they are firmly connected.
Step 6. Replace Liner
Refer to the removal photos in the second step to see how the fender liner falls back into place.
You will have to work it a bit and make sure all the holes line up. Be wary of not cross-threading the bolts once again and make sure they all go back into their designated spots.
The process for the passenger side will be the same except the brackets will be swapped, as mentioned in the first step.
Final Thoughts
There you have it! You have successfully installed these.
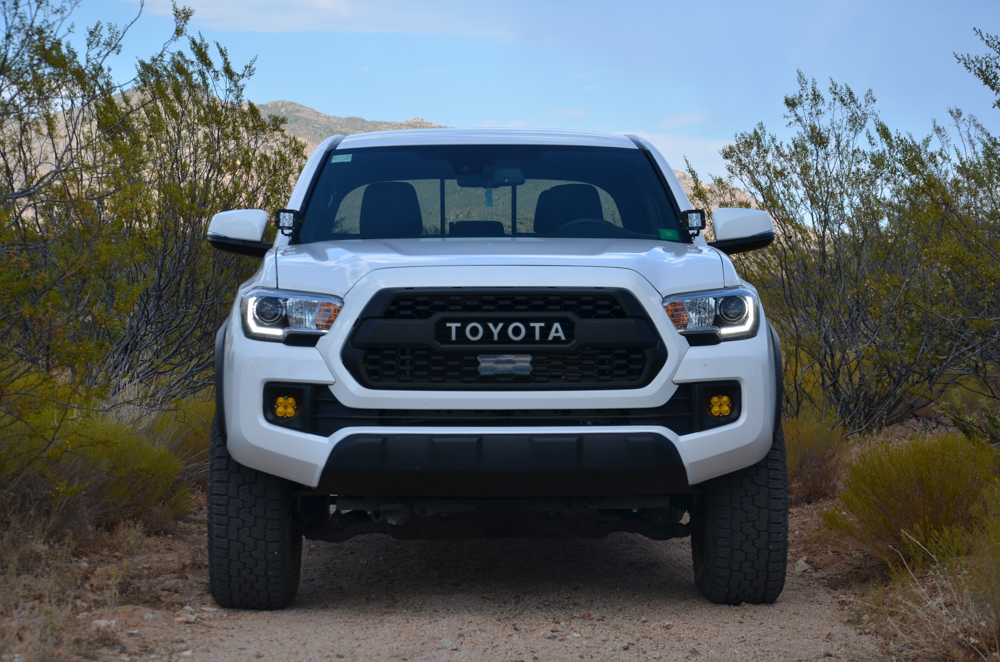
Be sure to step back and admire your hard work and how good they look on the truck.

As you can see above, these lights pack a serious punch.
All in all, the process is pretty simple. Having another hand to help with and guide you will make the process go by faster and smoother, but installing by yourself is very doable, it just requires a little time and patience. The total install time is roughly one hour. Now you can hit the road with confidence and style!
I have an SR5 and it doesn’t have the hole for the lights… would you recommend the casing/bezel i should buy for the baja lights?