
If you’re looking for a clean and functional way to relocate or add a battery, mount on-board air compressor, or increase storage space in your bed, then this article is for you. The JD Fabrication bedside box is one of the best-designed storage upgrades available for the Toyota Tacoma. Built with precision and designed specifically for the 2nd & 3rd Gen (2005-2023) Tacoma, this box adds a secure, lockable storage option to the bed of your truck while maintaining a factory look.
In this article, I’ll guide you through the complete installation process from start to finish, share tips I learned along the way, and offer my honest thoughts after installing and testing it out.
I got one of these because I was looking for a permanent place to hard mount my MORRFlate TenSix PSI Pro compressor. I also wanted a clean solution to add auxiliary battery terminals for full time power in the bed.
Features & Specs
- 5052 aluminum construction
- Laser cut, TIG welded
- Black powder-coated exterior
- Installs in space between bed tub and fender
- Optional frame support for added strength
- Lockable door latch
- Built for a Group 34 battery (optional battery tray)
Table Of Contents
Installation
Tools Needed
Before you begin, gather all your necessary tools. Having the right setup will make the install smoother and help avoid mistakes.
- Ratchet
- 10mm socket
- 10mm wrench
- 11mm wrench
- 4mm Allen wrench
- Multi-tool with cutting tip
- Cutting tool
- Blue painter’s tape
- Marker
- Drill
- 9/32 drill bit
- Tape measure
- Hammer or rubber mallet
I also made a YouTube video during this installation, check it out below.
If you like text/photo directions, keep reading.
YouTube Video
Step 1. Prepare Truck Bed
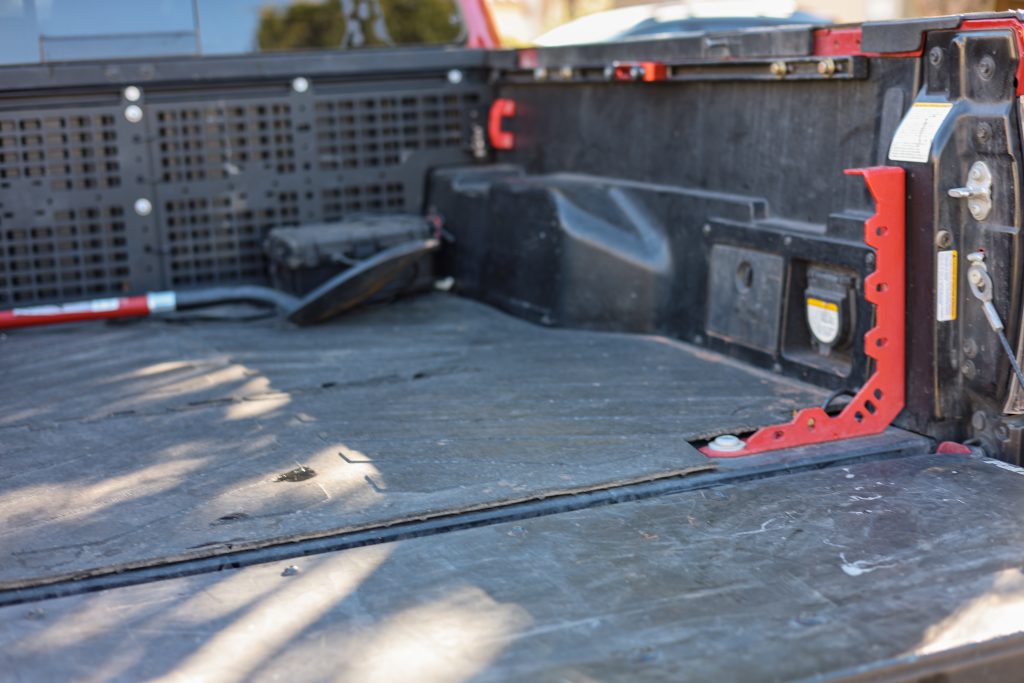
Start by clearing out the bed area where the box will be mounted. When purchasing the bed box, you can choose either a driver-side or passenger-side design. I ended up selecting the driver’s side box since my truck already has a box and power on the passenger’s side.
If you have a bed liner or tonneau cover, note that the bed box is designed to work with most setups. However, you may need to remove or temporarily adjust them during installation. My truck has the OEM rubber bed mat, and I learned through the install that if I had just pulled mine out of the truck bed, it would have made my job easier.
Step 2. Cutting The Bed
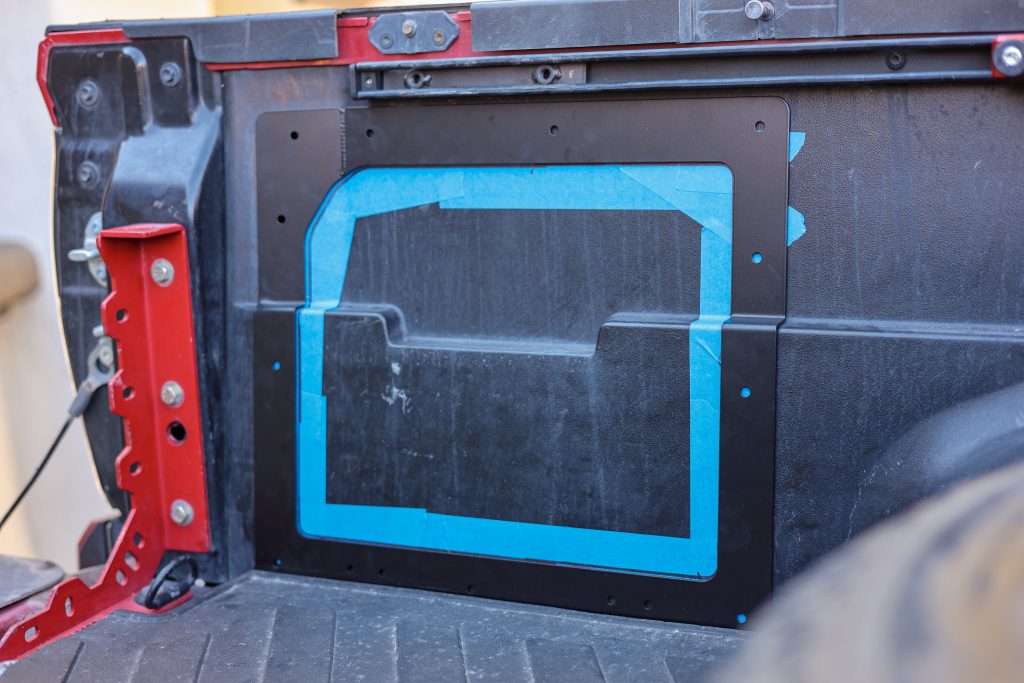
You will use the black frame plate that came with your bed box as a tool to outline your cut. It is important to note that you must use a tape measure to ensure you are making your cut in the correct area. The back edge of your frame plate that is closest to the back of the bed must be 7/8″ away from the back edge.
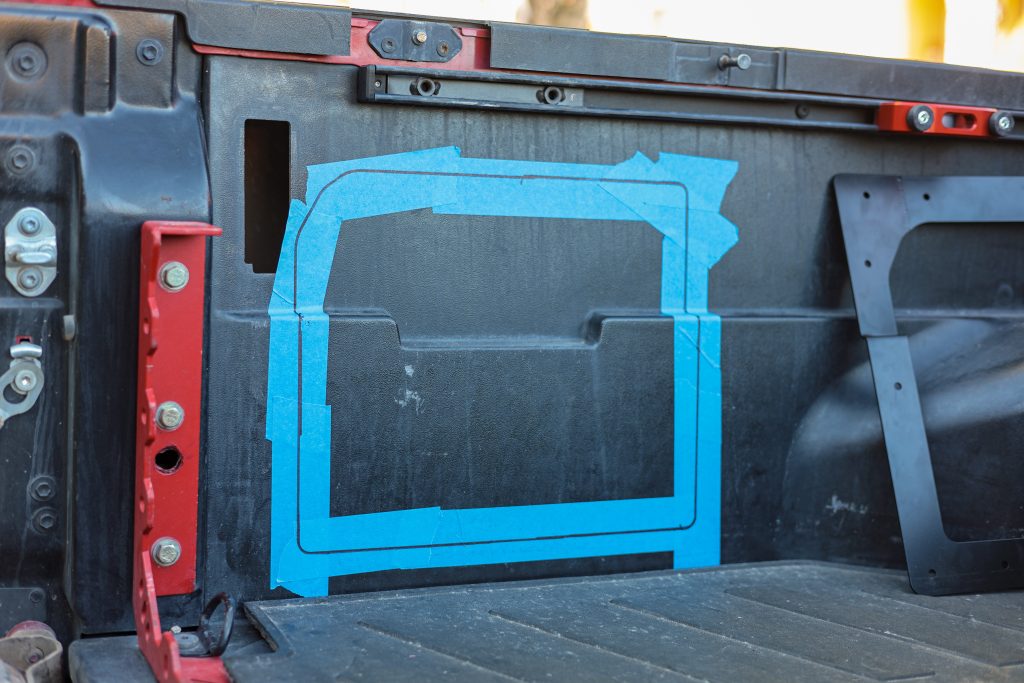
After positioning the frame plate, use blue painters’ tape around the inside edge of the frame plate on the bedside. We will use this tape as a surface to draw on with a Sharpie to know where the cut line will be.
Making this measurement accurate will ensure the bed box will align correctly with your frame plate. Behind the bed, where you can’t see, are multiple vertical supports to reinforce the bed’s structure. If you do not make this measurement, you may misalign your cut, and your bed box and frame plate will not align properly.
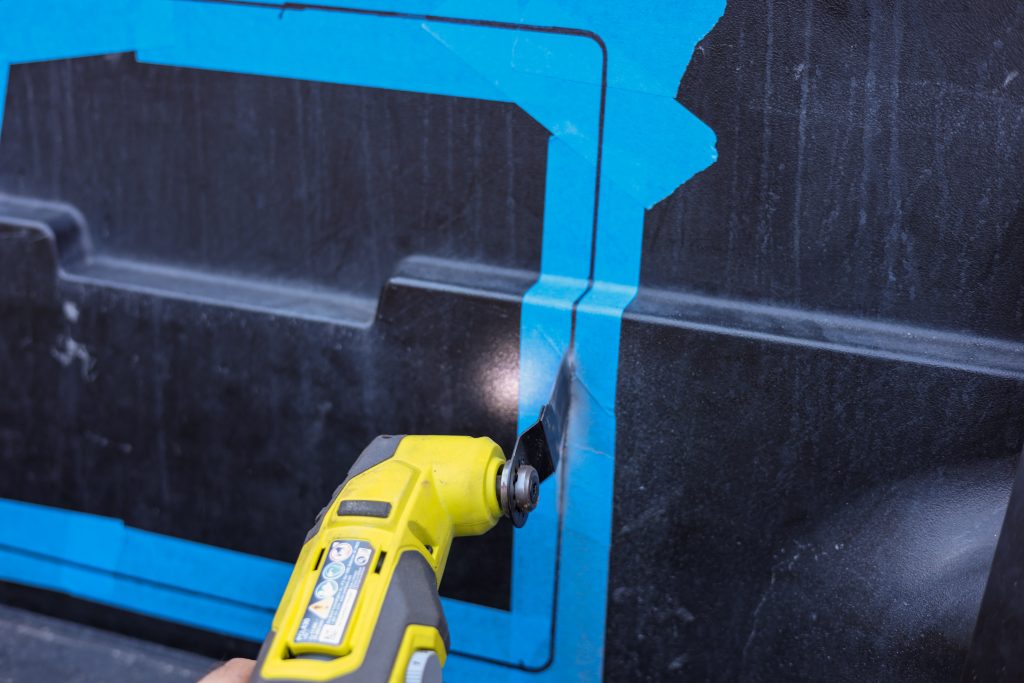
I used a combination of a small cut-off tool and a multi-tool to cut out this bed piece. If you were not aware, our beds are made from a composition that includes fiberglass material. If you have not worked with fiberglass, it can be very itchy, so it’s recommended to wear pants, long sleeves, and glasses for eye protection when cutting the bed.

After you get the hole cut out, you will see a rib behind this hole in the top center area of the cutout. This rib will need to be cut off, going up about 2 inches behind your bed. Cutting off this rib and making it smooth will help the bed box sit flush against the back side.
Step 3. Drilling Bolt Holes
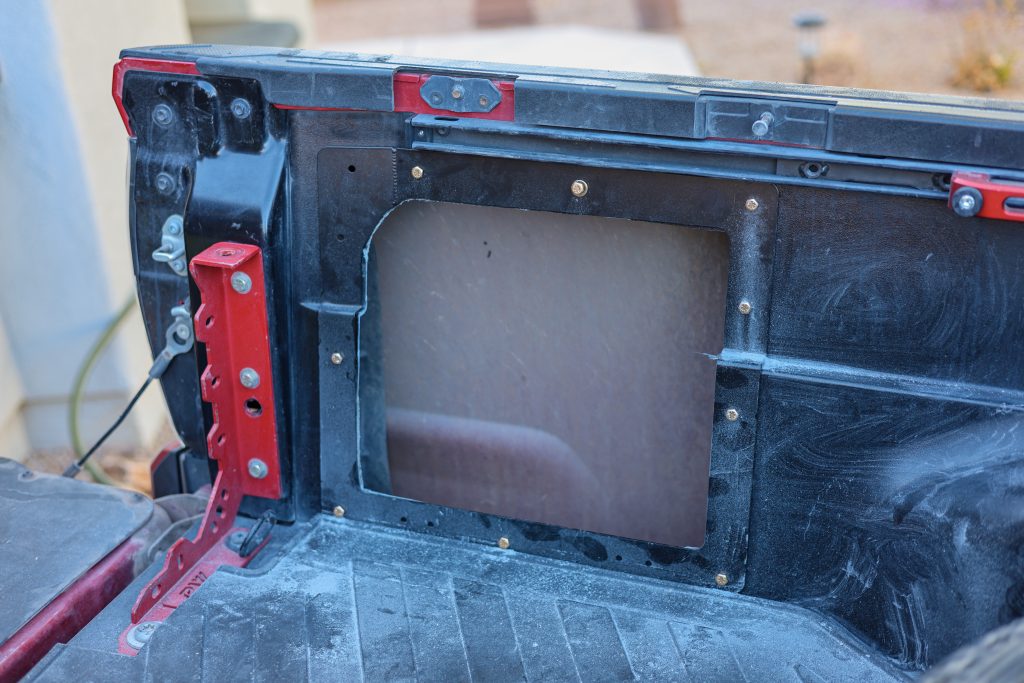
Now that you have cut out the hole for the box, it’s time to drill out the bolt holes, which are every hole you see in the frame plate. All of your bolts are 1/4″, so you could use a 1/4″ drill bit, but I personally choose to use a 9/32″ bit, which will give just a little bit of wiggle room to help everything align.
You will have a total of 14 holes that need to be drilled into your bedside. I recommend that each time you drill a new hole, you place a bolt in that hole to help keep your frame plate in the same location, preventing it from moving around.
Step 4. Assembling the bed box
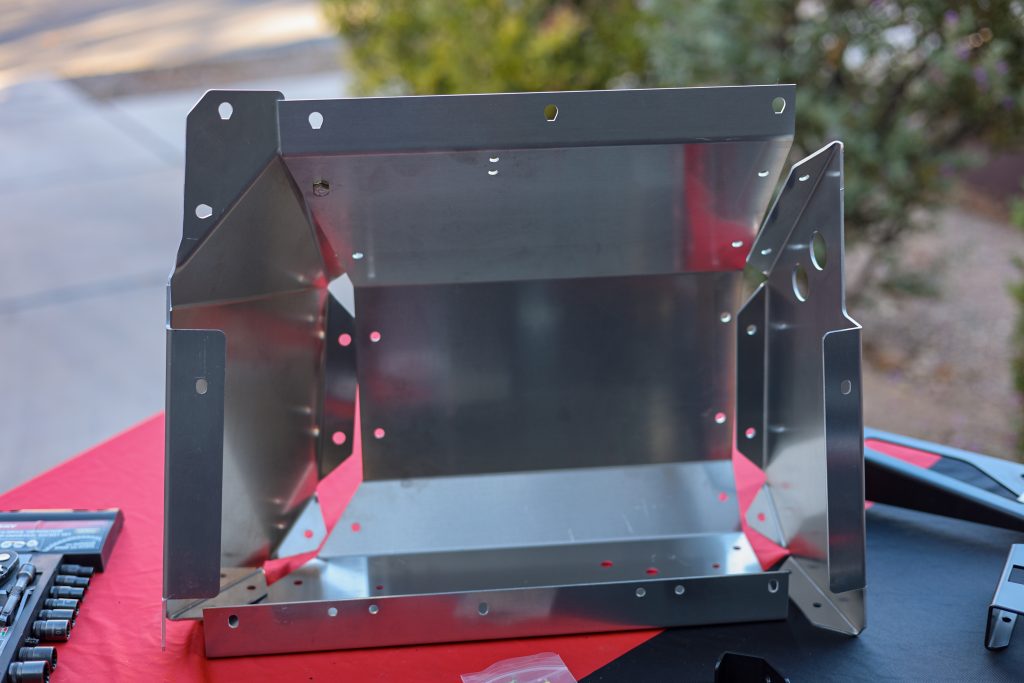
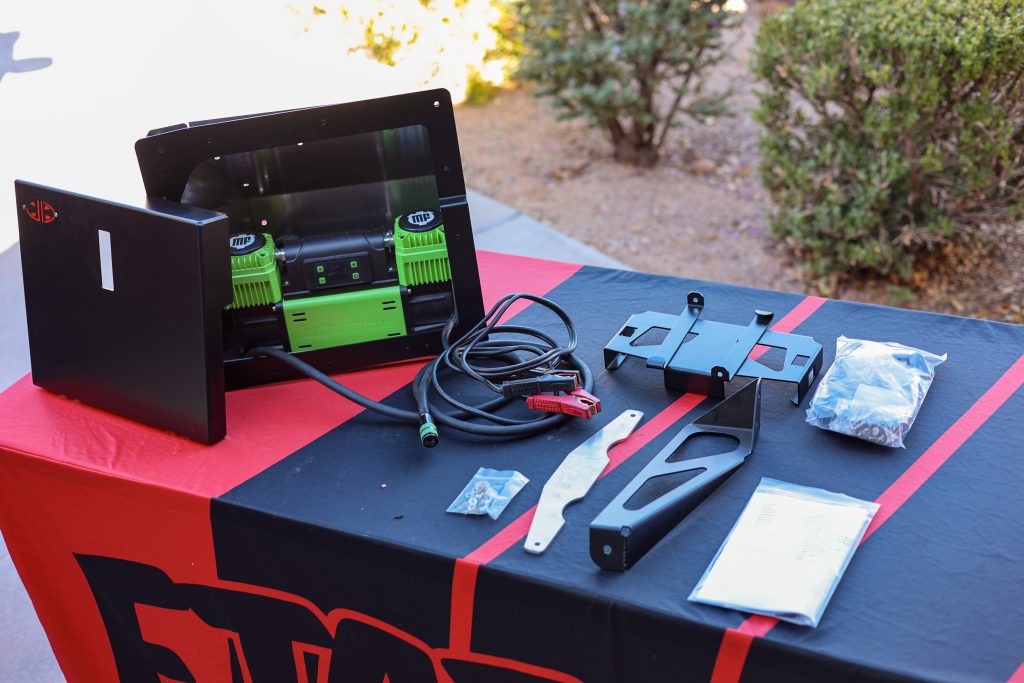
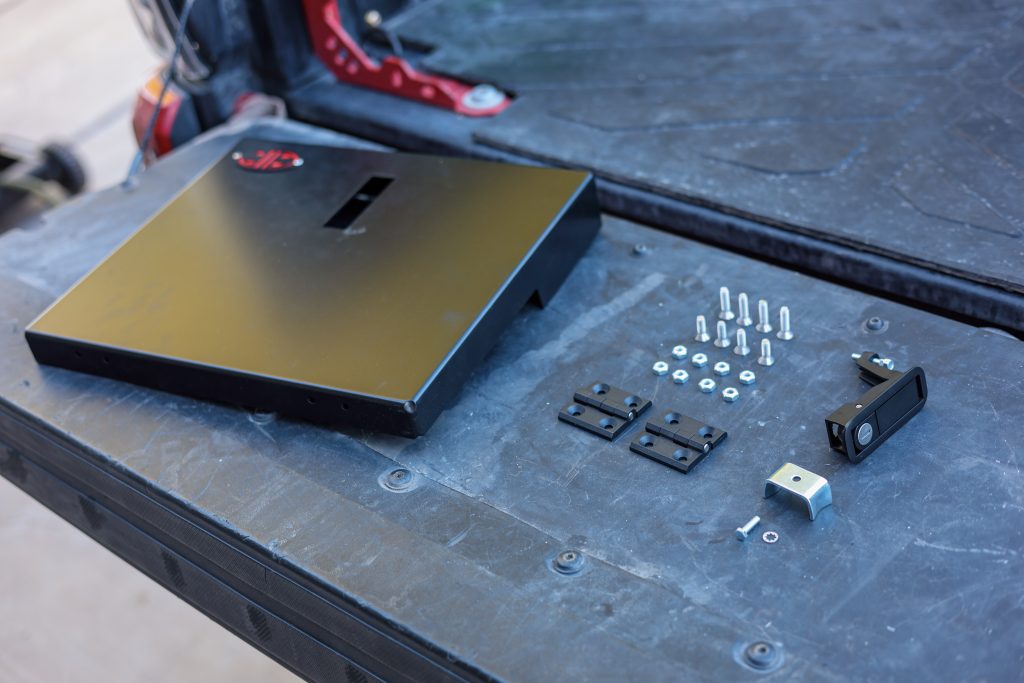
The actual box portion of this kit consists of three separate, bent metal pieces. You have the back piece, then two side pieces that are like big puzzle pieces. Place all 3 of those panels together, and you will see each side aligns with holes in the back piece. With all three pieces together, you can start to place bolts in each hole and secure them with the nuts.
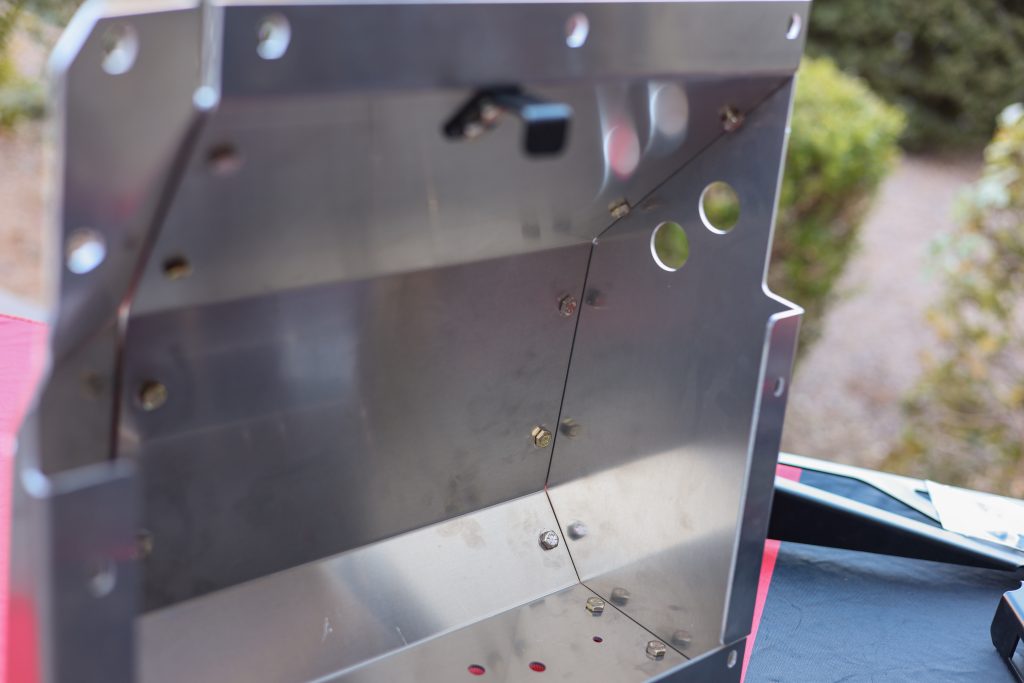
At this step, I also attached the door catch to the top side of the box. This catch is what helps secure the door closed and allows you to lock your box. It will be attached to the top of the box with two more bolts and nuts.
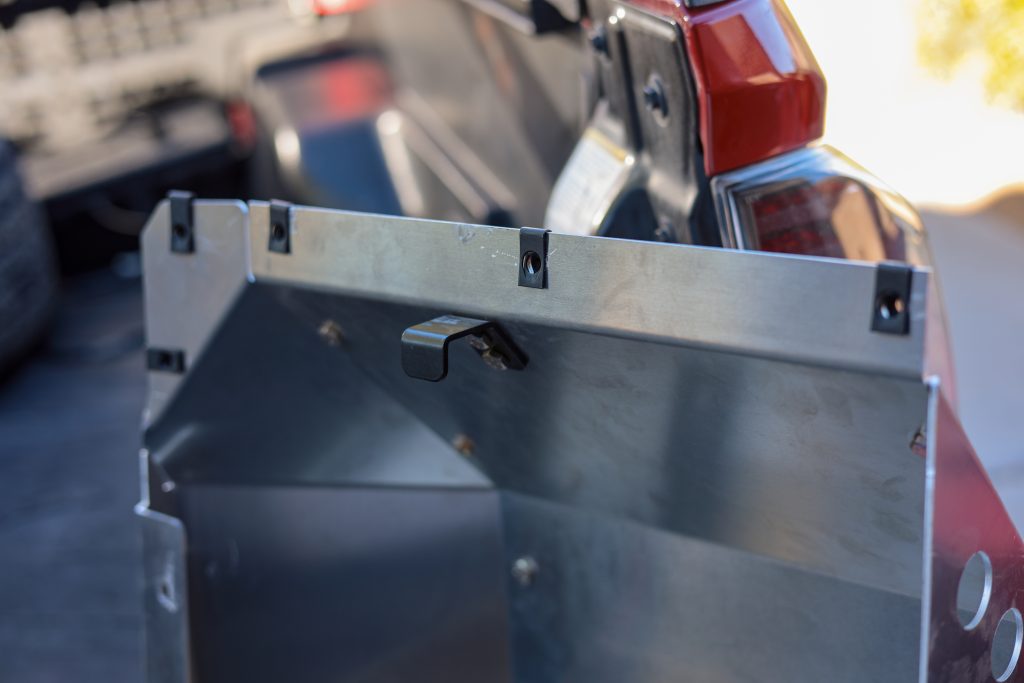
Don’t forget to add the threaded U-clips to the top 5 holes at the top. Adding these clips is important because once the bed box is installed, you will not have access to these holes on the backside to add a nut. They can be a little difficult to press on by hand, so using a hammer or rubber mallet can help seat them onto the lip of the box.
Step 5. Mounting Box In Bed

JD Fabrication recommends having a second set of hands for this step to ensure a smoother process, but it can be done with just one person if you’re creative. I was able to install it by myself, using my off-road jack and a block of wood to help hold the bed box in place while I bolted everything together.
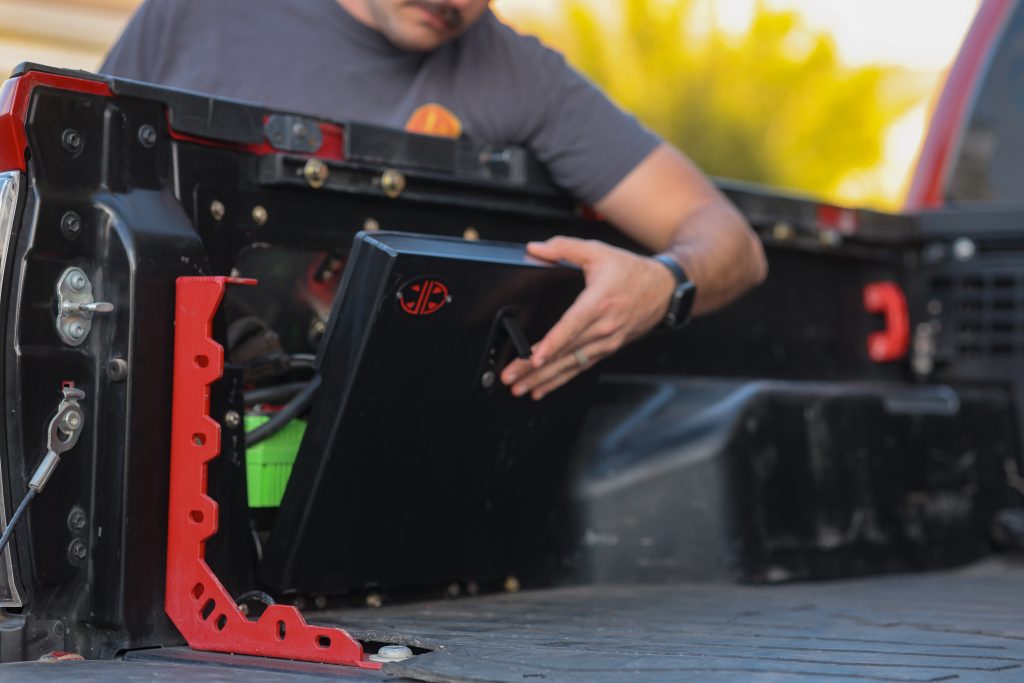
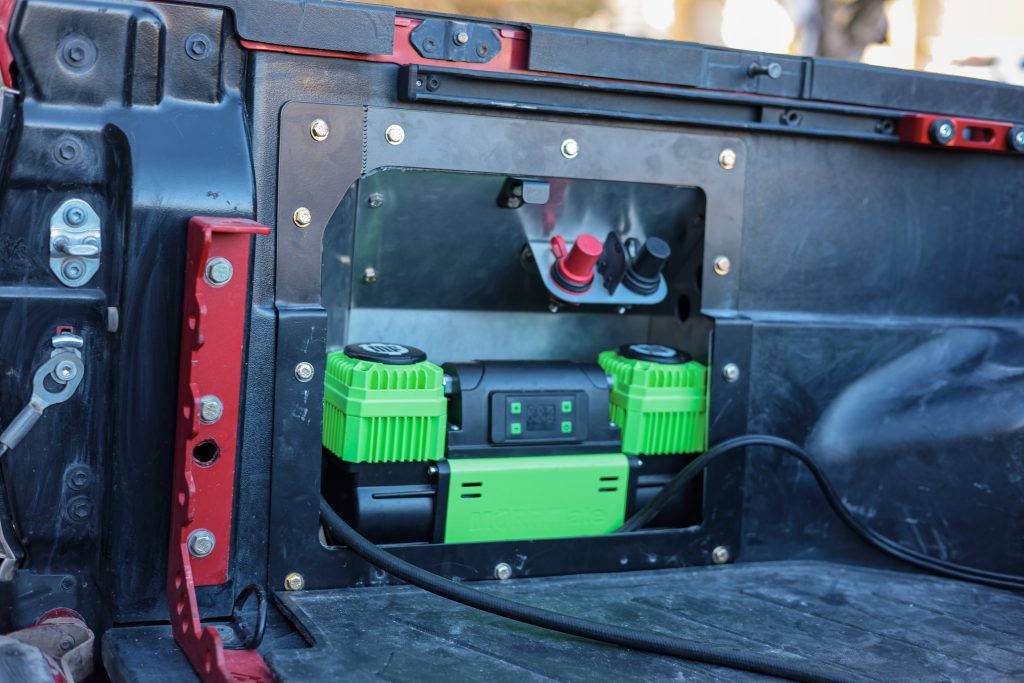
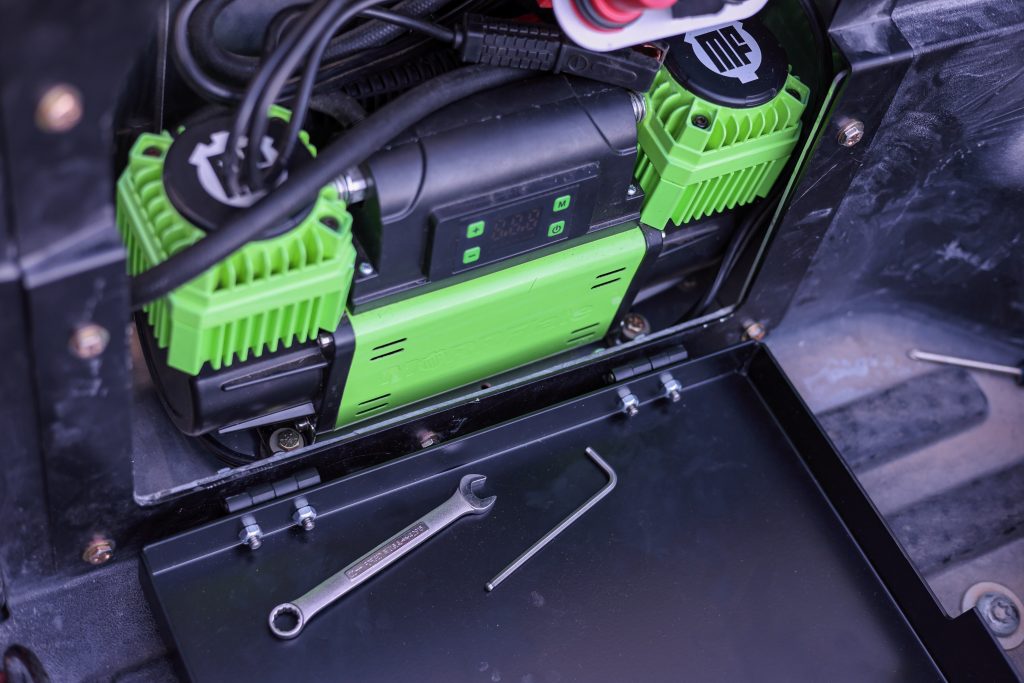
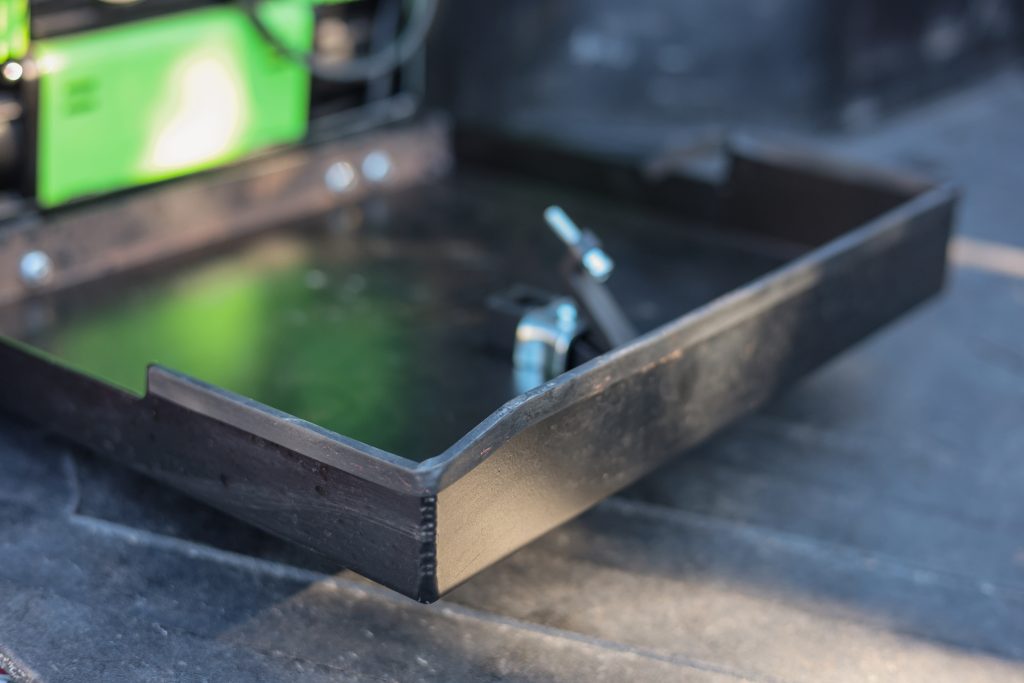
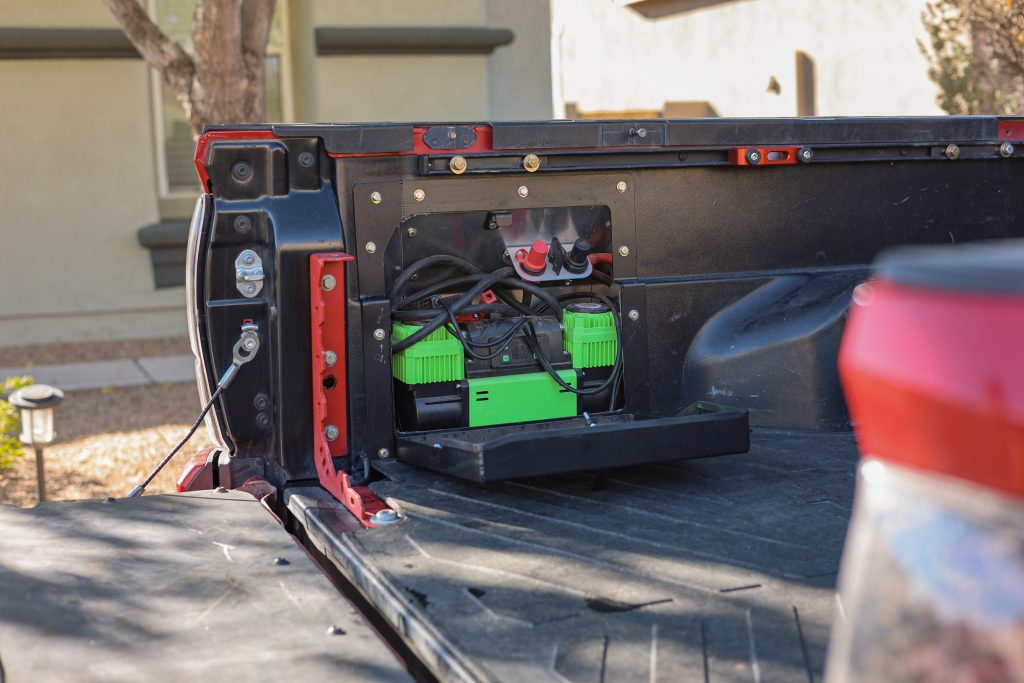
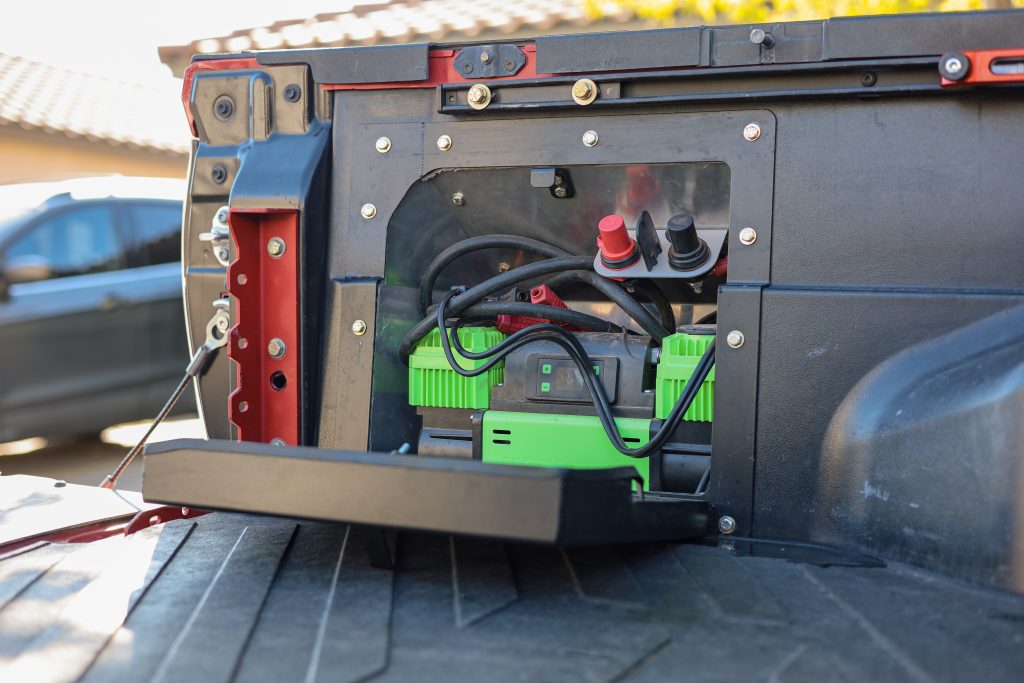
I found it easier to get all my accessories mounted before putting the box in. You can see my MORRFlate compressor fits inside perfectly, and the battery terminals for power are seen above. Alternatively, if you choose to get the battery box, I recommend you assemble it now.
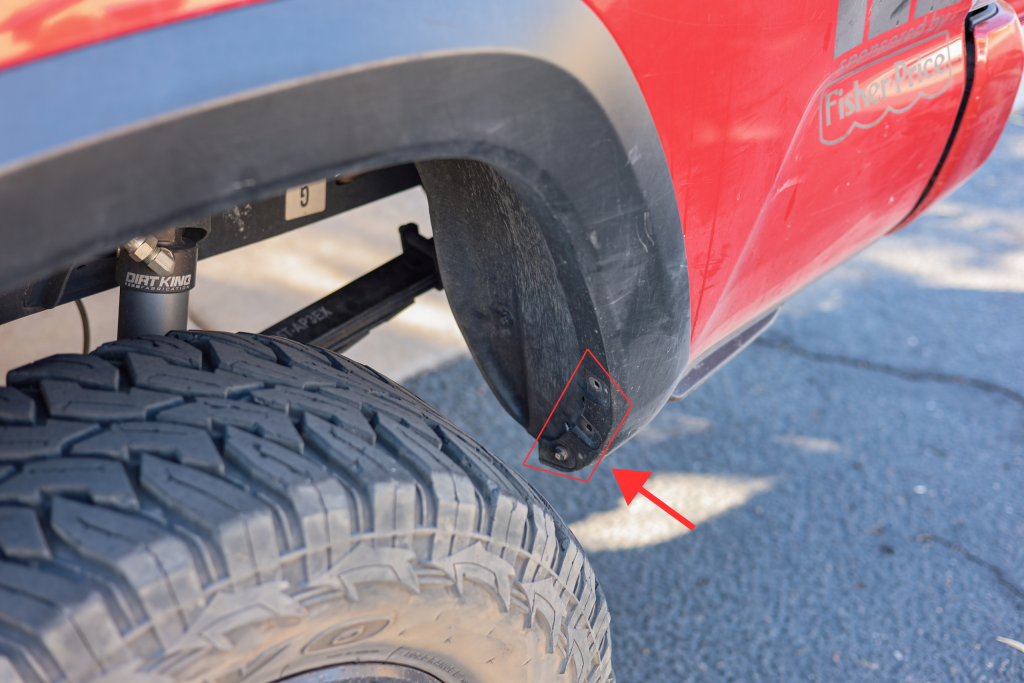
Down on the bottom side of your bedside, there’s a slim metal bracket that holds it to the truck, preventing it from moving or flapping in the wind. This bracket is secured to the bedside with two 10mm bolts, as shown in the photo above. You need to remove these bolts so the bedside will have enough wiggle room to fit your bed box up against it.
Keep in mind these Tacoma bed sides are very thin metal and will crease or dent easily. When lifting the bed box into its location, do not force or shove it up, as this may risk denting your bed. Once the box is up in position, you can start attaching bolts to the frame plate and to the bed box. Go around and install all 10 bolts until the box is securely in place on the bedside.
Step 6. Mounting The Door
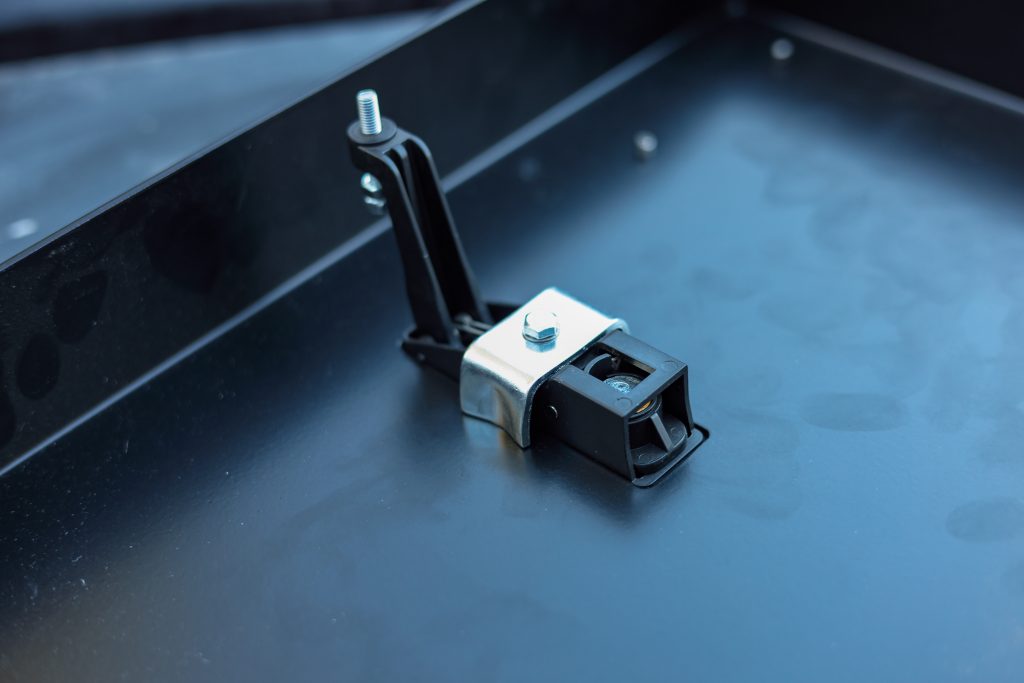
This step is relatively simple; we need to attach the door latch and both hinges, then we can secure the door to the bed box. For the door latch, insert the latch assembly into the rectangular cutout on the door. Then, on the backside, it is secured to the door using a U-shaped silver bracket and a small bolt with a washer.
When it comes to the hinges, you will notice that you have eight total hinge bolts, four of which are shorter and four of which are longer.
The four short bolts will be used to attach the hinges to the door itself because they go through fewer layers of metal. The longer bolts will be used to attach the hinges to the bed box because they go through the hinge, the frame plate, your box, and the bed.
To complete this project, the final step is to add the weather strip to the upper portion of the door. This weather strip will not make the box 100% waterproof, but it will help keep water out and prevent dust from entering. The biggest purpose I would assume is to help keep the door from rattling when it’s closed and pressed against the bed box.
Final Thoughts
After tightening everything down, test the bed box to make sure it functions as intended. Open and close the lid a few times to confirm smooth operation and proper alignment. It may require some minor adjustments to the door latch to ensure a snug, tight seal, but tighten or loosen the screw on the back side of the latch.
Additionally, at this stage, you can also reinstall any accessories, such as a bed mat, bed rack, or tonneau cover.
I have been wanting to add an on-board air system to my truck for a while now, and after completing this project, I can say I’m very happy with the outcome. The JD Fabrication box does not take up any new space in the bed, which is a huge win for the limited Tacoma storage issues we all deal with, especially on short beds. I also love how it looks. The bed box has a factory look, it looks like it was always meant to be there.
A few days after I finished the install, I went out on a trip to Sedona with some buddies, and I got to use my air compressor a few times. It was convenient to have the air compressor ready to go, and the location where the bed box is placed makes it easy to access, even with a bed full of gear from the trip.
If you’re looking to add more storage space to your bed, the JD Fabrication bed box might be what you need. It doesn’t have to be used for a battery or an air compressor; you can use this box for whatever you can fit in there.