
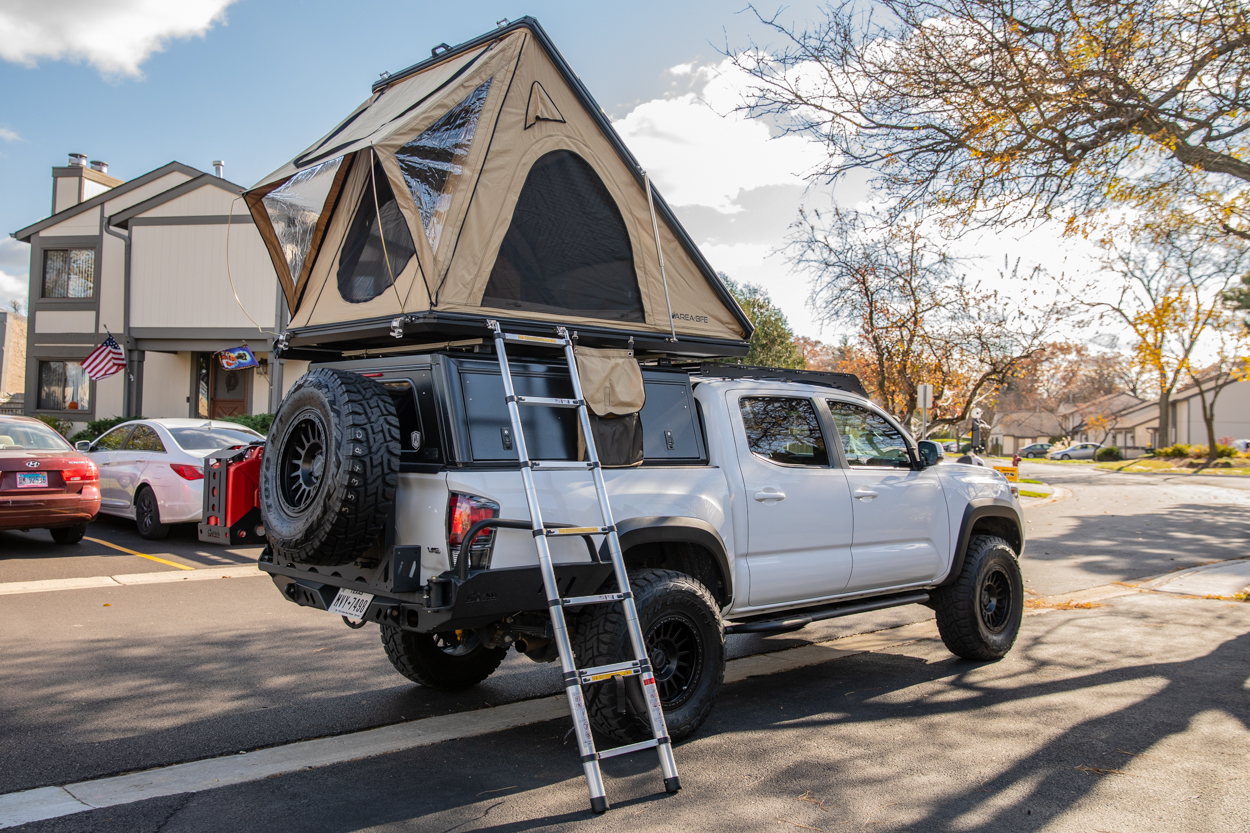
If you’re up to date on your hard shell tents, you’ve likely heard of AreaBFE.
This particular article will serve as a complete guide to mounting this tent on just about any vehicle. Of course, this install was on a 3rd Gen Tacoma, but the process is pretty much the same for any car with a roof rail system. Before you install this tent, make sure that your roof rack system can handle the added weight and stress.
Find It Online
- AreaBFE Black Series RTT: Check Price
Read the long term review too.
Table Of Contents
Unboxing

There’s no denying it, this tent is BIG.
The box it comes in is roughly the size of a queen size mattress. The tent arrived promptly and was very well packaged. Above, you can see that it was delivered in good shape and without any significant damage.
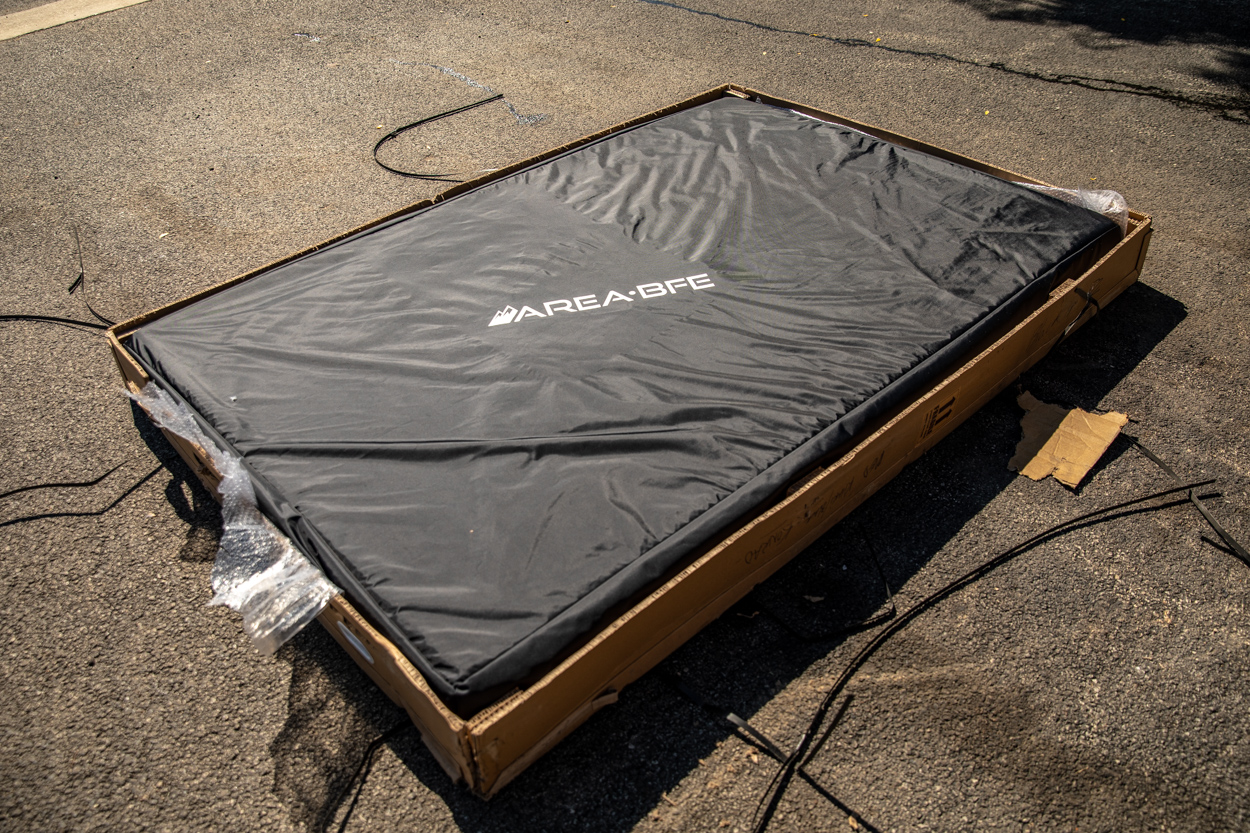
I removed most of it, but the tent is completely wrapped in a layer of bubble wrap.
Also, the tent has a dedicated cloth cover to further protect it during transit.

I’ve seen a lot of tents and slept in a few, but this was my first hardshell rooftop tent.
My first impression? I couldn’t believe how cool it was! This thing is super dope.
No complaints so far. This tent looks like it’s going to completely change my truck camping experience.
Hardware

This tent, like most rooftop tents, comes with all the necessary hardware and tools for install.
If you’re like me (way too excited), you might miss the hardware at first. The ladder comes in a separate box, and within that box, you’ll find all the hardware.
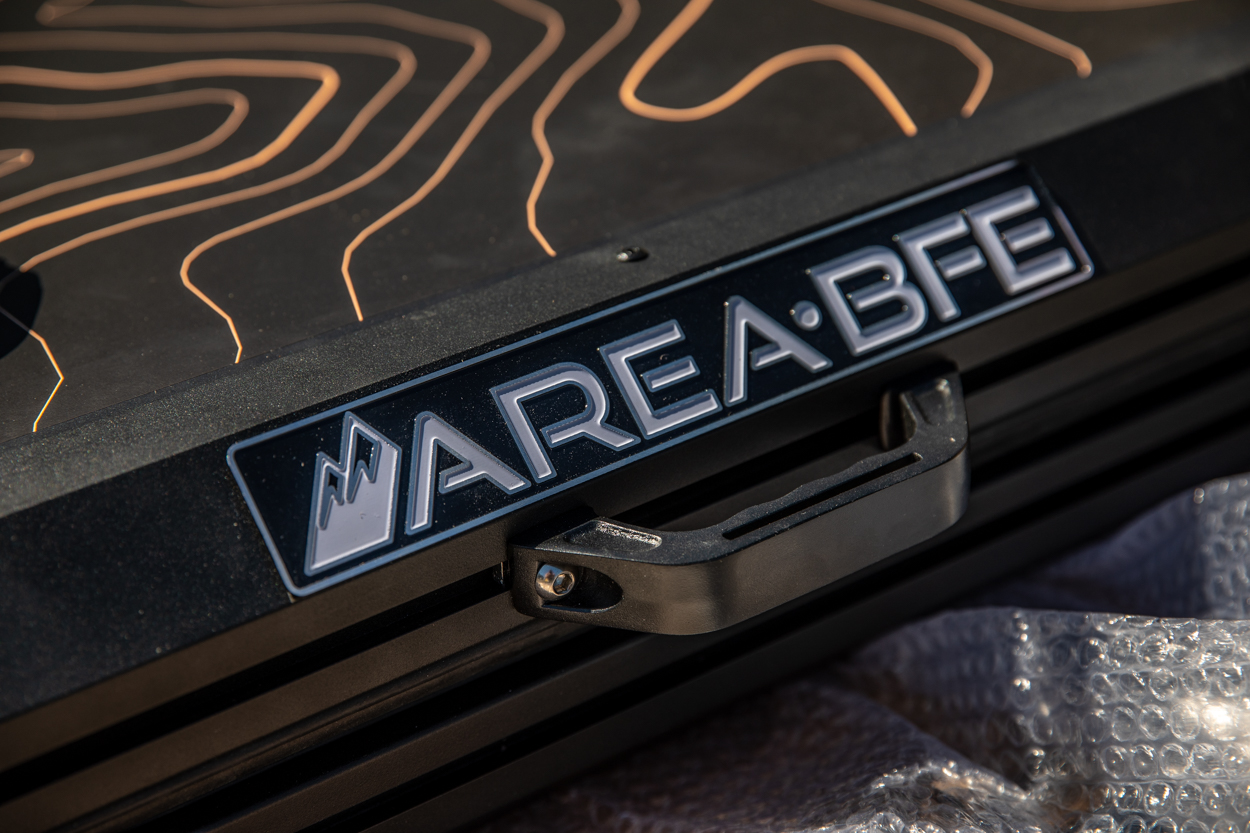
Step 1. Install Grab Handle

The first step is to install the grab handle.
Above, you can see the Allen bolt and the rectangular washer that fits into the tent’s side channels.

A closeup of the corner of the AreaBFE tent highlights the channels which run the length of the top and bottom of the tent.
Slide the handle and attached washers into the channel. This can take a few tries as the fit is tight, but do this slowly and carefully, and eventually, the washer will catch properly.
I chose to install the handle on the back of the tent, using the AreaBFE logo to help center it.
Technically, you could offset the handle or put it on either side. Might not be a bad idea either if you could get your hands on a few extra handles, to mount 3 total. Just a thought.
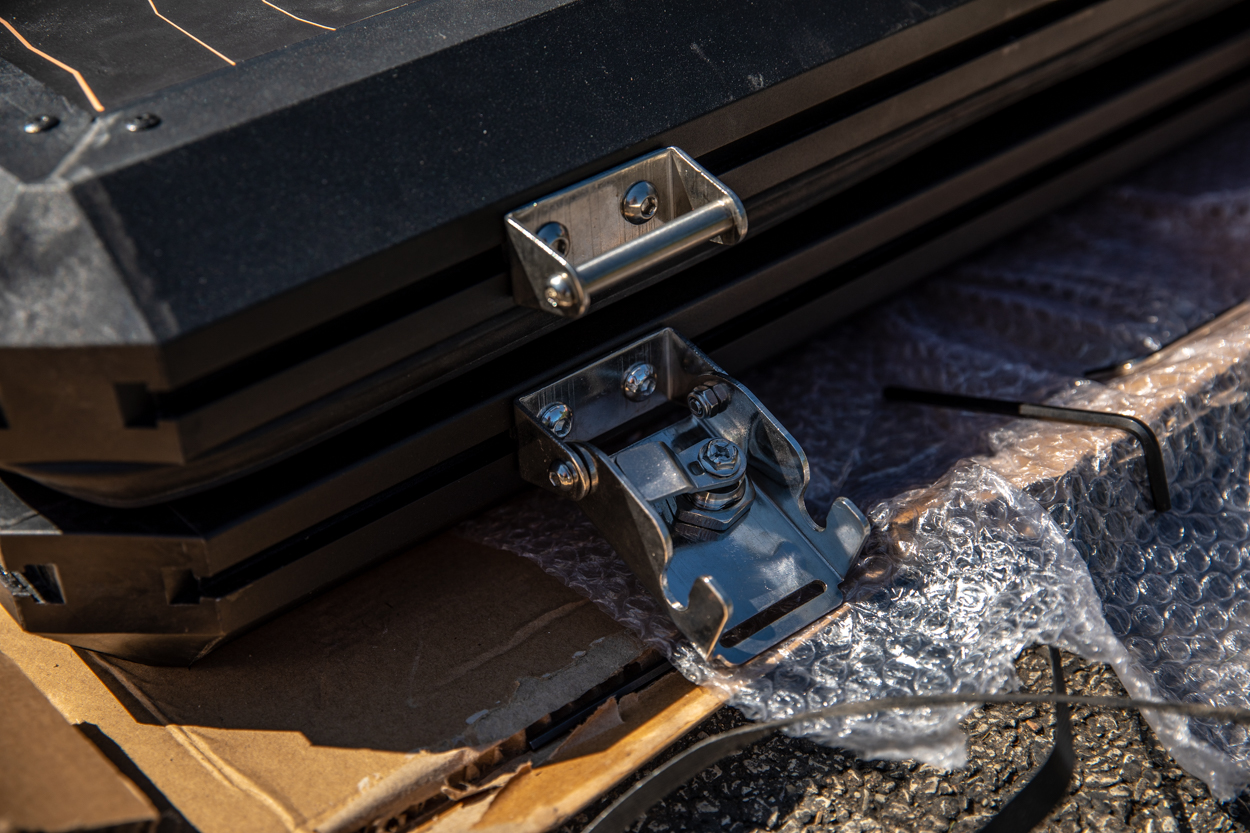
Step 2. Install Latches

Next up, you’ll need to install the latch which helps to keep your tent closed when you’re on the move.
These also feature a locking portion.

All of the mounts, latches, etc., mount using the channels in the tent.
Separate the latch into its individual pieces and first install the smaller part into the upper channel.

Install the bottom part next.
I placed the latch about 4 inches away from the side of the tent. I figured this would make it easier to close than if they were closer to the middle of the tent.
These latches need to align almost perfectly to properly close. Once you’ve got them lined up, tighten down the Allen bolts.
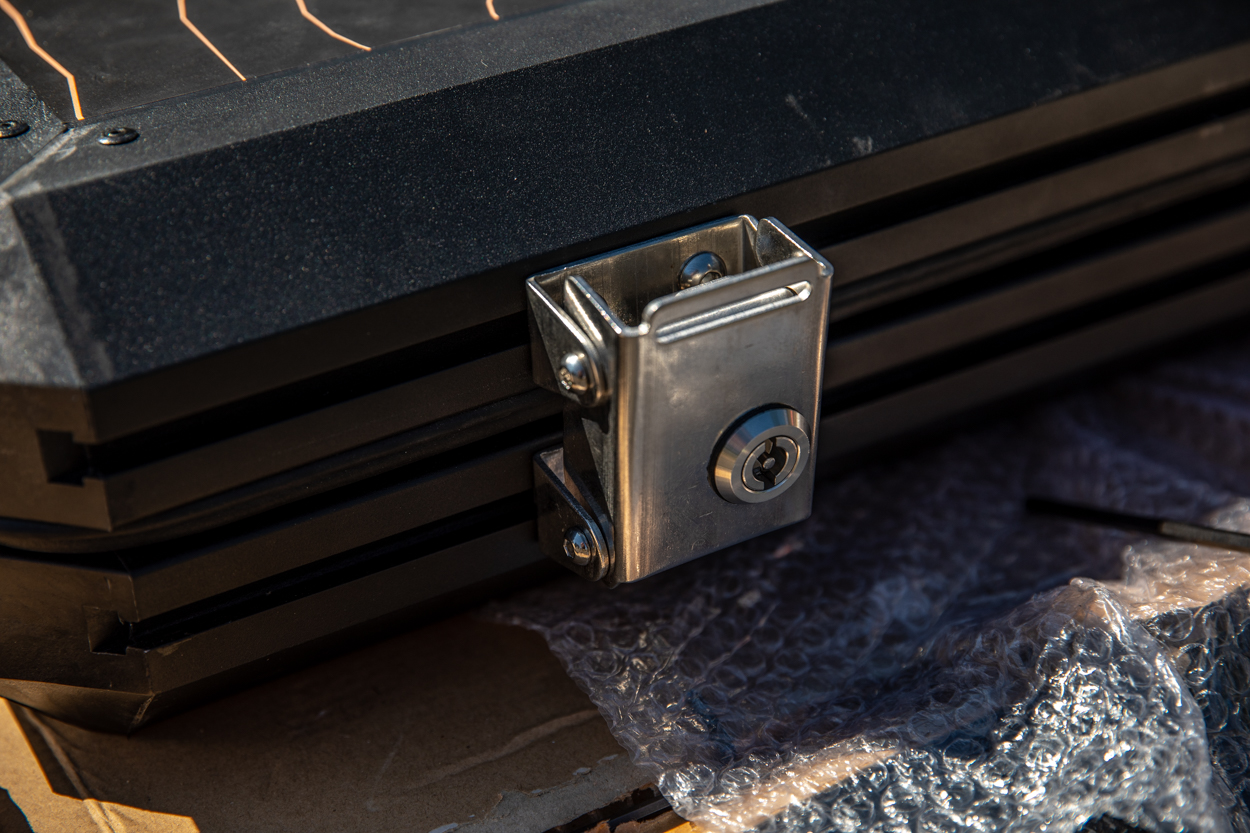
Finished latch install.
I chose to put the larger half of the latch on the bottom, so the latch swings downward, instead of upwards. This is a personal preference.
Step 3. Install Ladder Mounts

The tent comes with two sets of these. Technically, you only need two, but you might consider mounting a set on each side of the tent.
You can install these anywhere on the tent, but I only put one set on the side next to the passenger rear tire.

Make sure you install these on the bottom channel, otherwise, your ladder mounts will go with the top portion of the clamshell when it opens and you won’t be able to use your ladder.

For symmetry’s sake, I installed the ladder to the left and right of the AreaBFE logo on the side.
Step 4. Rain Fly Mounts

At the time of the install, I didn’t know what these were for.
Once I had the tent on, I realized they were used as the first insertion point of the rain fly.
Like all of the other latches and mounts, these also slide into the bottom channel.
Step 5. Mounting Tent

As with many rooftop tents, this one also utilizes these formed metal pieces, which hold the above-seen bolts, and slide into the channels on the underside of the tent.
Make sure you seat the bolts as seen above; there is only one way to install these.

We placed the tent on a couple of folding tables and installed these before lifting the tent onto the Tacoma. There are eight total, four per channel.
These tents are pretty heavy. There are 3 different sizes and they weigh around 150lbs.
With the help of a friend, we were able to shoulder press the tent into the air and place it on the roof rack rails on my AluCab. If you don’t feel confident doing the same, you could always try and construct some sort of rooftop tent hoisting system. This might be difficult if your garage is not big enough. My truck doesn’t fit in many garages with this tent on the roof.

Anyway, once you muscle up the tent on the roof, you’ll need to orient two bolts on each side per roof rack cross-member or rail.
The kit comes with an adhesive-backed rubber cushion that prevents there from being any metal on metal contact between the tent and rack/rail. This is a nice feature that I haven’t seen before.
You simply peel the backing off of the rubber and attach it to the long metal rectangular mounting piece with multiple holes. There are several holes in this piece to account for the size of the cross-member you’re working with.
As seen above, you’ll line up the holes in the metal piece with the bolts hanging from the tent. Then add a washer and a nut. Tighten down accordingly. I overtightened the mounts, hence the bend in the metal. This isn’t necessary, but this is a heavy tent, and I wanted to be sure it wasn’t going anywhere.
Step 6. Open Tent

Opening the tent could not be any easier.
Open the latches and lightly push on the tent handle to open the tent. Once you open it a little more than a foot, the shocks take over the rest.
From this perspective, you can see everything we installed in the previous steps. The ladder mount, the latches and the handle.

Above, you can see the opened tent.
The elastic which helps to hold the tent material while closing needs to be pulled down to allow the tent to open completely and to finish the rest of the setup.
Step 7. Attach Storage Bag
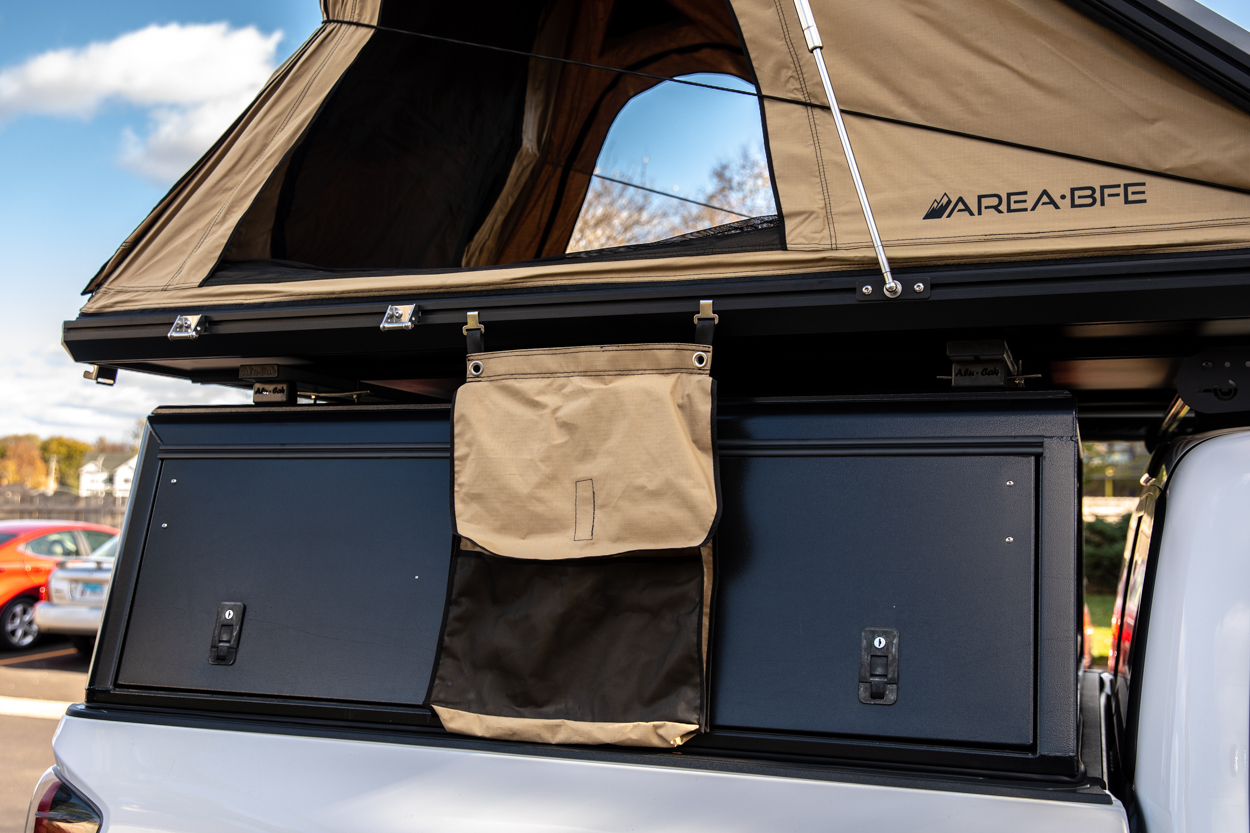
This step, again, couldn’t be any more simple.
The bag has hooks at the end which go into the channels on the side of the tent.
Step 8. Attach Ladder
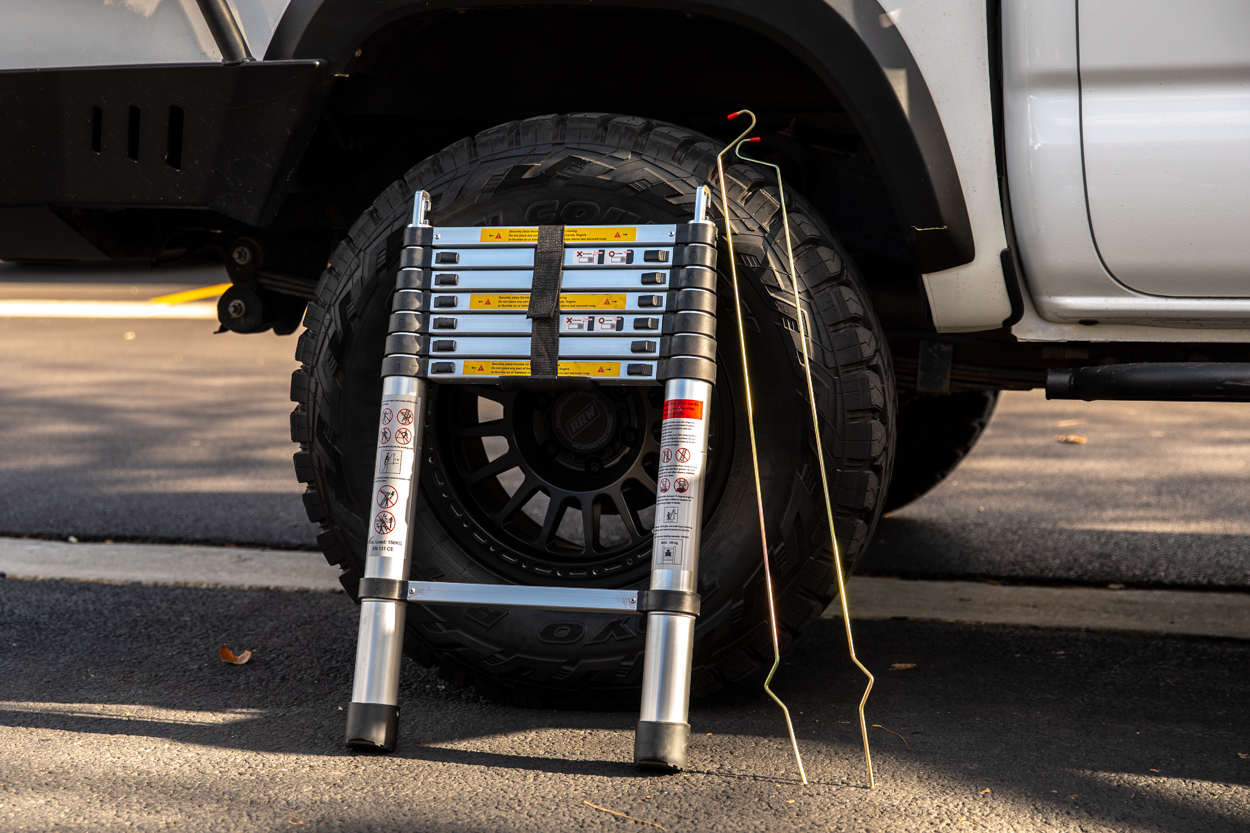
The ladder and rain fly poles look as seen above.

The ladder has hooks that grab onto the ladder mounts we installed earlier.
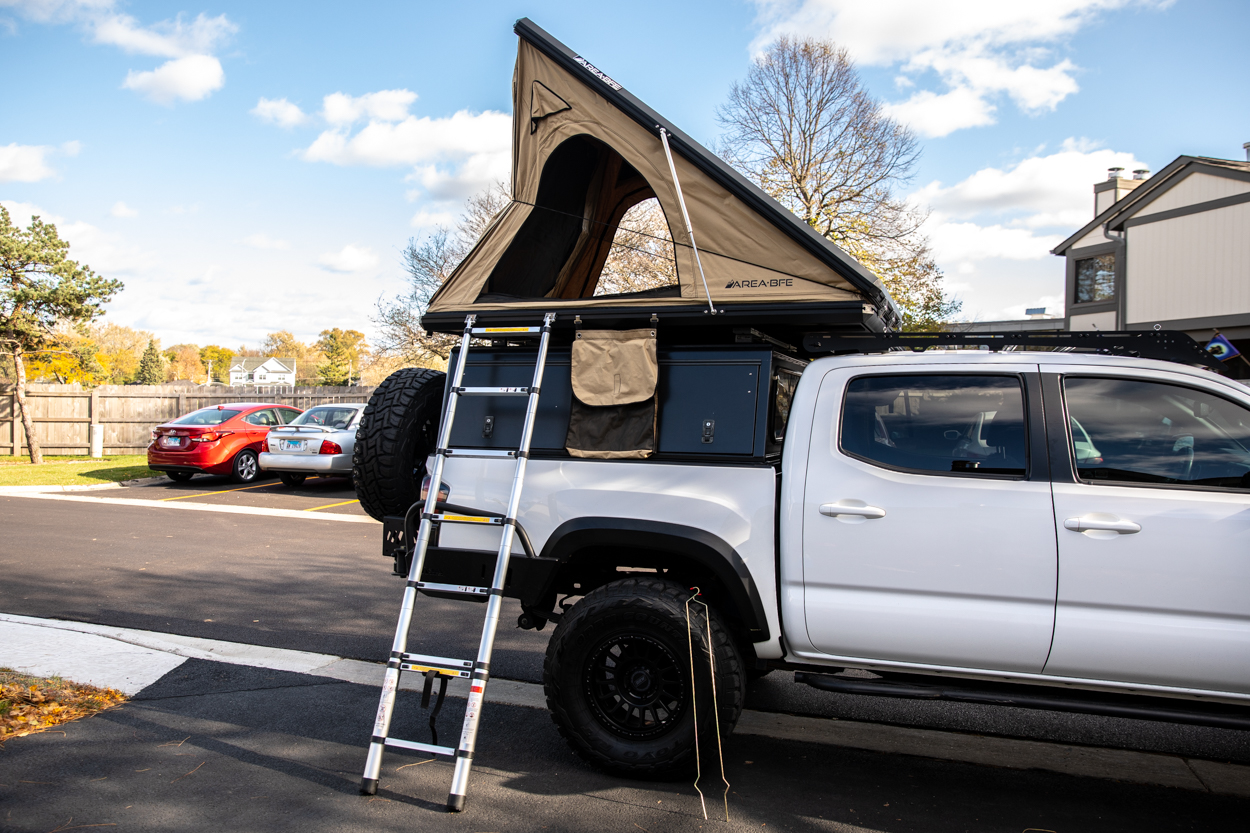
Ladder mounted onto the tent.
Step 9. Set Rain Fly

The rain fly pole end that is straight slides into the mount that was previously installed.

The other end, that has a hook, attaches to the holes at the far ends of the rain fly.
You’ll have to bed the poles to get them to fit. That’s it! Not bad, right?
Fully Deployed

Final Thoughts

Considering the size of this tent, the install is pretty straightforward.
If you follow along with this guide, you shouldn’t run into any issues. Be on the lookout for the complete review and overview after we put this tent through its paces. I’m beyond excited to spend a few nights in this bad boy and see what the hardshell RTT life is really all about!
We received this tent yesterday. Inside the tent, along with the ladder and rain fly poles, there was a round black metal bar that expanded. What is this bar for?
Hey Donna. I’m not sure what you’re referencing. Were you able to figure it out? Can you send me a picture, if you haven’t?
I own a roofnest falcon XL and this appears to be almost an exact duplicate of it. Alll the hardware is exactly the same and the small differences seem to be in how the tent stitching is laid out.
Many (most) companies in the RTT space, unless designed and built entirely in the United States, all order these tents from a handful of factories in China. It’s very likely that these two tents came off the same assembly line. At the end of the day, the prices are relatively the same, so the choice is really who has the best support and customer service.
Motop manufacturer RTT did an amazing job with such a design. Seeing everywhere now in US. Love it
nice write up – I just ordered one the other week from Spirit of 1876 on sale for my 4runner with gobi rack. is there any PDF file we can get – so that I can review before it arrives?
Also – did you get it via freight or UPS/Fedex?
Thanks, Thomas! That’s great. You’ll love it. What do you mean by PDF? I got mine shipped via freight directly from AreaBFE.
Hi Konrad – the product/instal manual in PDF-format (acrobat file of the manual)?
What size? Thanks for the info
This particular one is a medium. Check out my full review and overview. Search AreaBFE in the search bar.