
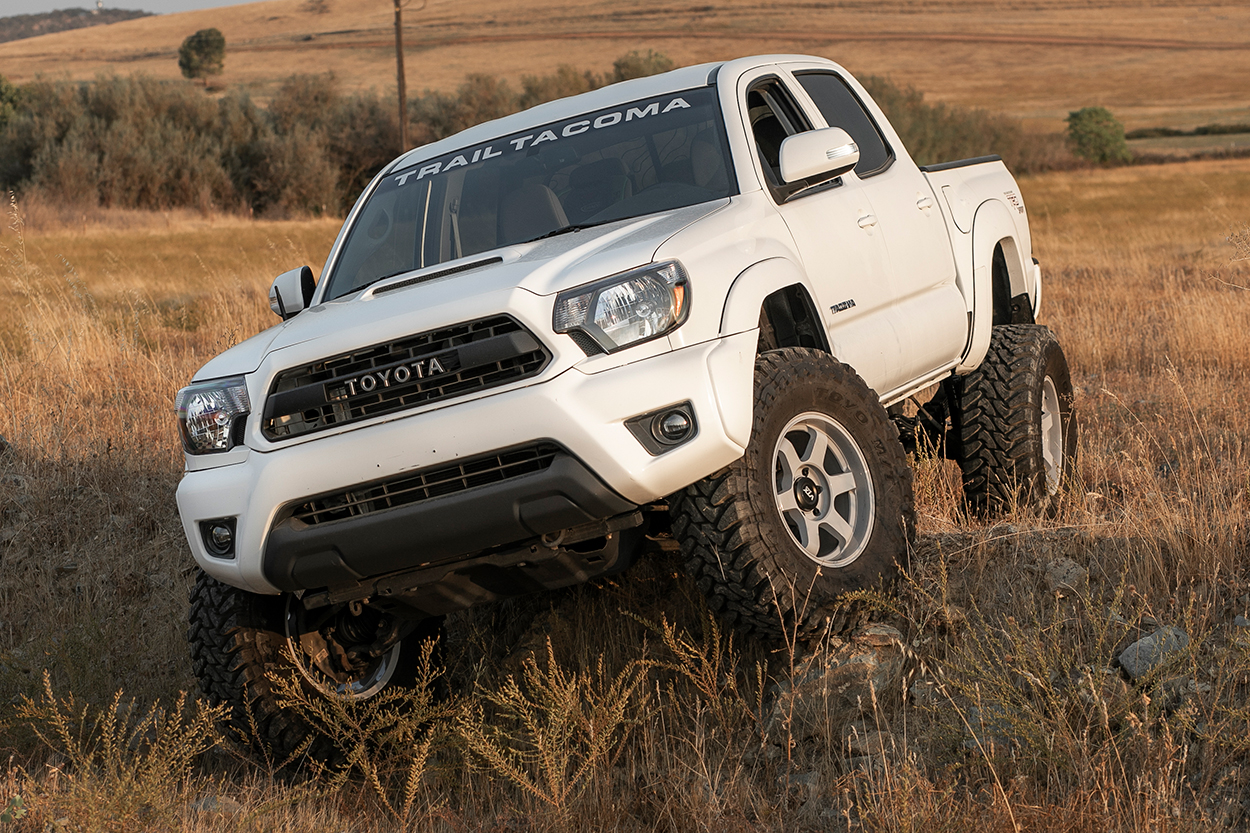
The stock brake lines on the 2nd Gen and 3rd Gen Tacoma might be plenty for a 1″ – 2″ lift kit but when you start to go over 2.5″ to 3″ in the rear, you want to extend those. This is especially the case if you plan on wheeling your truck. If you intend to flex out your suspension and droop that driver-side rear axle, then extended brake lines will give you added peace of mind.
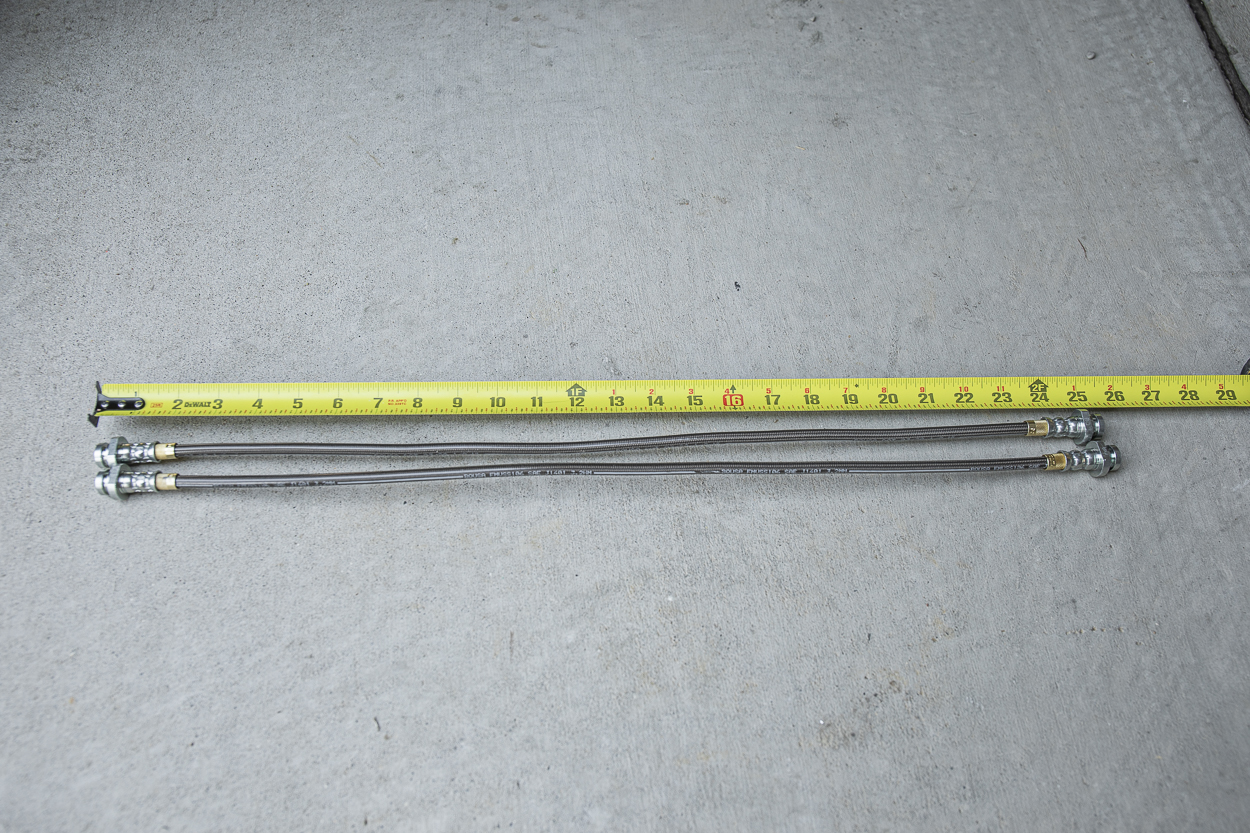
The factory lines are 20″ and the ones from YotaMafia are 24″ which puts you 4″ over stock.
Adding 4″ will give you plenty of travel to accommodate big 3″ lift kits in the rear and even most long-travel suspension setups.
Find it online:
- Brake Line Pro’s Extended Brake Lines: Check Price
Table Of Contents
YotaMafia Lines (24″)
Features:
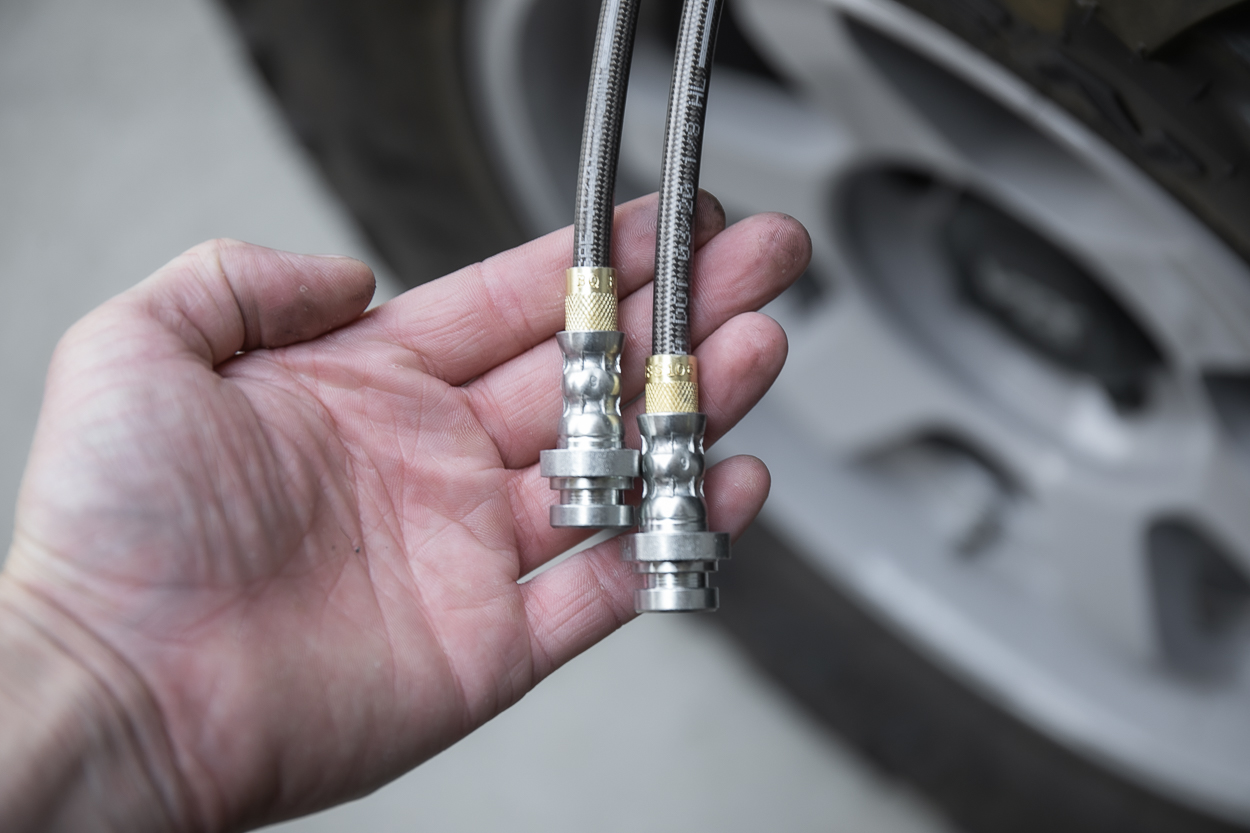
- Five (5) layer stainless steel
- Kevlar reinforced with a Teflon inner core
- Steel fittings that are extremely durable and reliable
- DOT-approved compatible with all fluids
- Extended Length – 24″ Rear Stainless Steel Braided
- Approximately 4″ longer than your stock rear OEM lines
- Includes all fittings needed for a quick installation
- Fits 2005+ Tacoma 6 lug 4wd/2wd & Prerunner
Factory Lines (20″)
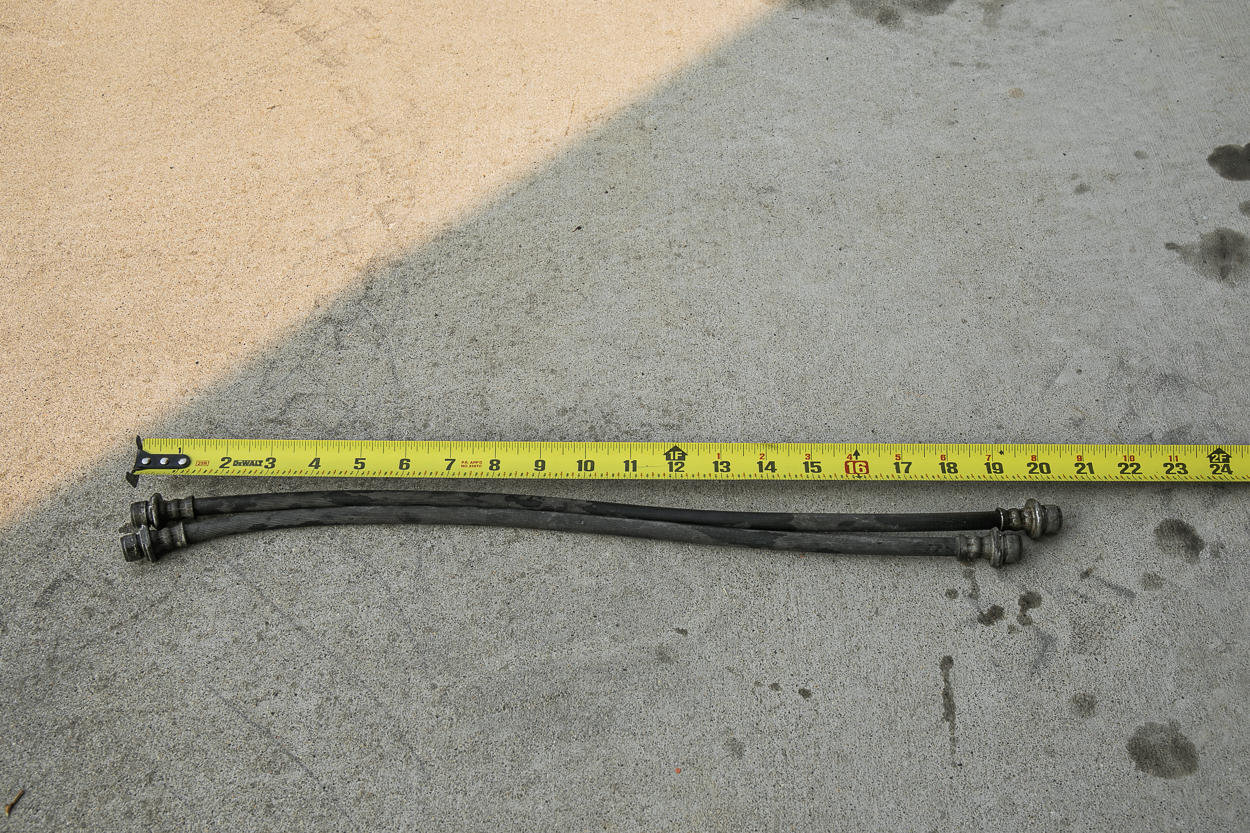
How long are the stock Tacoma Brake lines?
The factory brake lines on the 2nd Gen and 3rd Gen Tacoma measure 20″.
Tools and Materials

Not all of these tools are required, however, the 30° pliers from GearWrench really do make things easier for pinching those brake line brackets in order to separate them from the mounting bracket.
Suggested Tools and Materials:
- Diagonal Cutting Pliers
- Small C-Clamps (optional)
- 3/4″ Wrench or 19mm Angle Wrench
- 10mm Wrench (Flare Nut)
- 30° Pliers from GearWrench
- Clip Fastener Removal Set GearWrench (optional)
- Hammer
- Vice Grips
- Bent Needle Nose Pliers
- Compact Needle Nose
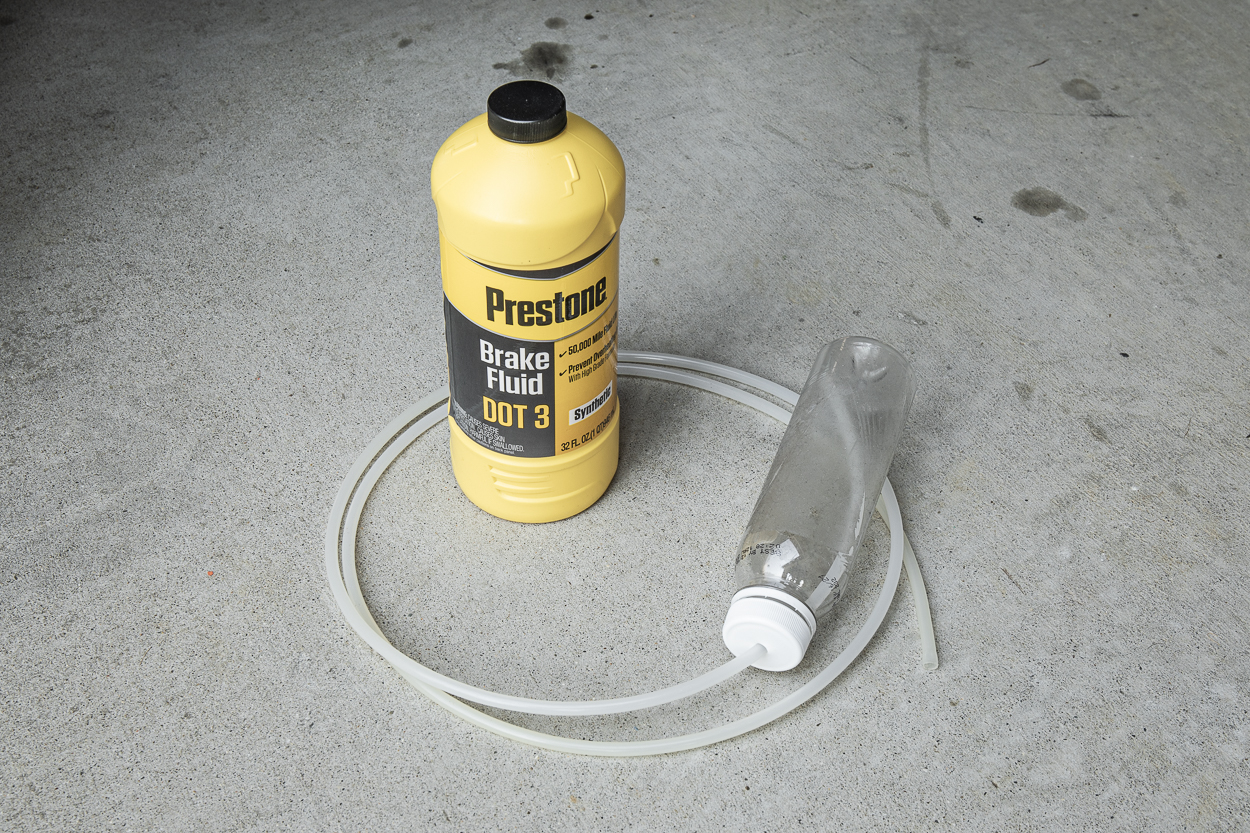
- Prestone DOT 3 Synthetic Fluid
- Plastic Bottle
- 5/16″ Tubing
- Rubber Nipple Caps
- Plastic Bottle with Tip
- Shop Towels or Rag
Step 1. Prep Lines
The first thing you want to do is to jack up your truck and set the driver-side rear axle on a jack stand.
Removing Tires Optional: In order to access the lines, you may want to remove your spare tire. Removing the passenger rear tire is completely optional as well but it does help as you need to reach in from the outside wheel well to remove or secure the flare nut
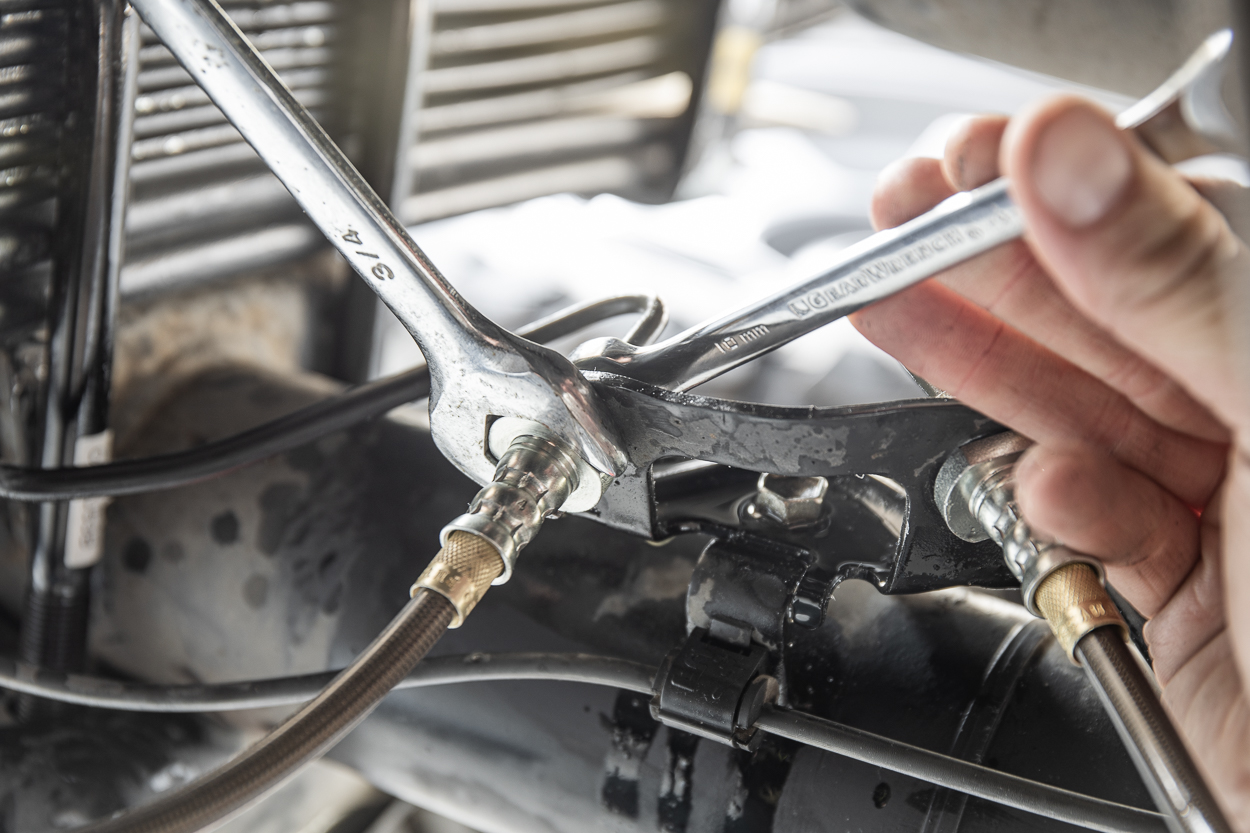
Step 2. 10mm Flare Nut
Before removing the lines, slightly loosen the nut with a 10mm flare wrench.
If you don’t have a flare wrench, that’s okay, a 10mm open-end wrench will work. However, you risk the wrench slipping off and stripping the nut – especially when brake fluid is present making everything slippery. If you’re reading this post before you start removing or installing brake lines, do yourself a favor and buy a flare wrench set.
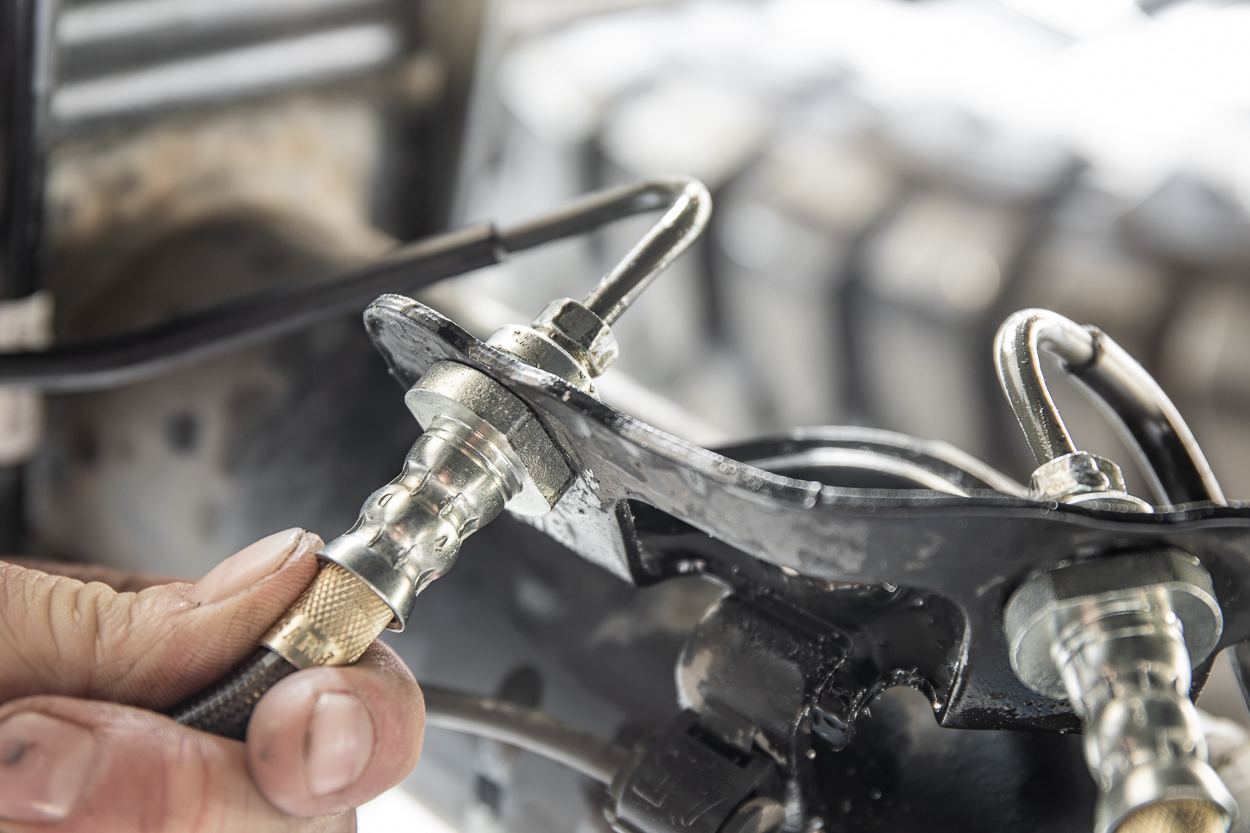
Pro Tip: Do not remove your retainer clips first.
With the retainer clips in place, it provides some resistance when cracking that 10mm nut. You can always loosen and remove the 10mm nut after the retainer clips are off, you will need two wrenches and it’s a bit more challenging.
Cracking the 10mm before removing the retainer clips makes it a little easier on you.
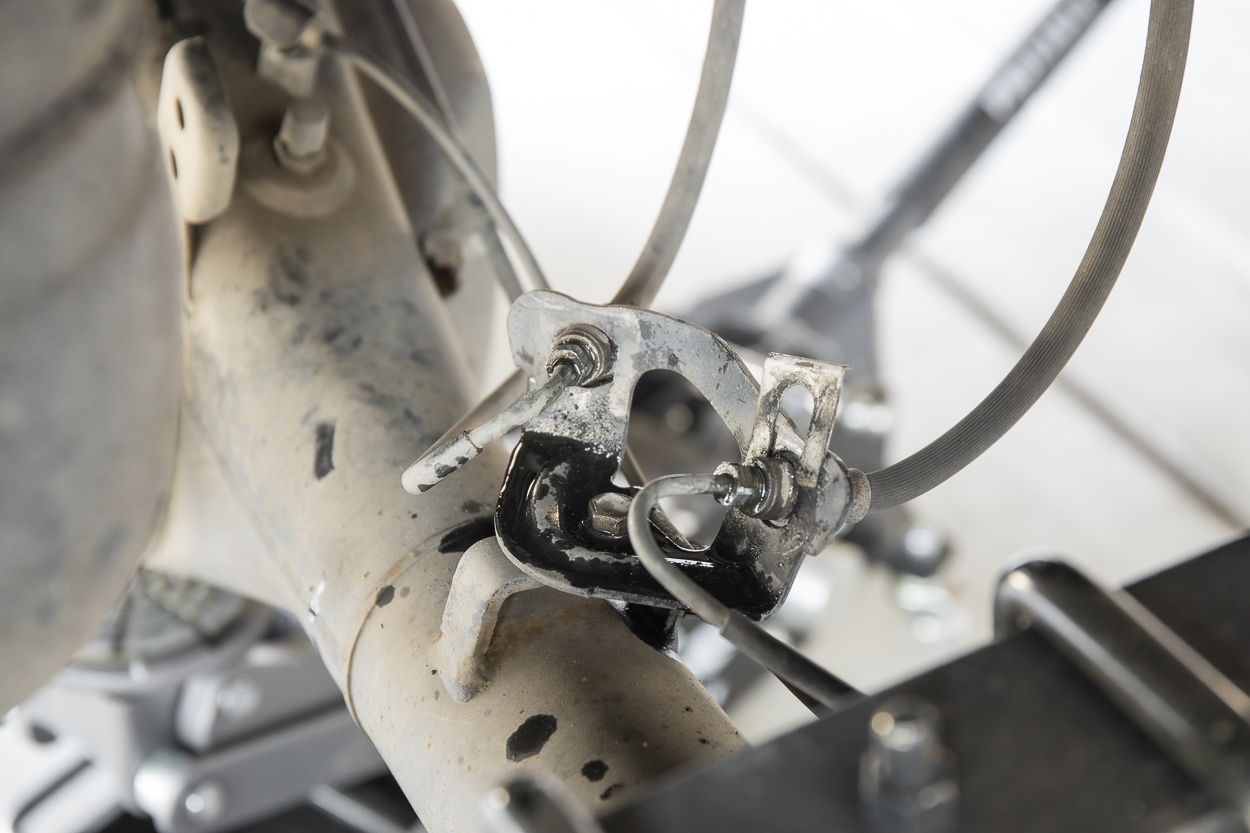
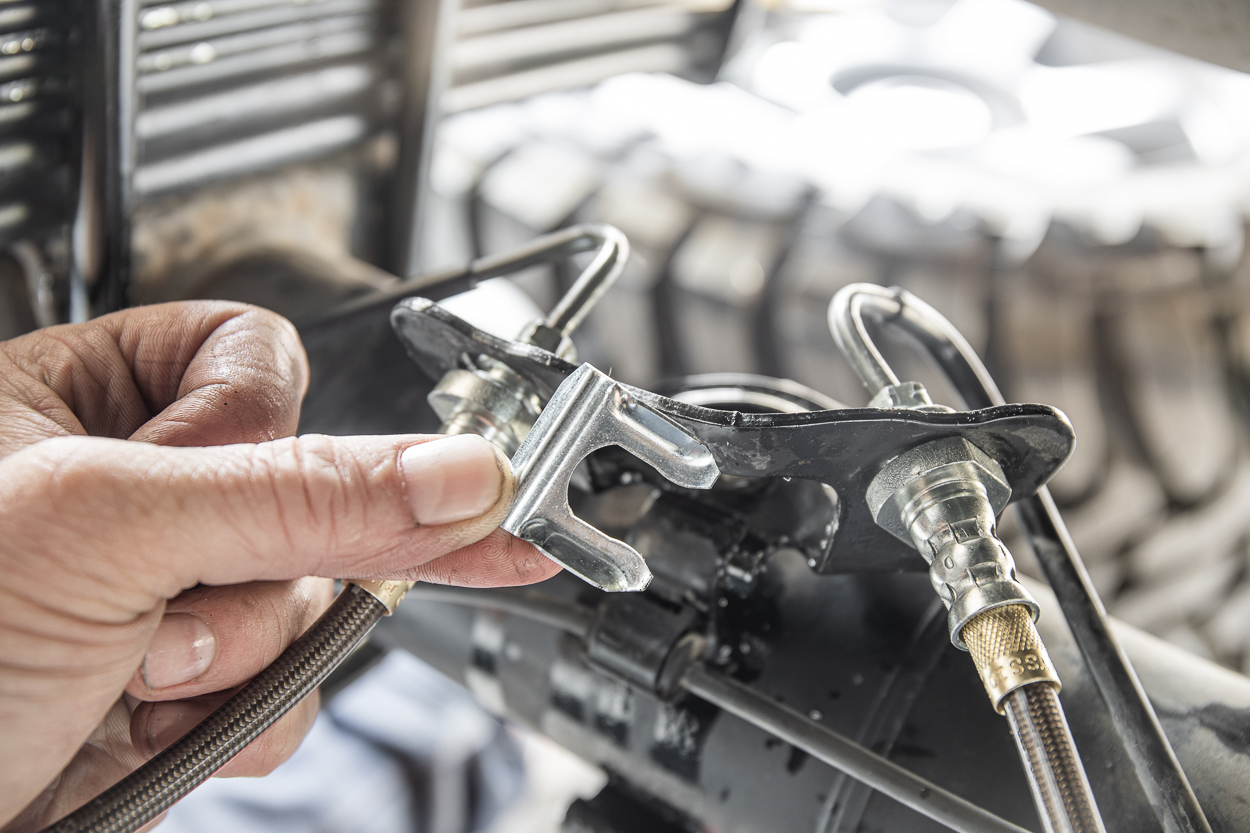
Step 3. Retainer Clips
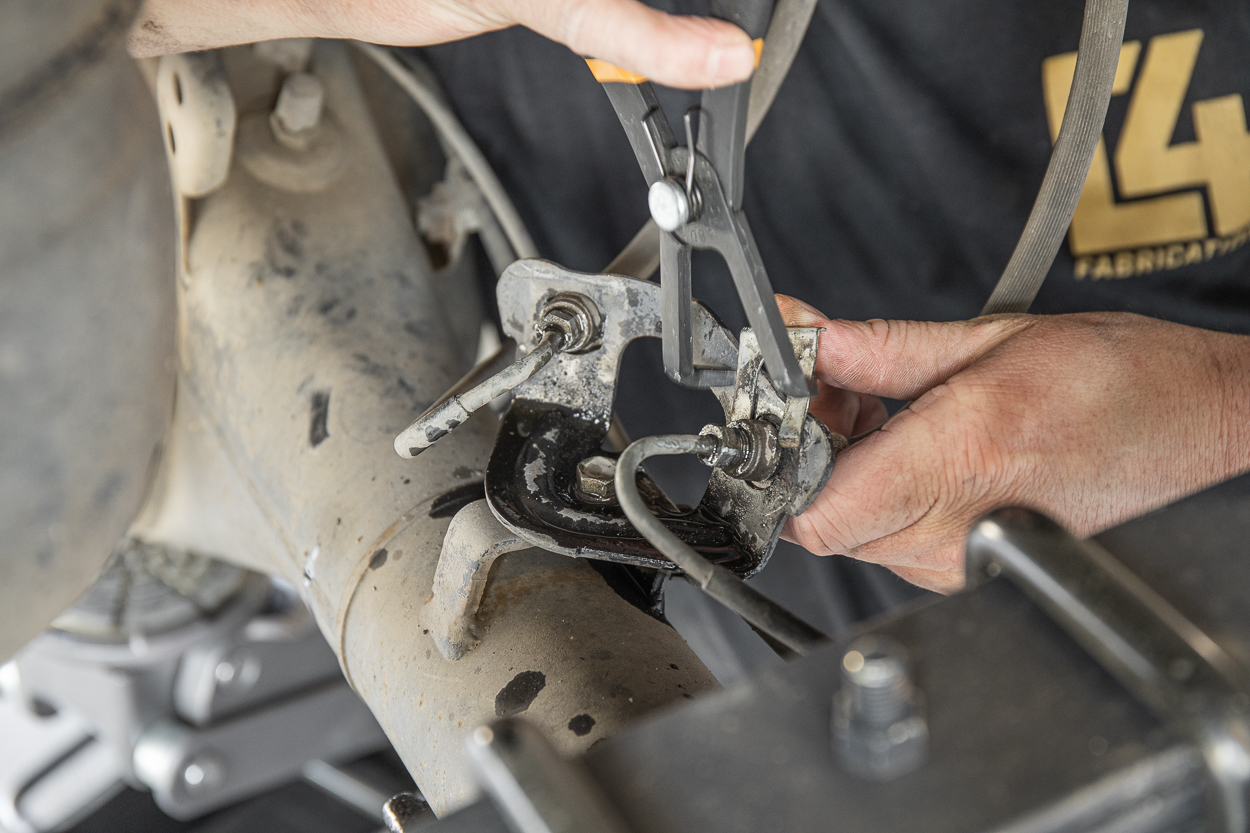
There are a couple of ways to remove the retainer clips.
I found that it was easiest to use 30° pliers from GearWrench.
Using the 30° pliers, clamp the outside edge of the clip until it slides off the metal backing plate. At this point, you can use the pliers to work the clips out.
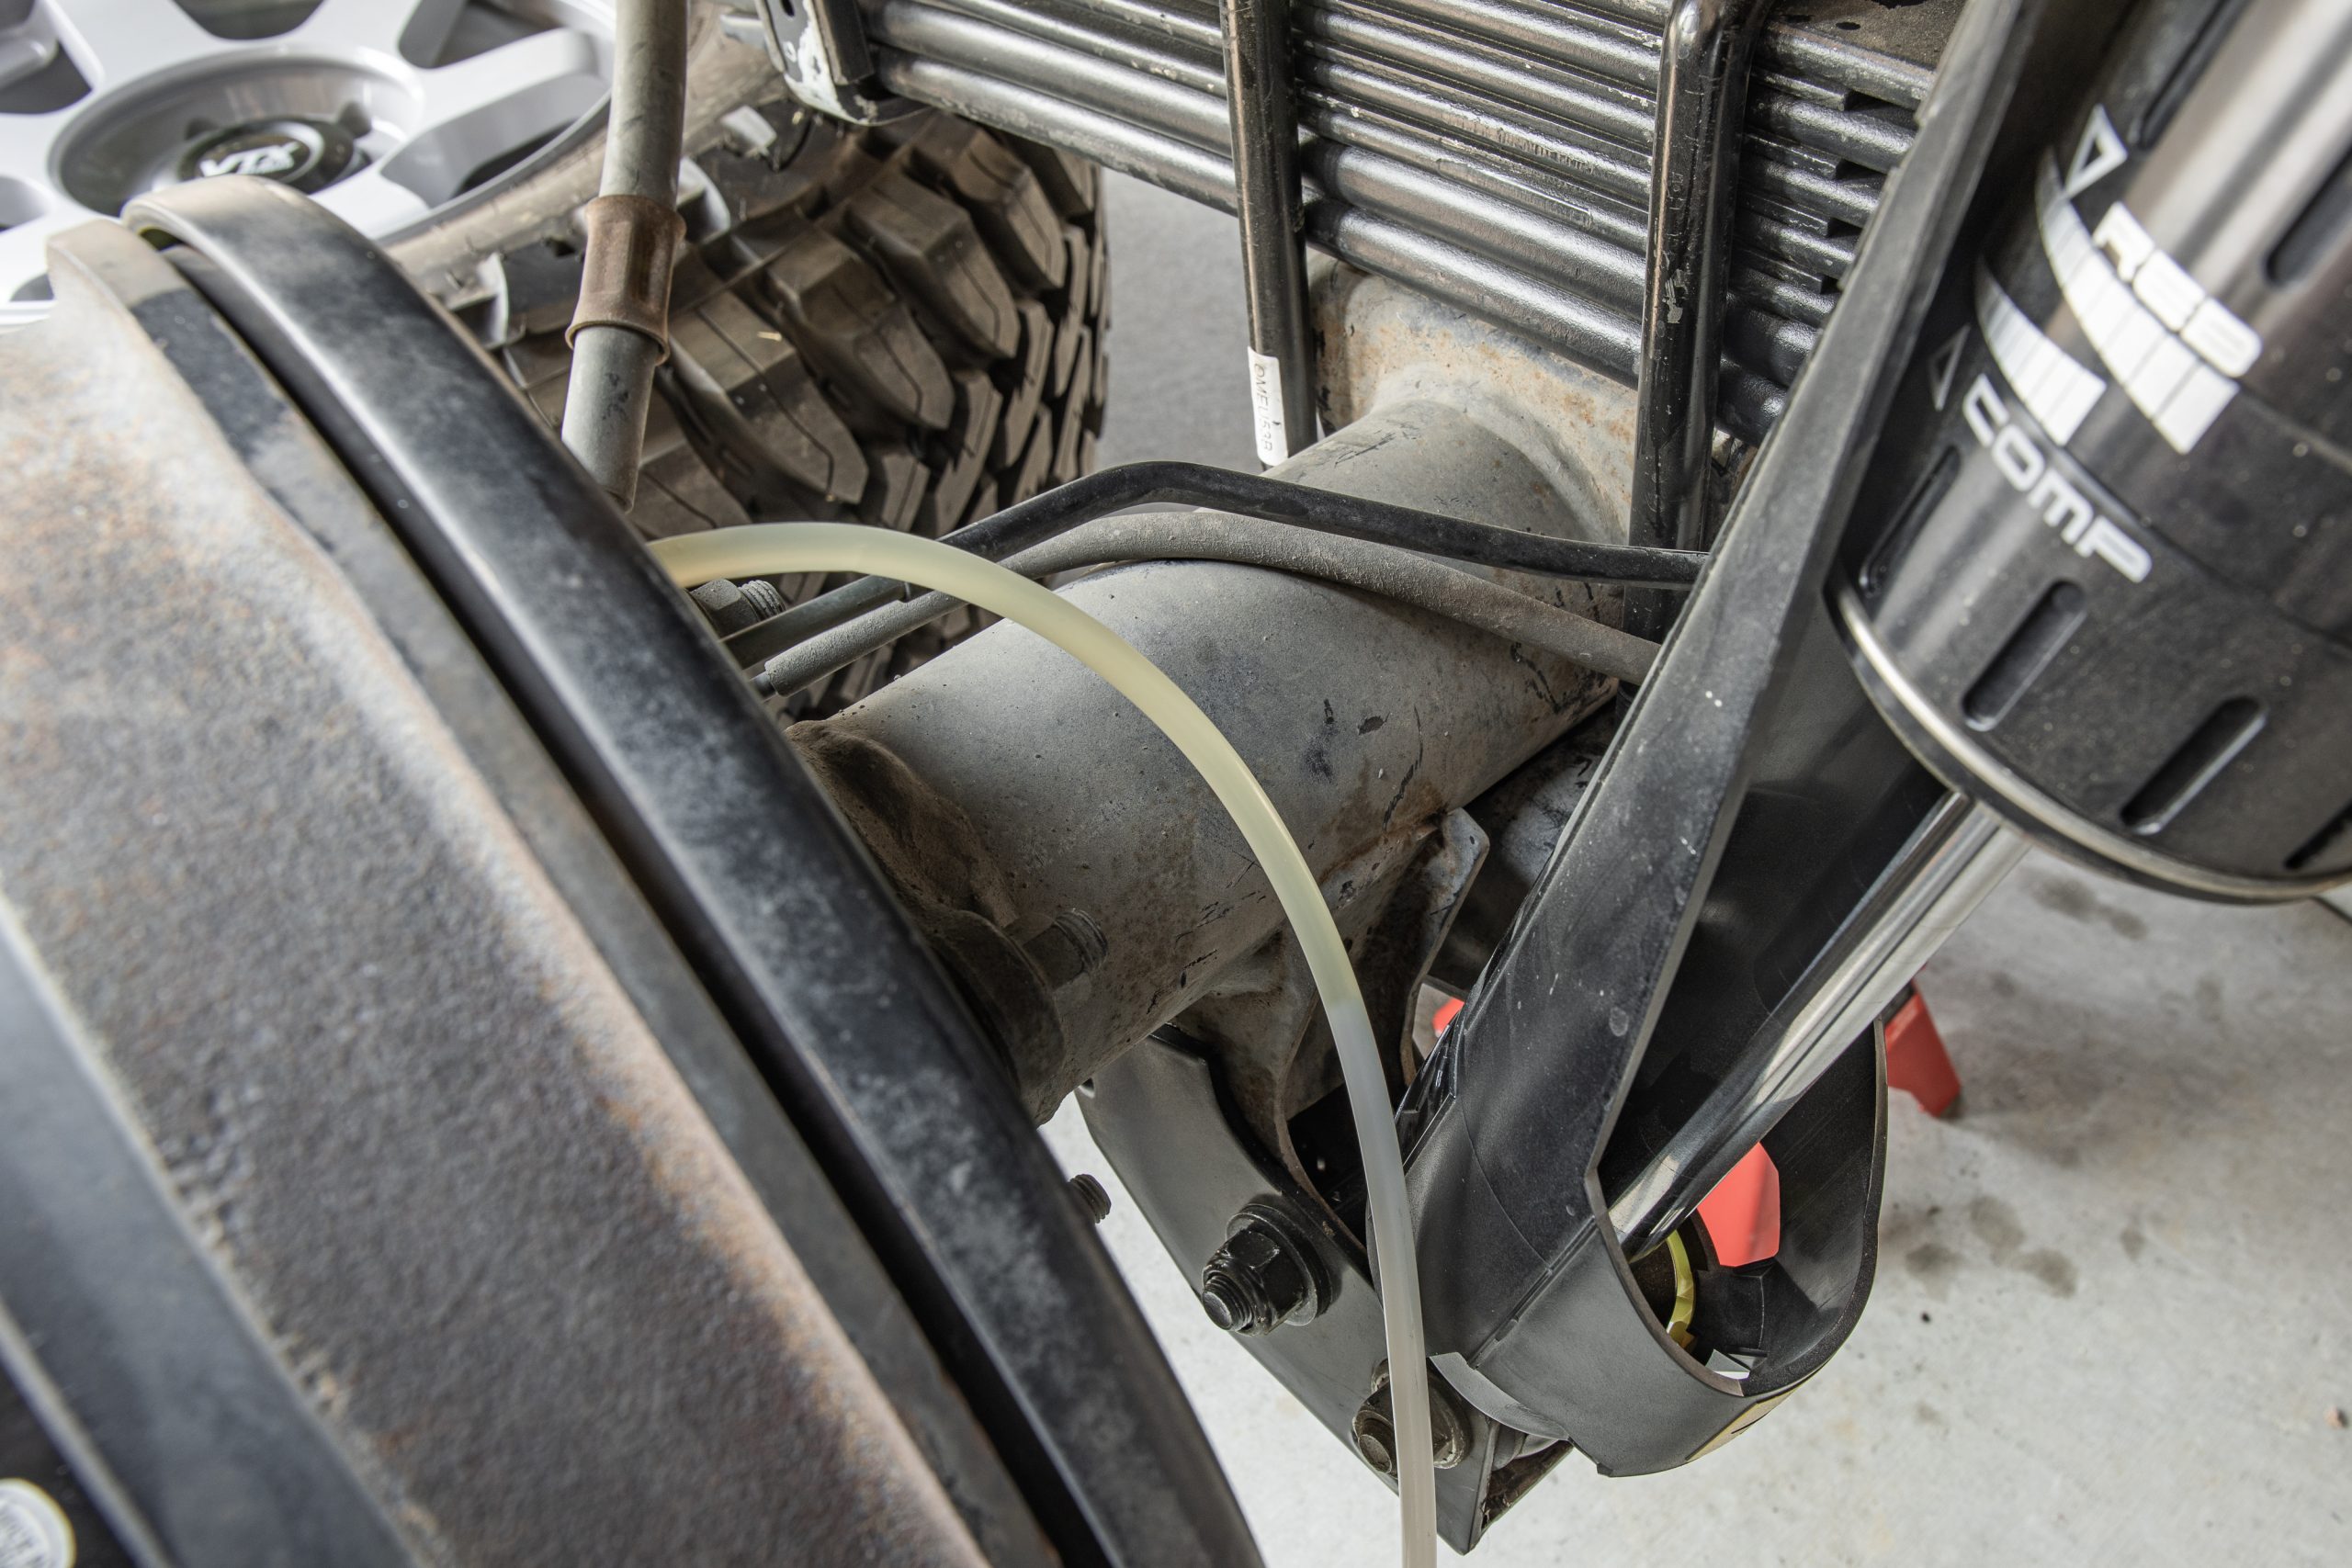
Step 4. Remove Lines
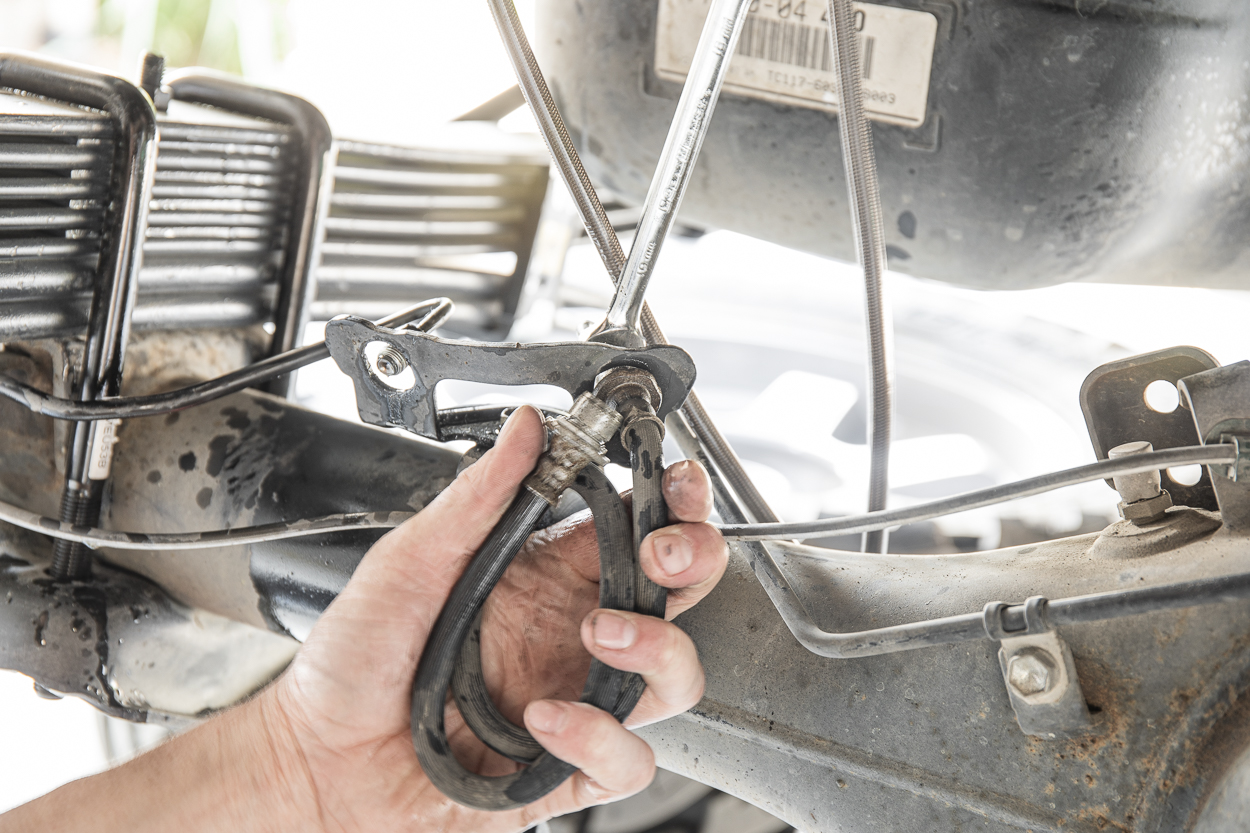
Once the retainer clips have been removed and the soft lines are loose from the hard lines, you can set them aside.
When you remove the soft lines, your hard lines will leak brake fluid.
You can stop the brake fluid from leaking with some rubber stoppers or a threaded brake line plug.
Step 5. Connect New Lines
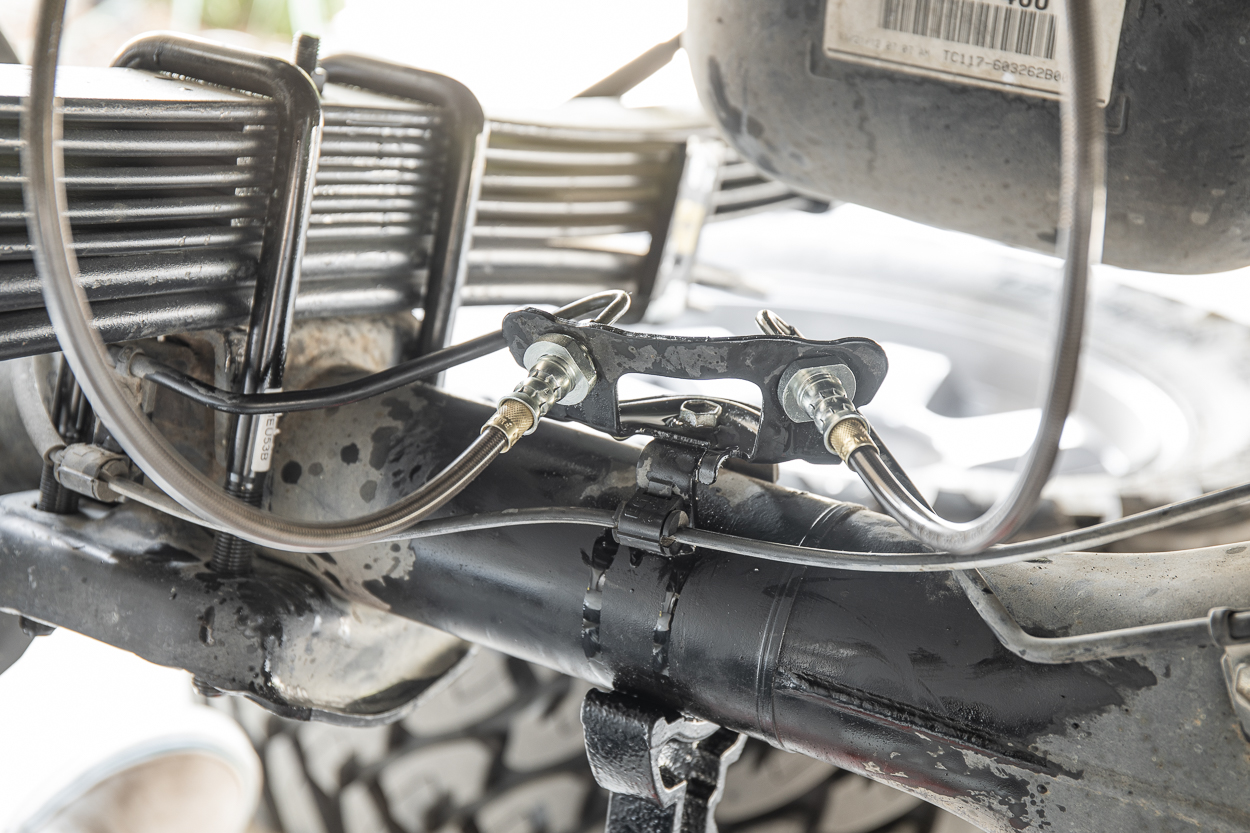
If you’re not using a plug, you need to move fast as the lines will drip fluid. As long as you lightly thread the extended brake lines on, the fluid will stop leaking. At this point, you can clean everything up and wipe everything down.
Step 6. 3/4″ Wrench + 10mm Wrench
Once the lines are threaded into place, tighten with a 3/4″ angle wrench (19mm) and a 10mm flare nut wrench.
You want to make sure the loop of your extended line is facing the rear of the Tacoma. You don’t want your lines to face the front or side of the Tacoma. Let the lines flow and face the same direction as the factory lines.
Step 7. Press Fittings Against Bracket
Make sure your fittings are pressed firmly against the metal mounting bracket.
Step 8. New Retainer Clips
These are the new clips provided by YotaMafia.com.
Step 9. Hammer Brackets Into Place
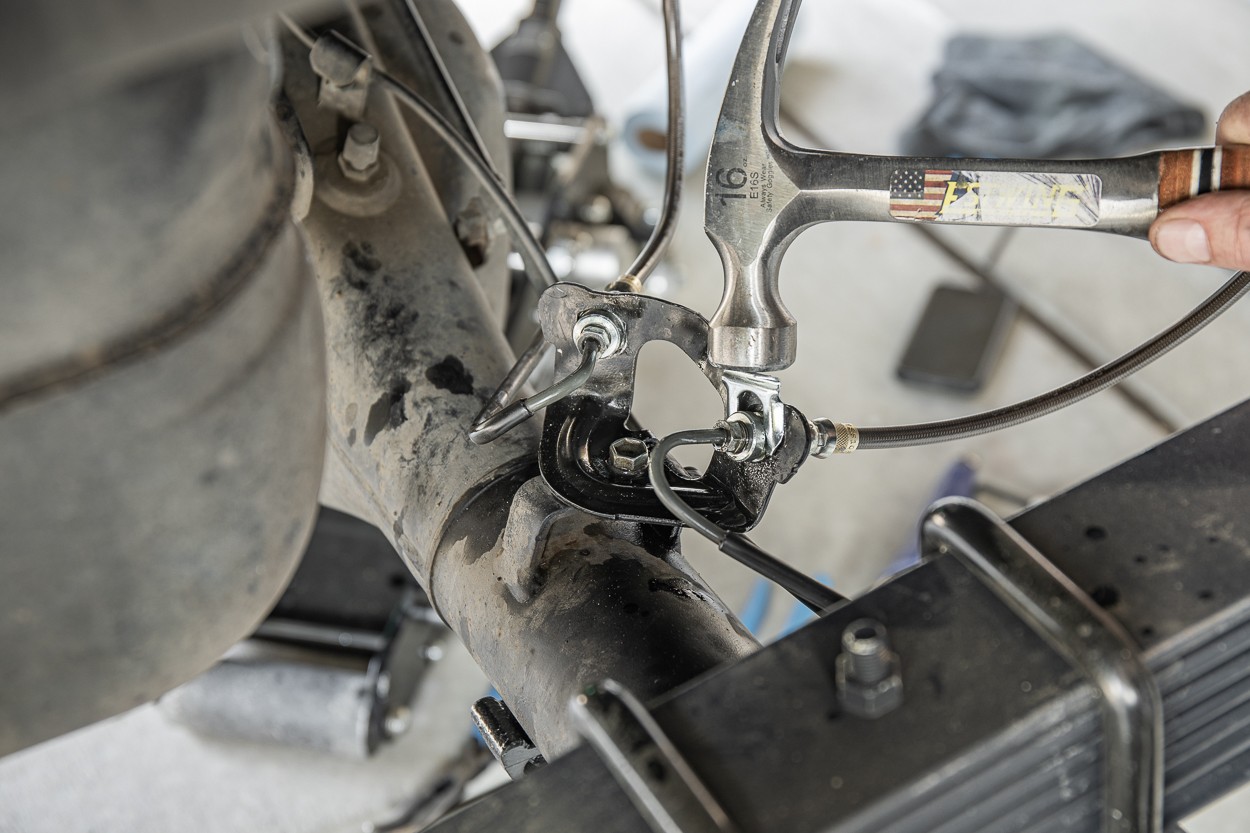
Use a hammer or compact ball peen hammer to LIGHTLY knock the clips into place.
Step 10. Top Retainer Clips
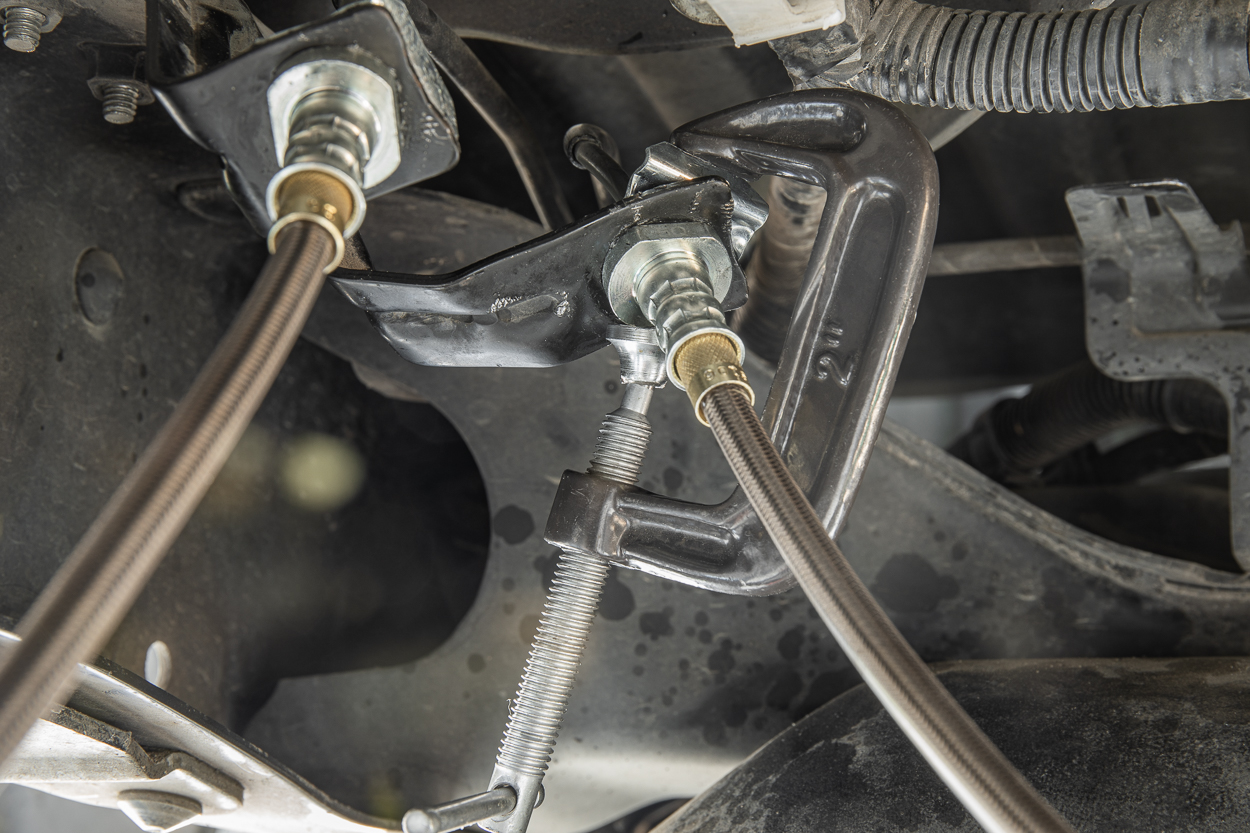
The top brackets may be difficult to hammer in as there is a lack of room to swing a hammer. I found it easy to use a mini c-clamp to pull the bracket into place.
Finished

Bleeding Brakes: What Type of Fluid? (DOT 3)
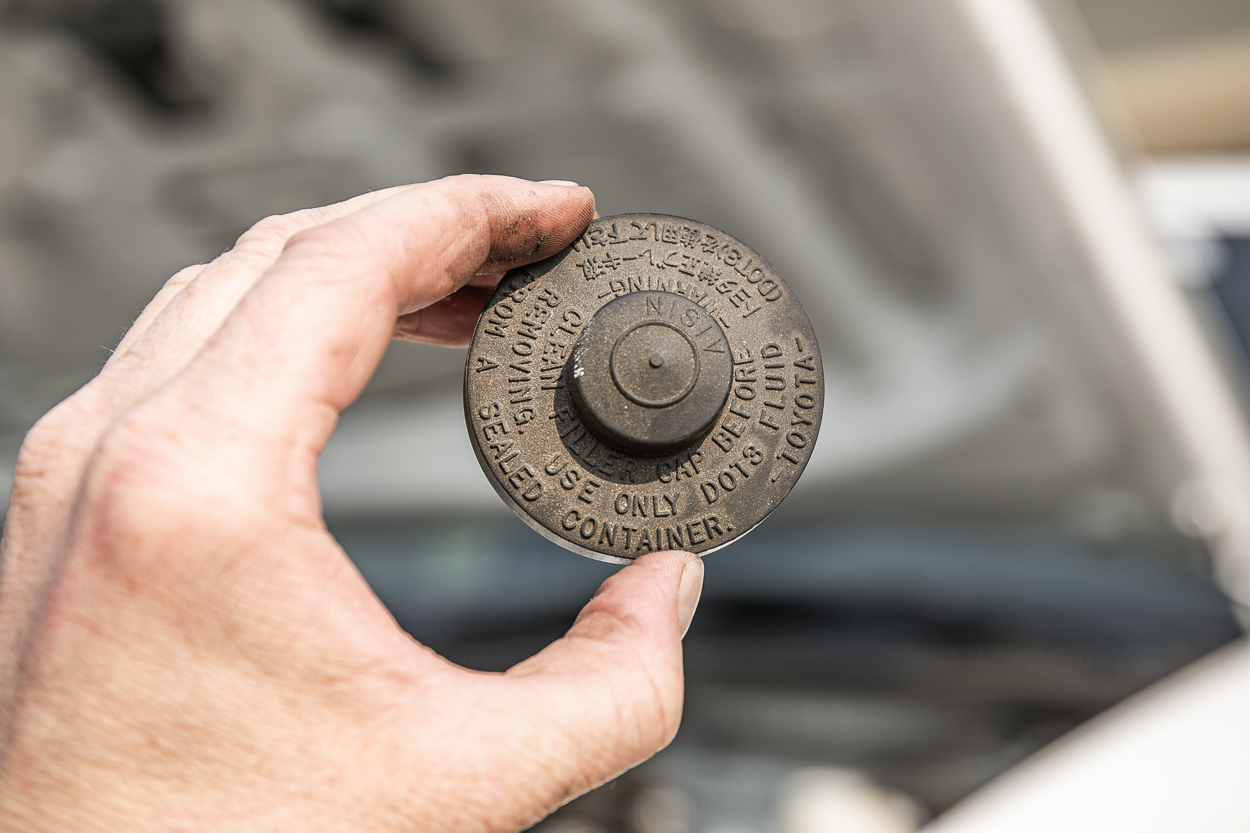
The cap on your brake fluid reservoir indicates which fluid to use.
Although DOT4 is acceptable, DOT3 is recommended per the Master Cylinder Cap.
Step 11. DIY Brake Bleeding Kit
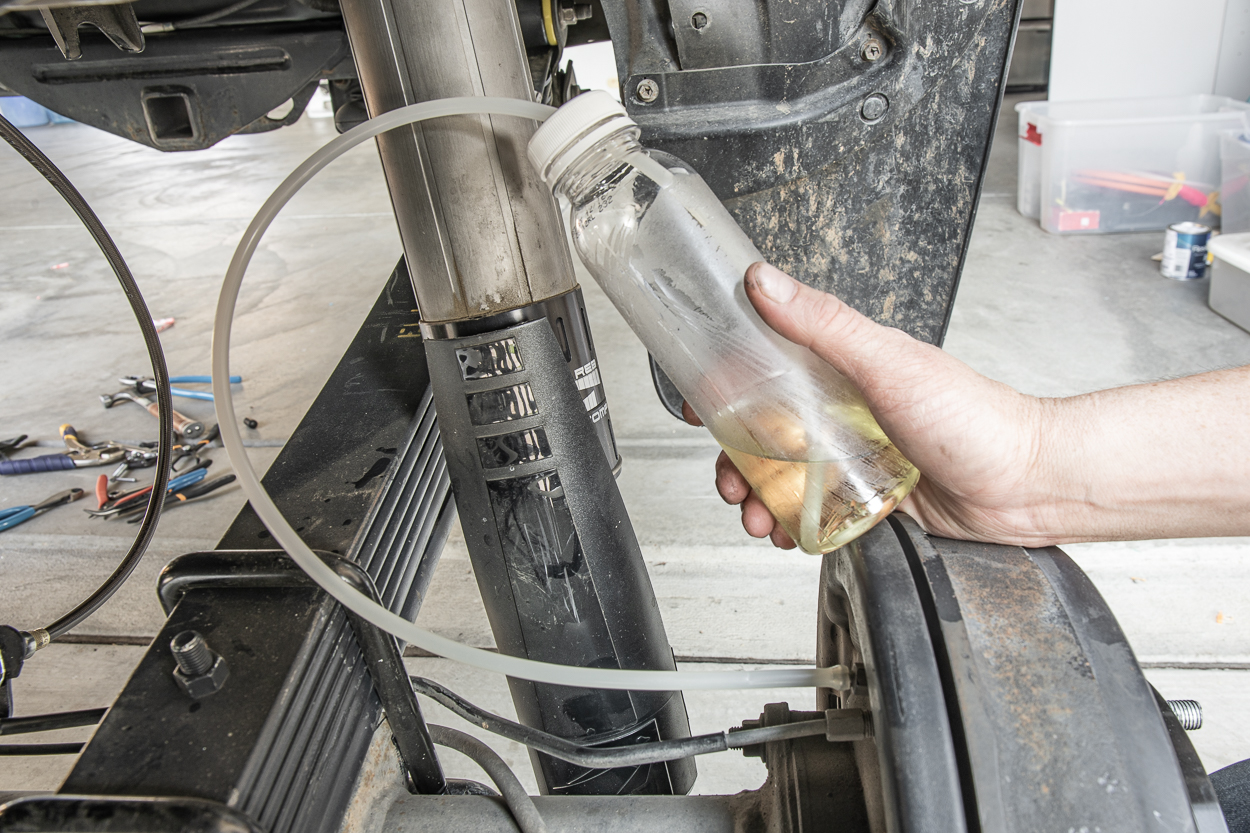
Step 12. Open Brake Bleeder Valve

Before you open this valve, please continue reading the whole post.
Once you have the brake bleeder valve open, pump the brakes to remove any air bubbles. Start by bleeding the brakes farthest from the master cylinder. Use 5/16″ or 1/4″ Tubing for the bleed.
Order of brake bleeding on Tacoma:
- Passenger Rear
- Driver Rear
- Passenger Front
- Driver Front
Step 13. Pump Brakes and Release Air Bubbles
Pictured here is a 2015 TRD Sport, so I have a vacuum-assisted master cylinder as opposed to an electric master cylinder. If you are unsure of which master cylinder you have, check out this thread on TW.
Bleed with an Electronic master cylinder?
While you have the bleeder line hooked up to each corner and the valve open, lightly press down on your brake pedal. The electronically assisted cylinder will push any air bubbles through the line along with brake fluid. It doesn’t take much to push any air bubbles through. A couple of light pushes on the pedal should do it. Once you have the air bubbles out and the brake fluid is solid, close the valve off.
Bleed with Vacuum-assisted master cylinder?
If you have two people, you can pump the brakes with the lines closed, and then once the pressure builds up, release the valve and air bubbles will come out. Repeat this process until all the air bubbles have been released. It also doesn’t take much to release the pressure here. You can also perform a brake bleed job with one person. Just follow this process; pump brakes, crack valve, bleed lines, close valve, repeat until the air has been removed. Easy.
It’s important not to force the brake pedal down too hard. If you press down too hard, you may damage the master cylinder’s primary or secondary pistons along the cylinder walls. Either that or you can damage a seal. Regardless, don’t push on your pedal extremely hard.
Step 14. Refill Master Cylinder
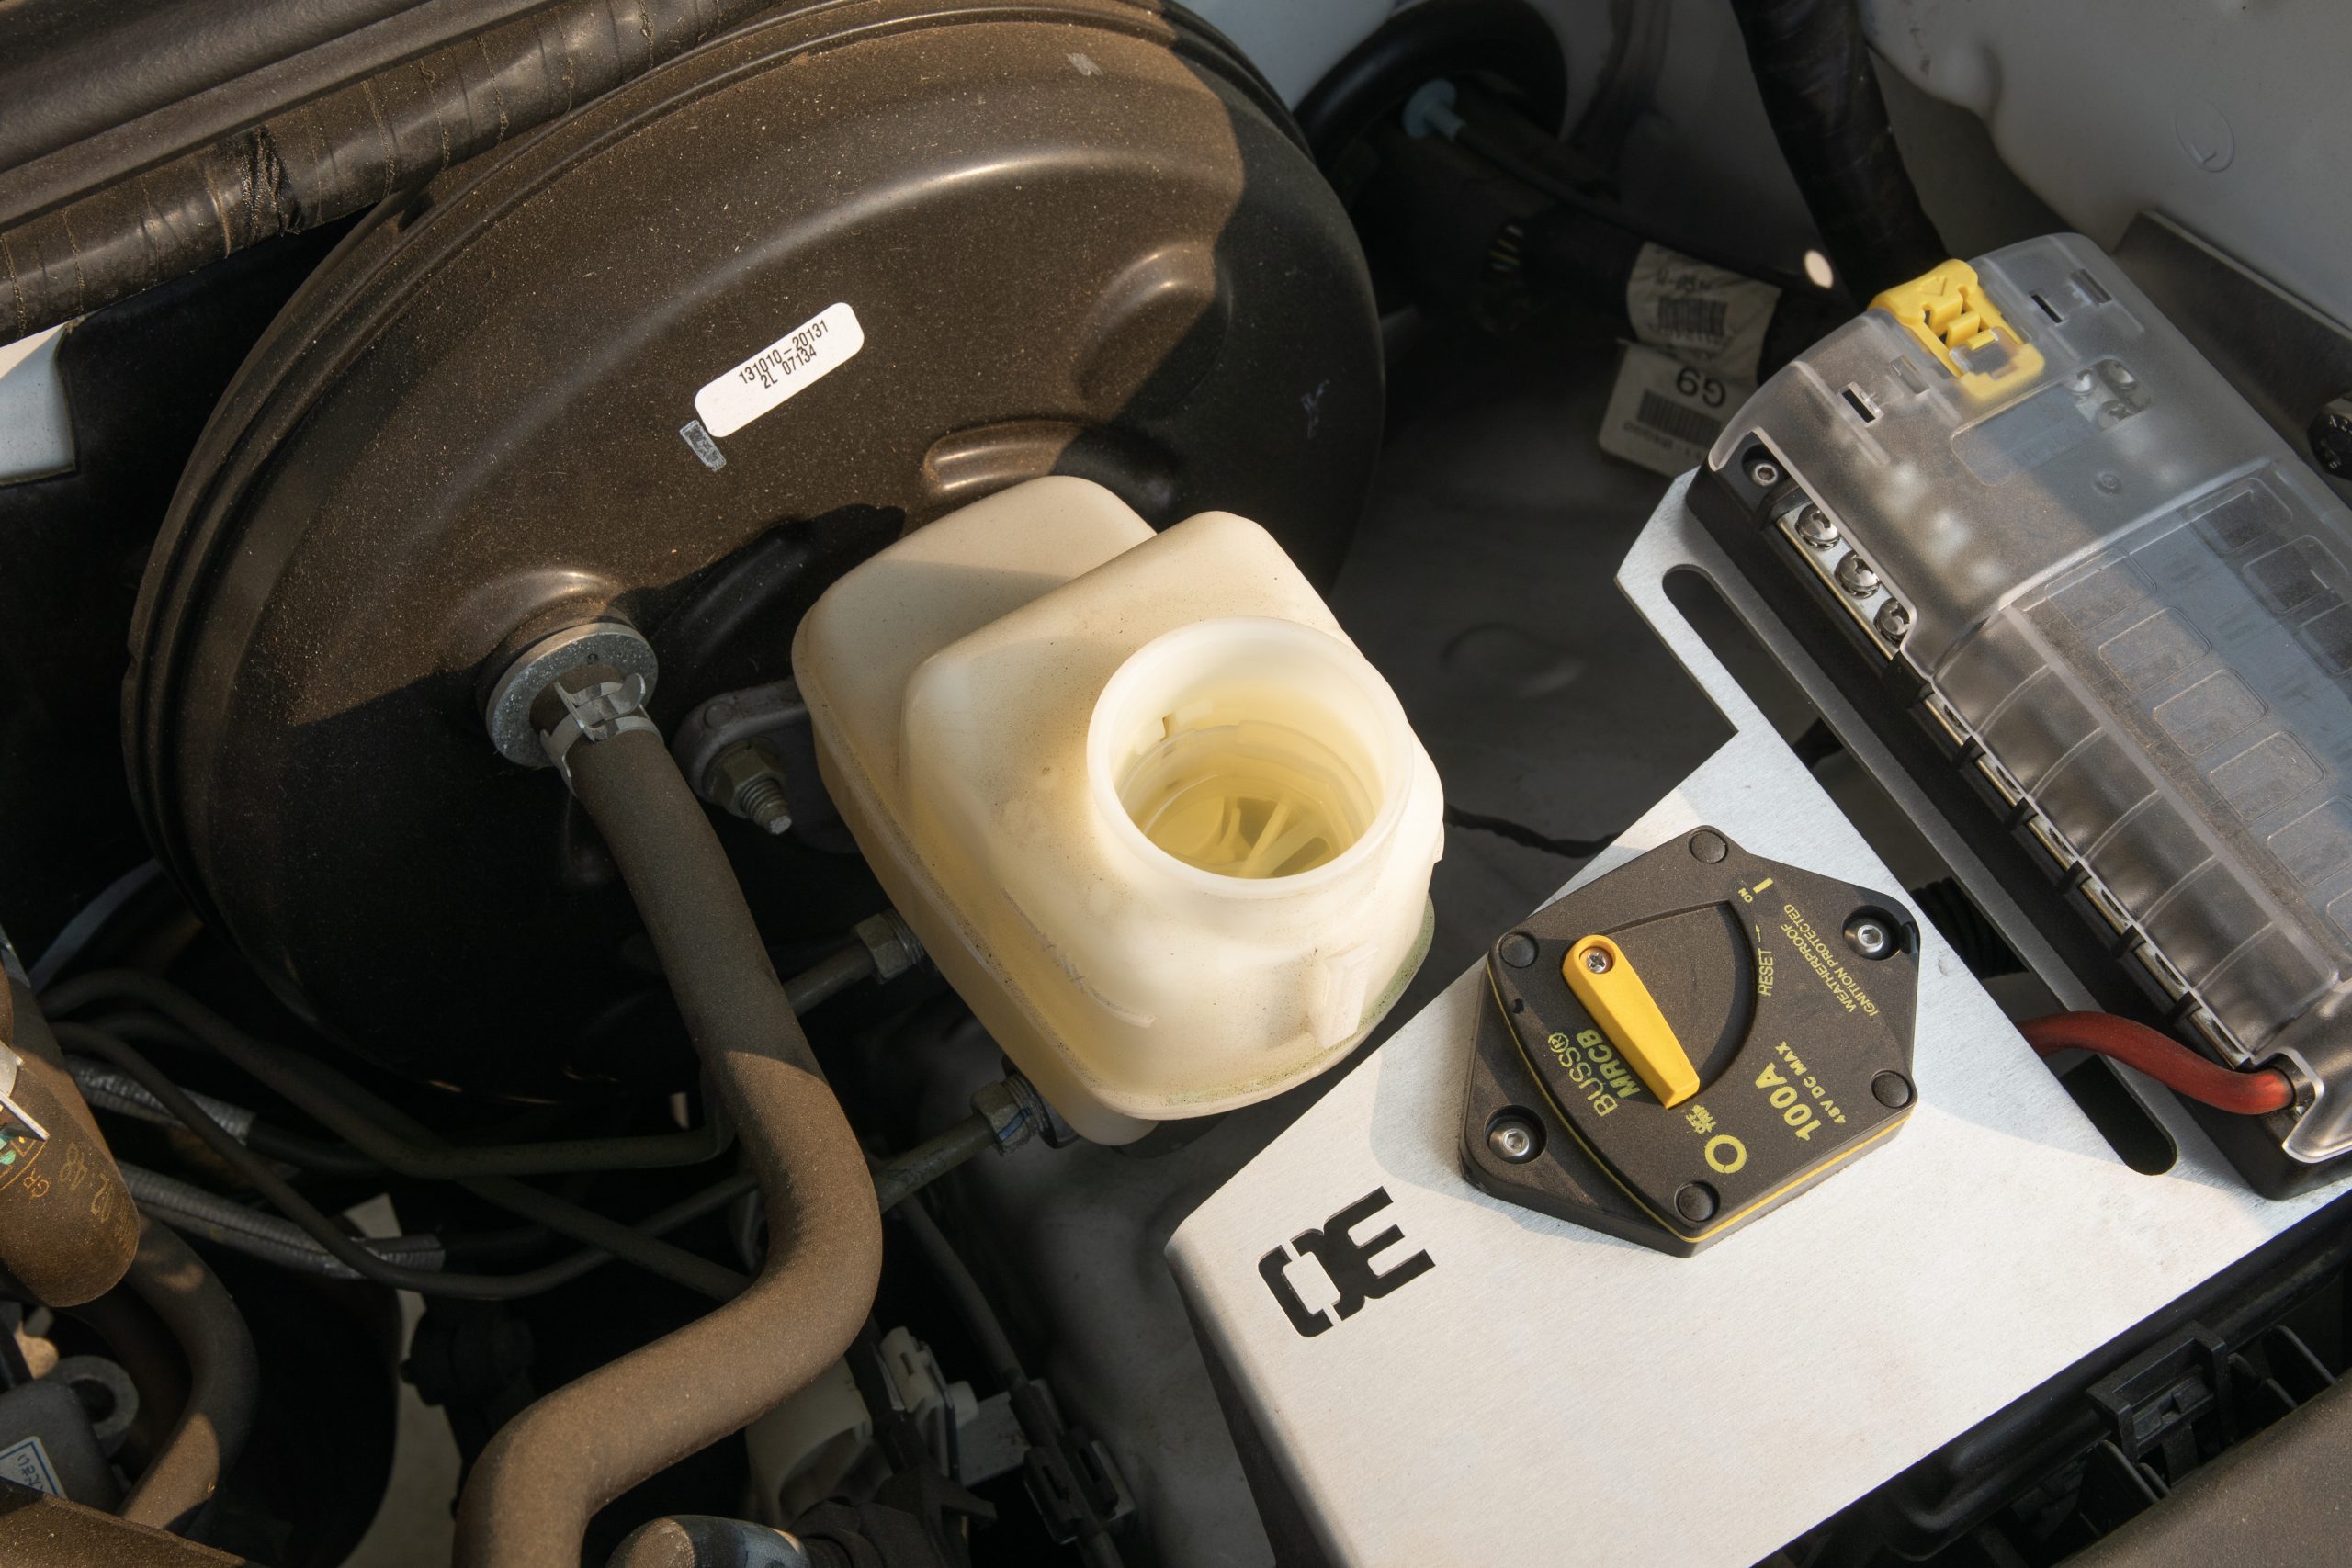
Once you have removed all the air bubbles from the brake lines, refill the master cylinder with brake fluid to spec. Be careful to watch for the fluid level as you bleed the brakes. If you drain the reservoir completely, you’re gonna have an expensive trip to the mechanic. Also, just before you start bleeding the lines, you can top off the master cylinder as well depending on where your level was sitting before you started the bleeding process.
Final Thoughts

Sitting high in the rear with the expectations of wheeling hard, extended lines are a must.
The quality is on another level. I have installed the extended brake lines from Metal Tech 4×4 on another truck, and those were nice but those from YM are a step above.
The actual lines, crimped fittings, retainer clips, and hardware provided… all high quality. No complaints here.