

After doing my research for headlight options for the 3rd Gen Tacoma, I decided to go with the Spyder Auto. There are a couple of reasons why.
First, I wanted something with a dark housing that blended in with the truck a little better. Second, I wanted the sequential turn signals. These check off both of those boxes and I think they bring an awesome look to the Tacoma.
These headlights have projector housings for both the high and low beams as opposed to the stock which use a projector for the low beam and a reflector for the high beam. They also have a DRL that wraps almost completely around the outside of the light. The top half of the DRL also acts as a sequential turn signal, which looks awesome and would pair nicely with sequential turn signals on the mirrors.
Now let’s get into the install process, which should be relatively similar for any aftermarket option you want to install on your Tacoma.
Find It Online
- Projector Headlights: Check Price
- SKU | UPC: 5085818 | 847245085818: Toyota Tacoma 16-18
- (SR5 Model Only Will Not Fit TRD Model )
- Low Beam-H11 (Not Included)
- High Beam-H9 (Not Included)
- Signal (Included)
Table Of Contents
Features
- Compatible with 3rd Gen Tacoma
- Driver and passenger included
- Easy Installation
- Polycarbonate Lens
- Superior UV protection
- High Impact Resistance
- 100% DOT / SAE approved
- Aftermarket HID or LEDs will void the warranty
Installation
This whole install can be done with two simple tools.
Tools & Materials:
Step 1. Remove Grille
The first step to getting the stock headlights out is to remove the grille (don’t mind the mud).
This is the same removal process that you will need to do to change out the stock grille for the TRD Pro grille.
First, you will need to pop the hood. Once the hood is open, locate the two 10mm bolts that are holding the grille onto the front body cross member of the truck. Remove those bolts and then locate the two remaining fasteners holding the grille on the truck. You can remove these with either a flathead screwdriver or a trim removal tool by sliding it under and popping out the middle of the fastener.
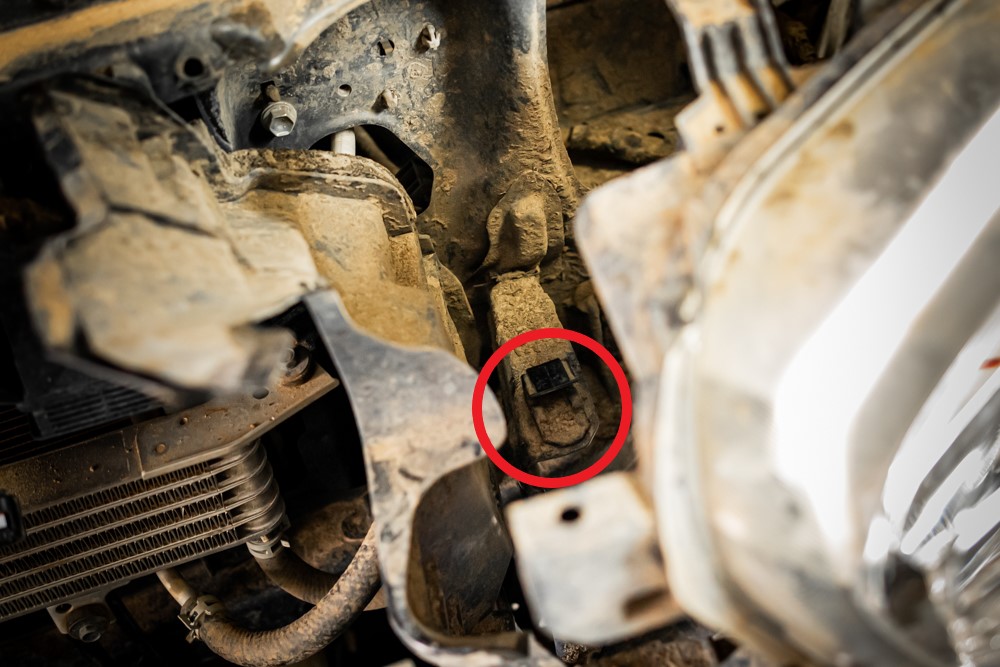
If you have a 2018 or newer Tacoma, you will also need to unplug the Toyota Safety Sense (TSS) sensor that’s attached to the grille. You should be able to see the plug attached under the right grille support. This can be somewhat tricky and a bit of an awkward angle to get leverage on the plug to pull it out.
For me, it was easier to pop out the plastic tabs holding the TSS cable to the grille support. Once the cable is free, it is much easier to see and press the tab on the connector so you can unplug the TSS sensor.
Now that the TSS sensor is unplugged, you can remove the grille from the truck. To do this, you simply lift slightly and just shimmy the grille until you feel it release. Then you can pull it off completely.
Step 2. Bumper Cover Removal

To remove the stock ones, you will need to pry off the sides of the bumpers. This part can be somewhat tricky, but like most things, it just requires some finesse and elbow grease.
To start, locate the bolt on the inner fender of the wheel well. This is a 10mm bolt but can also be removed using a screwdriver. Lower down on the fender, there is another fastener that will also need to be removed. To remove this, simply use a flathead screwdriver to twist it 90 degrees and pull it out.

There is also another fastener near the inner part of the headlight that would be advantageous to remove, which will give you a bit more room to slide it out. This can be removed by popping out the middle of the fastener with a flat head screwdriver and removing it.
Now that those are free, you can pop off the fenders. This step was a little bit easier for me since I have done the high clearance viper cut and cut away most of the inner fender, but essentially, you need to pop out the tabs of the fenders from the inside of the bumper. However, to make things easier, you should be able to pull back the inner fender liner a little to pop out the tabs.
From here, you need to pop out the corners of the bumper itself. This part can be a little sketchy, but you should be able to use a good amount of force without breaking the clips on the bumper. To pop it out, I pulled from the bottom of the bumper near the corner and the part of the bumper that the fender clips into.
Pull the bumper until you hear the main clip pop, and then you should be able to pull the bumper out enough so that you can access the headlight bolt. Repeat this step for both sides.
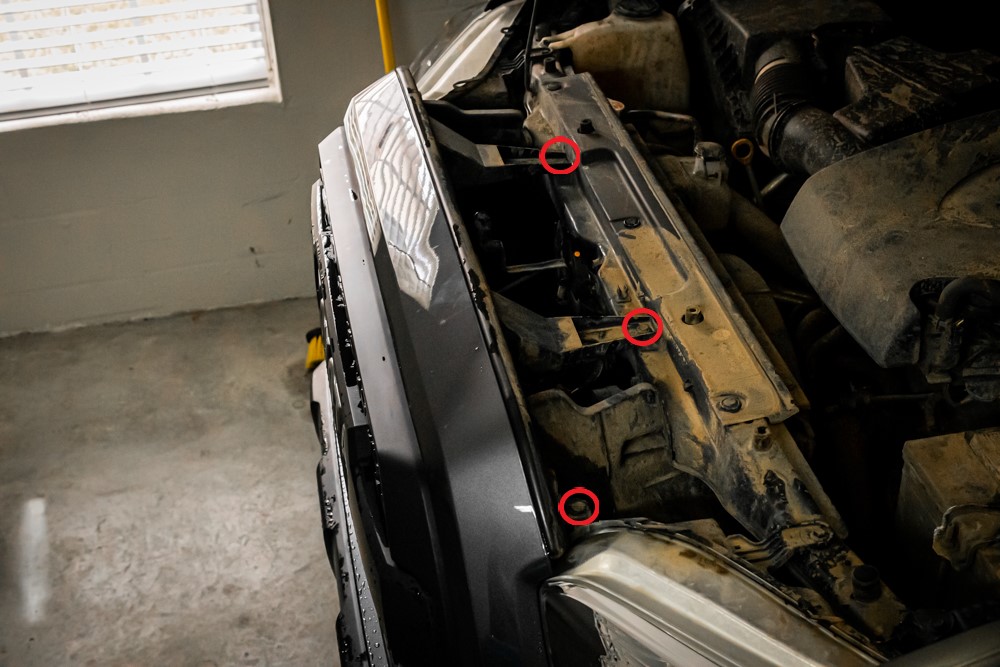
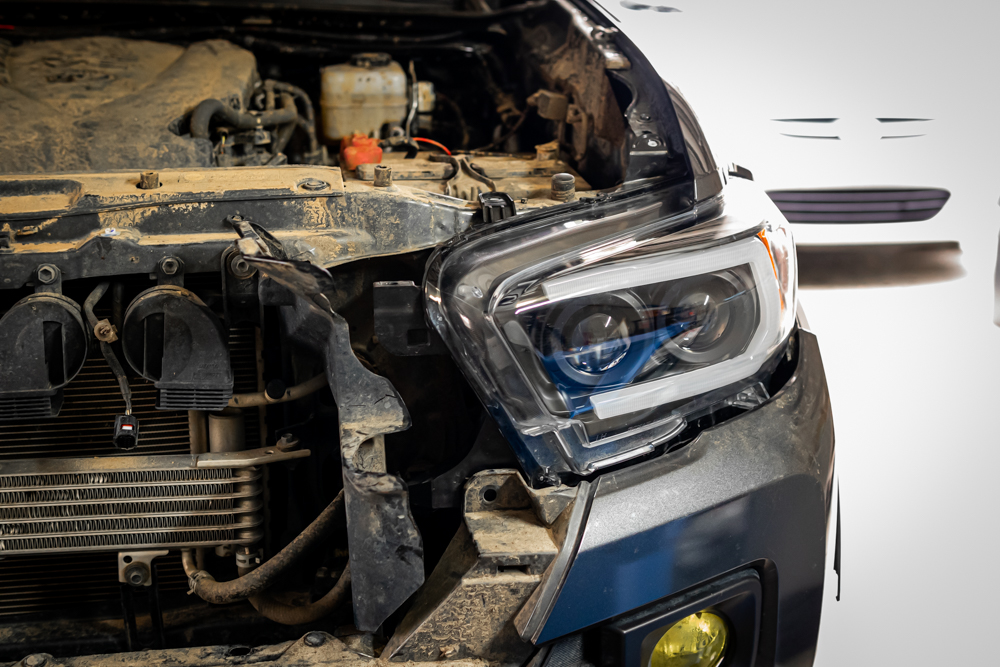
Step 3. Remove Headlights

With the stock bumper cover loose, you are ready to unbolt the stock headlight. There are two 10mm bolts on top and one in the side under the bumper that you just loosened. You will need a deep socket for the bolt under the bumper. Remove these bolts, and then you are ready to remove the headlight.
There is a retainer that is holding down a tab on the rear of the headlight that you will need to slide out of before removing. I found that the best way to do this is to slide the it in towards the grille until the tab is free and then you can angle the headlight out of its spot.
It takes a little bit of finesse to get it out, but you will eventually find the right angle.
There are four plugs, one for each light (including DRL), as well as a power plug. Unplug all of the connectors, but make note of which color plug is for the low beam and which is for the high beam. In my case, the green plug was for the low beam and the yellow was high beam.

After the stock headlights are out, you are ready to transfer over the bulbs to the new ones.
Step 4. Transfer Bulbs
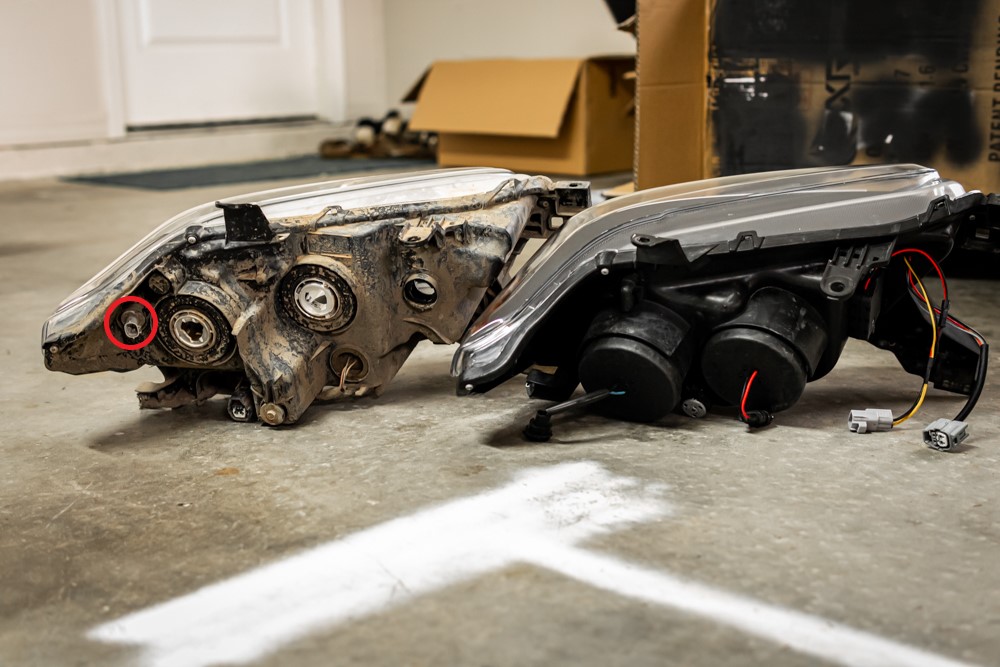
The Spyder Autos differ from stock in that the bulbs are mounted more internally, and under a cover, whereas in the OEM, the bulbs are plugged directly into the back.
Because of this, you should remove the covers with the included harness from new ones first. Once those are removed, you can remove the stock low beam bulb by twisting it until its tabs are free from its socket.

After the bulb is removed, plug it into the harness on the inside of the cover. Next, put the bulb into its socket and twist it until it is secured. Finally, return the cover over the opening. Repeat the above steps for each of the low beam and high beam bulbs.
Because these have a DRL that also acts as a sequential turn signal, you do not need to transfer over the blinker bulb. However, there is a small gray plug for the DRL that you will need to remove from the stock one and transfer over. To do this, simply twist the plug until it comes loose and insert it inside.
At this point, you should have both low and high beam bulbs transferred as well as the small gray connectors for the DRLs.
Step 5. Install New Headlights
The first step here is to match up all of the plugs and connect them to the new headlights. As I mentioned earlier, the low beam and high beam plugs are the same but the rest are unique and can be matched up easily.
When you have it plugged in, it may be a good idea to have someone go into the truck and test the lights and blinkers to ensure everything is working as expected.
If everything looks good, you can angle and slide the headlight back into its spot on the truck.
Step 6. Reassemble Bumper
This step is pretty self-explanatory because you essentially do the reverse of step number 3.
At this point, you should have the headlight in its spot on the truck. Tighten down the three 10mm bolts you removed earlier. Next, push the bumper sides back into their spots until you hear the fasteners click.
Be careful to line up the lip on the bumper with the slot it’s meant to go in. I accidentally bent mine slightly, which caused the bumper to bow slightly at the gap. To fix this, I simply pulled the bumper again and carefully bent the lip back to the correct shape.
Next, push the fender tabs into their holes until the fender is secured to the bumper. Then replace the fastener near the inside, as well as the 10mm bolt and fastener inside the wheel well.
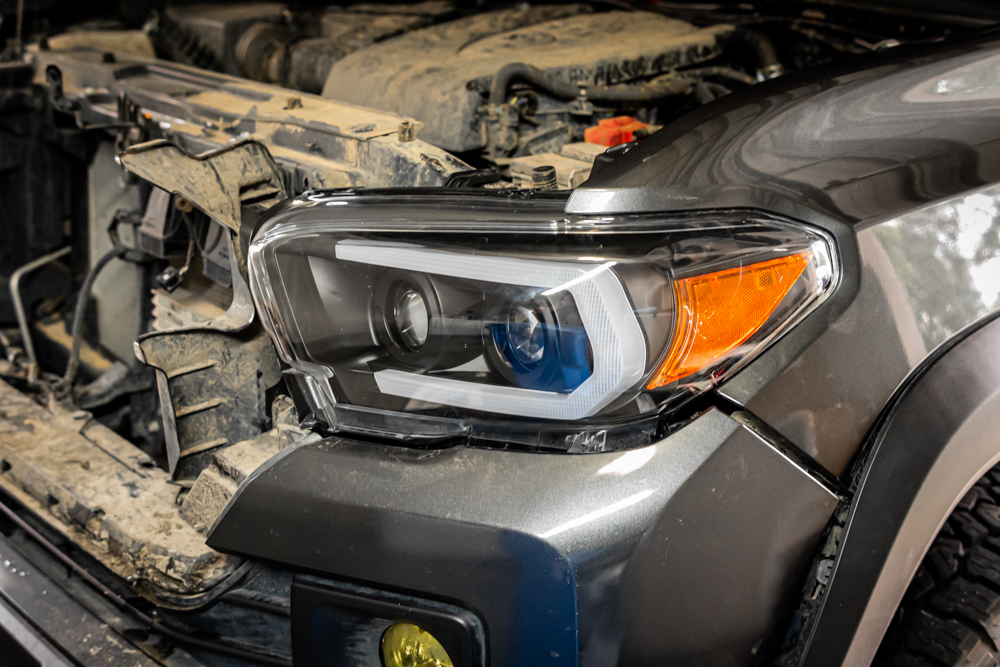
At this point, they should be installed snugly into their spot on the truck without any excessively large gaps between the headlight and bumper.
Step 7. Reinstall Grille
To reinstall the grille, you can simply line up the tabs with their slots on the truck and push it in. You should hear an audible click as it snaps into place, but it will still be slightly mobile.
When it’s loosely installed, you should plug the TSS sensor back in and pop it’s fasteners back into the grille support. Reinstall the two fasteners and tighten down the two 10mm bolts. Your grille should now be installed securely onto the truck.
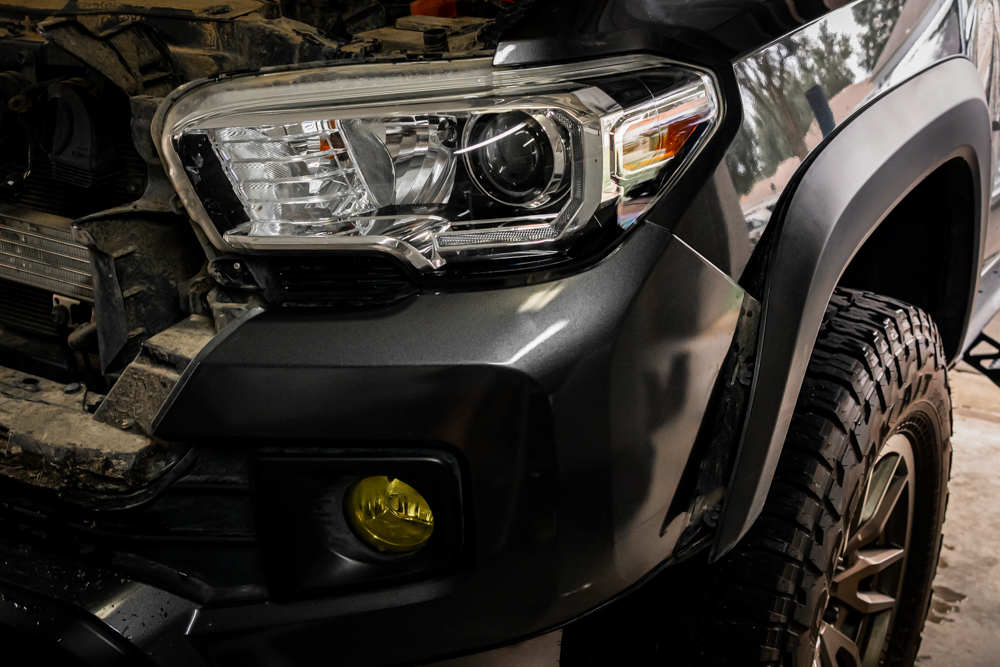
You should now have fully installed, functional, and looking awesome on your truck.
Final Thoughts
These bring an awesome look to the front of the Tacoma. I absolutely love how the inside are blacked out, which is how the Tacoma headlights should come from the factory.
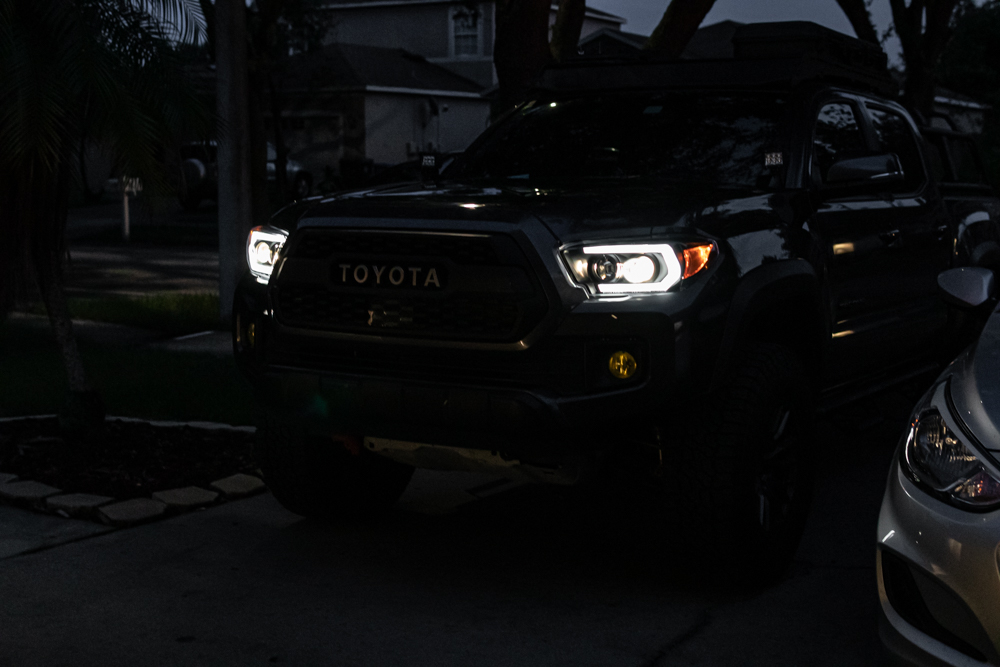
The DRLs aren’t quite as bright as the stock, but they still look amazing in the dark. I like how they wrap almost fully around.
As mentioned earlier, the DRL also functions as a sequential turn signal. Only the top half of the DRL lights up orange as your turn signal. The sequential light looks smooth from a distance, but up close you can somewhat see that there are three sections of the DRL that light up sequentially.
As for the actual light output, they’re just okay. They aren’t an improvement over the stock, and if anything, they may be slightly worse. This is somewhat disappointing but is quite common for cheaper aftermarket options. Also, the beam pattern has some scatter above the hotspots which may annoy oncoming drivers.
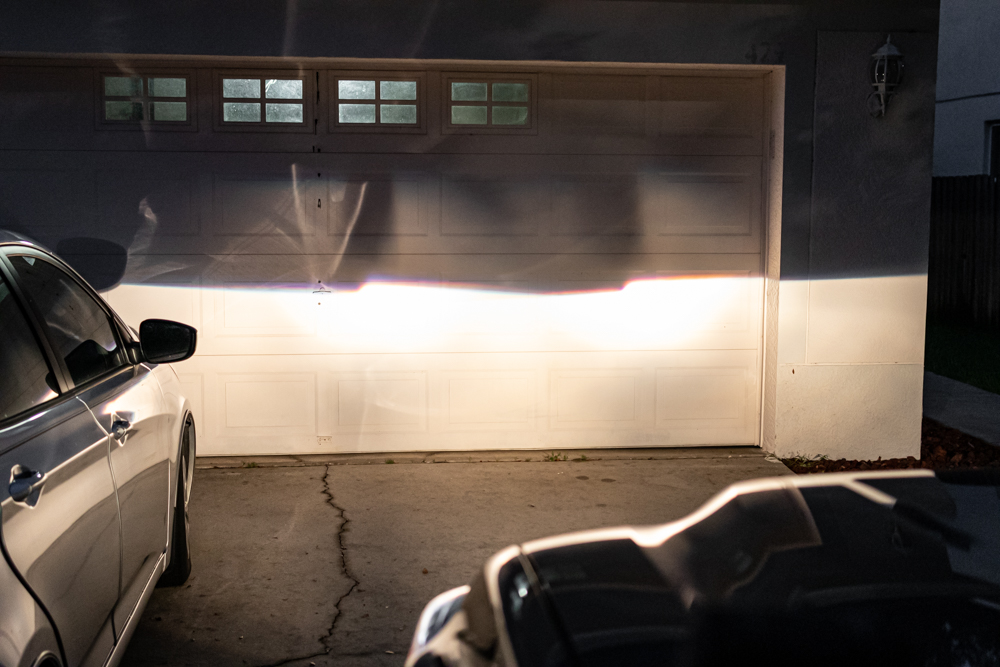
Personally, the look makes up for the lack of light output.
In the future, I may look to add an HID or LED kit to increase their output. As a word of caution, using anything but normal halogen bulbs will void the warranty. According to the Spyder Auto website, the warranty will differ between vendors so make sure to check with the vendor first.
Overall, I think these look awesome on the Tacoma, but I would not recommend them for someone who is looking for an upgrade as far as the actual light output is concerned.
How do you connect the side marker on the outside of the headlights? I couldn’t find a connection running from the fuse box that fit the connection in the new Spyder headlight (small LED connection coming from the hole where you could place the old LED bulb mount).
There is a small plug you need to transfer over from the stock headlights (see the piece circled in red in the photo under Step 4)
Is this what you’re referring to? Also, what model is your truck? Wondering if the SR/SR5 trims are different.
My 2017 SR5 has these installed I just purchased it and it has an LED Fahren H11 6500K bulb in it. The beam is pretty dim. is there a particular bulb or a better bulb that could make the low beam lights brighter
Honestly the light output is pretty bad with the stock bulbs. I’d assume LEDs would help a little, but it might depend on the LED.
The only other thing I could think of is trying HIDs, but that might require modifying the back of the light housing so that the ballasts fit.
I read somewhere to use H7 bulbs?
Do you have any feedback on that?
So if my LED bulbs are dim, so you have any suggestions on a brand of bulb? Can I use any brand?
What size HID If I went that route?
I don’t think these headlights will work with an H7 bulb as they’re designed to be used with the stock size (H9)
Check out this video from Jesse Rizo. He seems to like the Tacomabeast LEDs but I can’t really speak to them:
https://www.youtube.com/watch?v=KFZB47eT5ek
I attached an image with the cord that’s coming out of that area. I couldn’t find anything to plug it into. Thanks!
Yeah that looks like the gray piece you need from the stock headlight (circled in red in attached photo)
Try twisting that out & unplugging from the stock headlight and transferring it to the Spyder one.
I know this is an old thread, but when you transfer from the stock headlight and transfer to the spyder, what do you do with the small black/red wire coming out of the spyder? Thanks for your details instructions!
Great read if your looking to buy these headlights! A lot of information from how to install, how they look, and how they perform!
Thanks, Joshua!
You guys do awesome reviews! Thanks for all the info, and an in-depth install process!
So happy that you find our articles useful. Thanks for the support.