
Ironman 4X4 is no stranger to the high-end lighting market. They offer a variety of kits to suit your specific high-powered lighting needs.
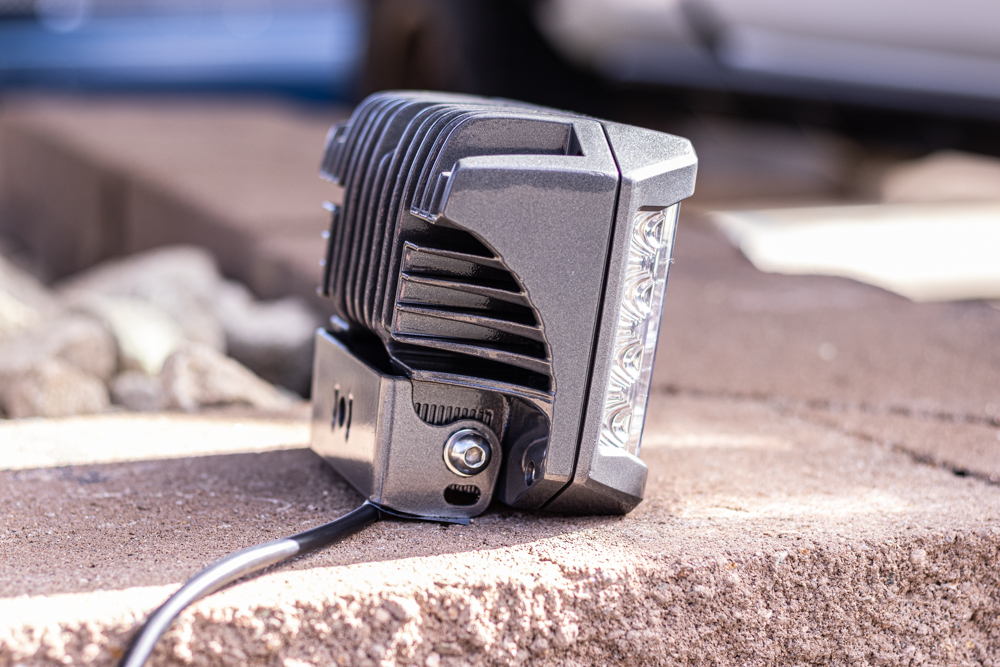
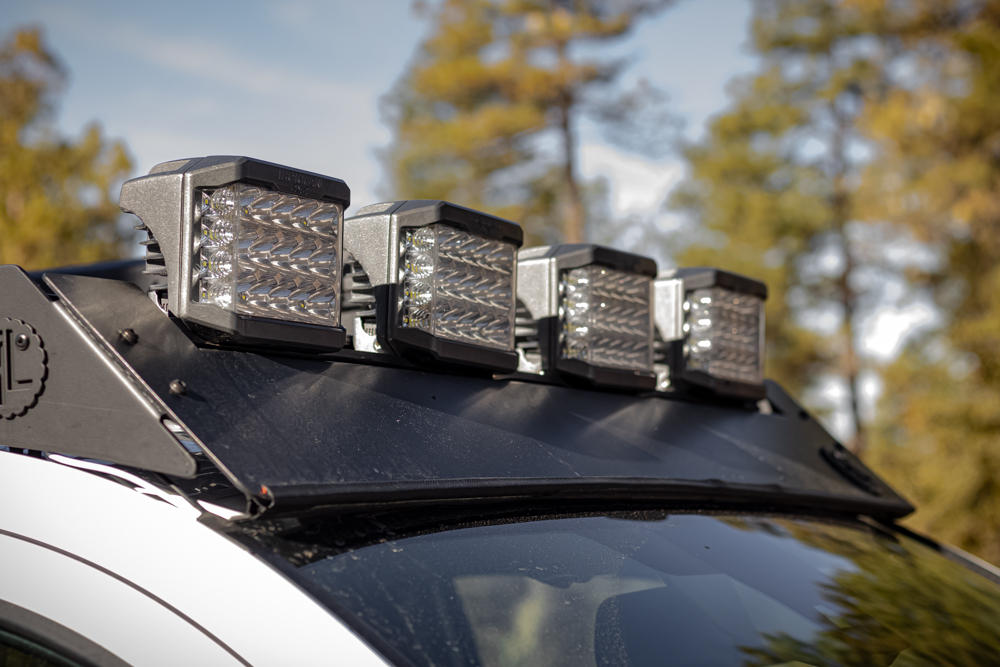
Perhaps one of their most impressive offerings is the Eclipse LED Driving Light. These rectangular lights are very similar to Ironman’s 3” universal pod lights, only much larger, and far more powerful. These lights are incredibly bright on their own and, with four of them, blinding is probably the best word to describe them. The output is awesome and the best part… they’re incredibly affordable.
Find It Online
- Ironman 4X4 Eclipse 5″ x 7″ LED Driving Light: Check Price
Table Of Contents
Specifications

Specifications:
- 6000K white light to imitate natural daylight
- 140-degree beam
- 15 x 5W and 8 x 3W high lux output Osram LEDs
- 75W driving light
- 24W side shooter spread beam
- Combined 99W high lux output delivers a beam distance of over 1.3km
- 7540 raw lumens
- IP67 Rated
- Heavy-duty alloy build, polycarbonate lens, stainless steel bracket
- Operating voltage: 10-30V DC
- Current: 6.48A@12V / 3.21A@24V
Packing all these LEDs, these lights are no joke. Like the smaller pods, they have included side shooters to spread the beam over 140 degrees for maximum visibility. Just two of these lights produce 7500+ lumens at a 6000K color temperature. They’re the perfect alternative to pricey light bars and have the advantage of a more universal mounting system.
Required Tools & Materials
- Mechanic’s Tool Set
- 16mm Wrench
- 16mm Socket
- 10mm Socket
- 10mm Wrench
- 5mm Allen Key
- 35mm M6 Head Bolts (8)
- M6 Lock Nut (8)
- Flat Head Screwdriver
- Electrical Tape
- Crimping Tool
- Wire Stripper
- Waterproof Crimp Terminal Connectors
- Waterproof Crimp Buttsplice Connectors
- Zip Ties
- Heat Gun
- Drill with metal drilling bits
- Self-tapping screws (optional)
Instead of re-using the Ironman switch, I used an OEM-style push switch mounted in a 3-switch panel. You can find these here if you’d like to do something similar. Note that this panel uses the tall-style push switches, it will not fit the shorter and wider switches.
- Cali Raised Switch Panel: Check Price
- Push Switch: Check Price
Installation
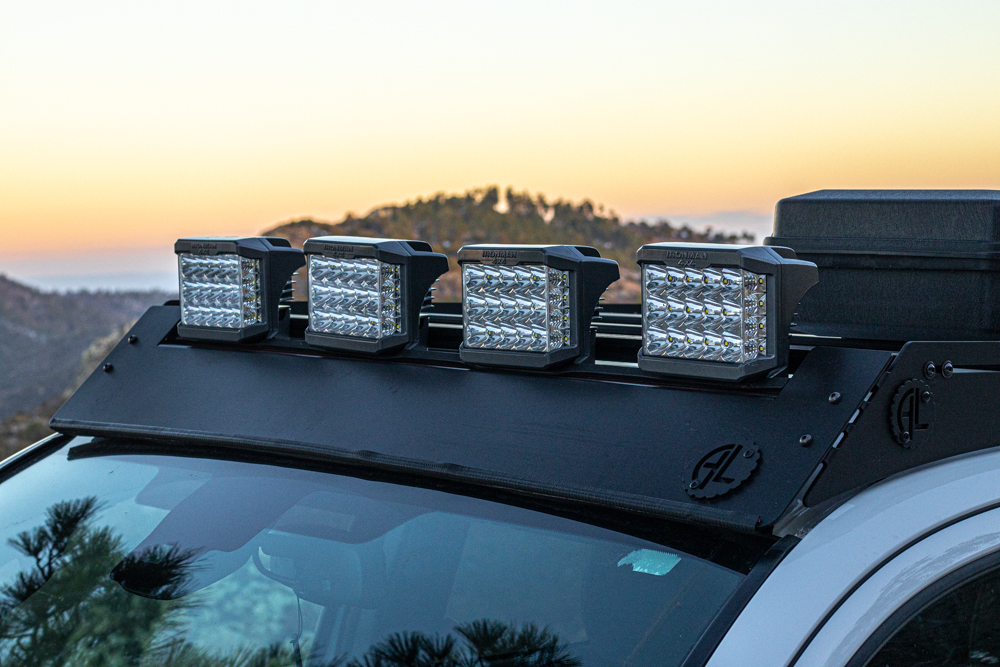
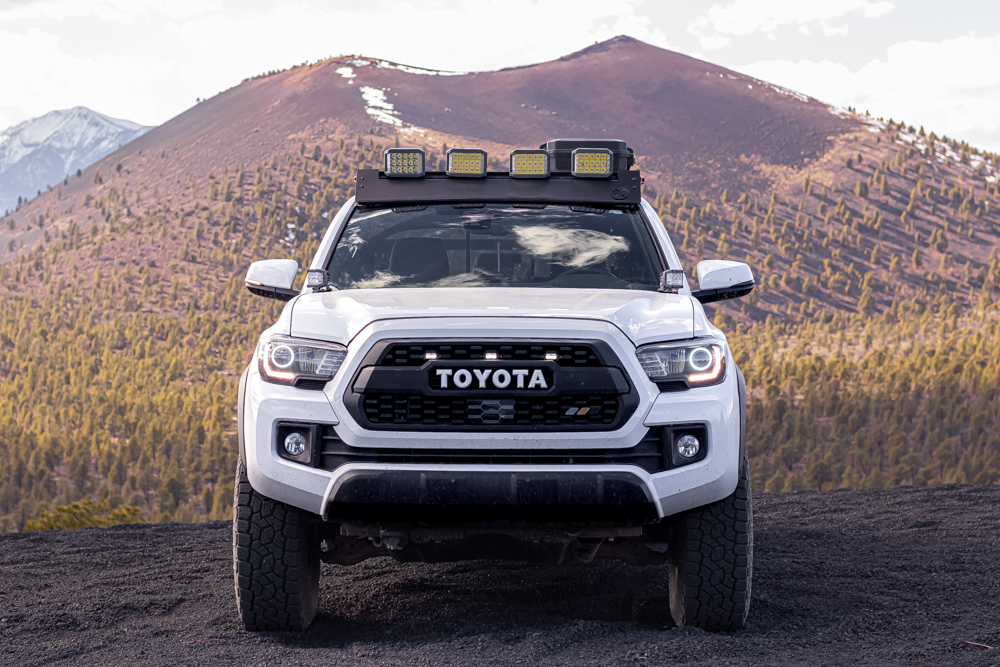
Like all pod lights, these lights come with a horizontal mounting bracket that allows you to pitch the light up and down, as well as side to side. These lights are perfect for mounting on bumpers and top of roof racks. However, I chose to mount these lights a little unconventionally.
I wanted to place them up on my roof rack and mount them in place of a light bar. Four of these lights fit perfectly in the light bar cutout of my new wind fairing on my AL Off-Road roof rack. This rack features slotted crossbars, so drilling into them was not ideal.
This presented some challenges, but luckily, the Ironman light brackets only needed a slight modification to accomplish this. These brackets can be rotated 180 degrees and used in the opposite orientation to allow for this. Unfortunately, the brackets keep the lights from adjusting any further upwards than just below 90 degrees. This means the lights are aimed slightly downwards, but because they’re mounted on my roof, I didn’t have a problem with this.
I’ll be using two 35mm long M6 head bolts instead of the one 16mm bolt provided for mounting for this install. The larger included hardware does not fit inside my roof rack crossbars, but the M6 head bolts slide in perfectly. I chose to drill two holes in the Ironman light bracket to secure my lights to the crossbar as safely as possible. These lights are heavy, and could easily crack a windshield or damage my hood or roof.
Step 1. Measure Light Bracket

First of all, I removed the brackets from the light by removing the 5mm Allen bolts and lock washers. On each of the four brackets, I measured out 1.25″ inches from the left and right sides and marked it. Once marked, I used a punch to create an indent where I planned to drill these holes.
Since the brackets are cast iron, they were very hard to dent or scratch. I used the punch a few times at each location to ensure the drill bit did not walk on the surface of the bracket.
Step 2. Drill Holes

After this was complete, I placed my brackets flat on a piece of scrap wood and drilled out the two holes on either side of the center with a 1/4″ drill bit for each bracket. You’ll want to make sure the drill bits you are using are safe to use on metal to prevent damage to the brackets and the drill. You can also reattach the brackets to the light to give you a safe drilling option. Just be sure to place the face of the light on a soft material to avoid scratching and avoid putting too much stress on the lens.
Once these holes were drilled out, I took a flat file to clean up the burs left behind. I also used a round file on the insides of the holes just to make sure there were no sharp edges.
Step 3. Install Bolts in Crossbar

Now that the brackets are ready, I began installing the bolts into the crossbar of my rack. In my case, I had to remove the two 5mm Allen bolts securing the wind fairing, as well as the two 5mm Allen bolts securing the first crossbar to the side of the rack. I was then able to slide all eight of the M6 bolts into the slotted crossbar and position them roughly where the brackets would sit.
I took the time to measure out the total width of the light bar cutout area and the width of each light to make the spacing of the four lights even. This allowed me to secure the brackets down correctly the first time and get the lights mounted up with less hassle. Since the dimensions of light bar cutouts vary from different manufacturers, I will not be including this information in the install.
Step 4. Install Brackets

I then reinstalled the 5mm Allen bolts into the wind fairing and into the crossbar to secure the rack in place.
I placed the light bar brackets onto the protruding bolts and secured them with two washers and two mm lock nuts. I was also careful to orient the brackets the correct way so the holes in the lights line up with the holes in the brackets.
Step 5. Test Fit Lights

Once all the brackets were tightened down and secure, I dry-fit the lights just to make sure they looked alright and fit inside the light bar cutout.
After some minor adjustments, I secured the lights to the brackets with the lock washer and 5m Allen bolt. These bolts were tricky to secure up on the truck—there wasn’t much room to work with between the lights, but I was able to install them without issue.
Step 6. Connect Both Wiring Harnesses

Now that the lights are secured to the roof, the process of wiring them up can begin.
Ironman provides a comprehensive, high-quality wiring harness for two of these lights that include a relay, an inline power fuse, an inline switch fuse, a toggle switch, and plenty of lengths to reach anywhere on your vehicle.
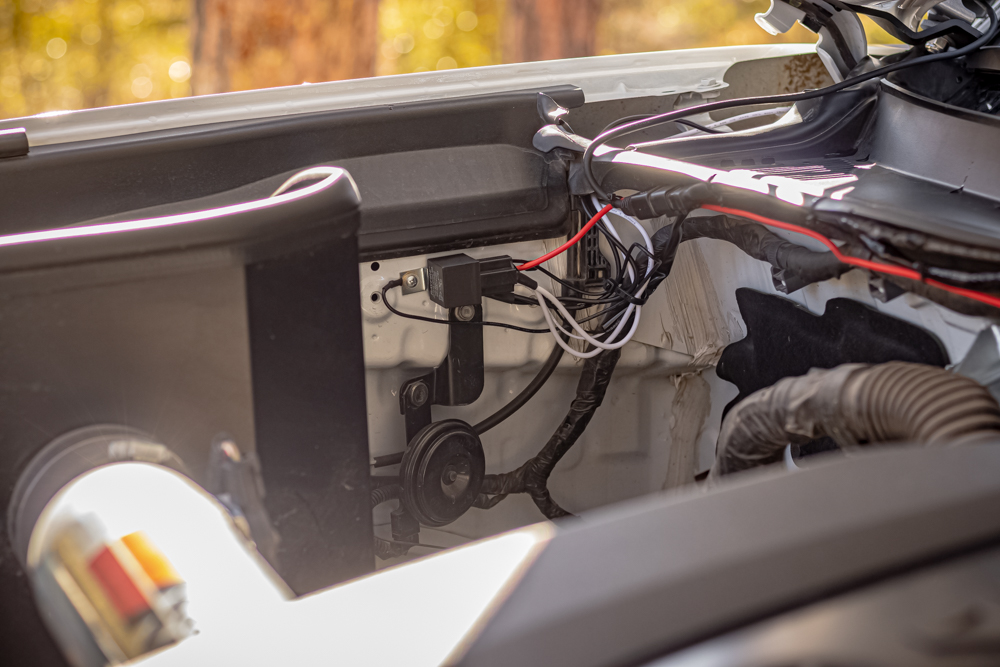
My first step was to connect the wiring harness to the two lights via the plug on the back of the lights. Since one harness will handle two lights, I used two harnesses with one on each side of the vehicle. I then determined where in my engine bay I wanted to mount the relays.
There are plenty of factory locations where a relay could be installed, but I chose to drill into the engine bay to mount the relays exactly where I wanted them. This can also be done with self-tapping screws if necessary. I made sure all the wiring to the switch and power reached their respective locations before finalizing the location of the relay. Once the relay was in place, I had a good idea of the amount of slack I had in the wiring harness.
Step 7. Run Wires From Roof to Engine Bay
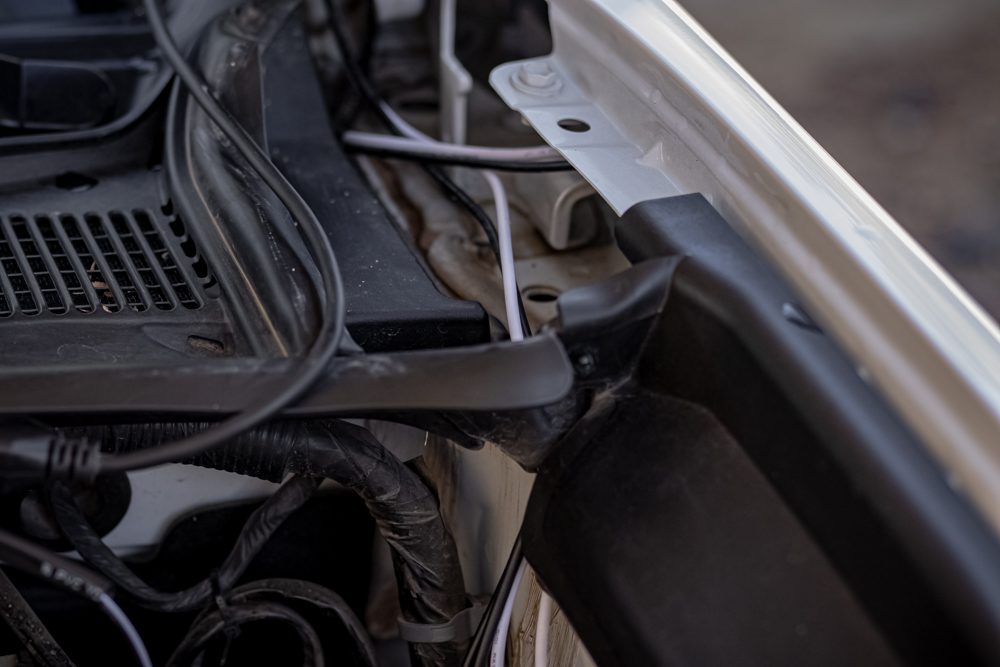
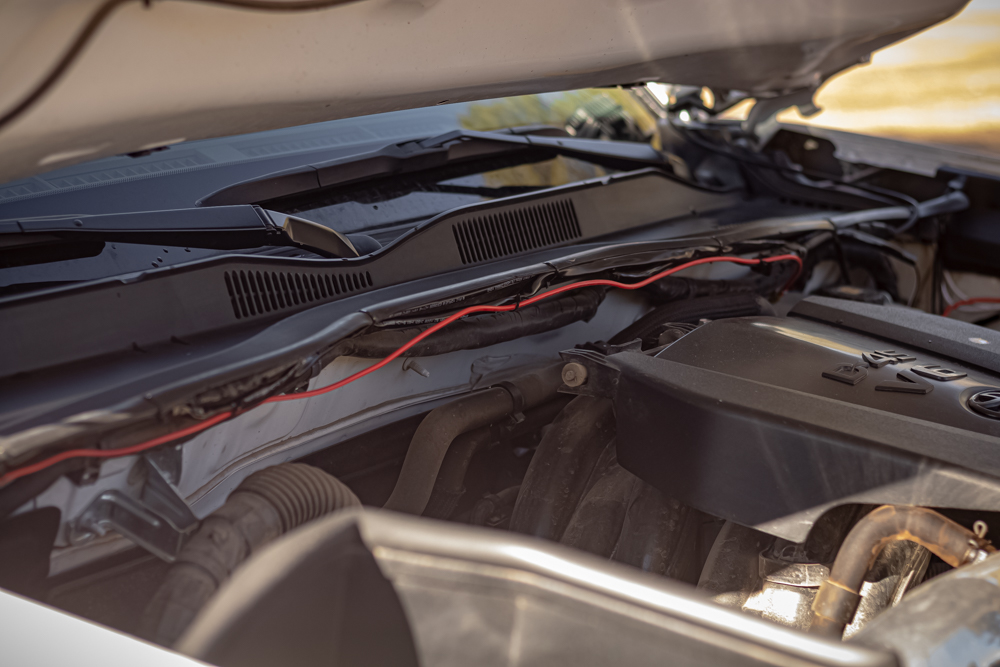
Each plug splits into a white power wire and a black ground wire, so each side of the vehicle had two sets of these wires running down from the lights to the engine bay. To run the wiring from the lights on the roof to the engine bay, I decided to stuff the wires into the weather stripping channels that run down the windshield.
The rubber sleeve on the wiring harness was too thick to fit in the tight gaps, so I carefully cut the rubber sleeve off of the light power and ground wires. I found it easiest to start a cut at the top of the wiring harness and pull the rubber sleeve off against the wires. It saved a significant amount of time and reduced the risk of cutting into the wires themselves.
Once the wires were free, I popped out the plastic tab that secures the plastic guard to the engine bay and ran the wires underneath to prevent any damage and keep them organized. I then gathered all of the extra slack at the top of the roof rack and zip-tied them to the underside of the rack, as shown above.
Step 8. Wire Management

I taped the uncovered wires together with electrical tape in bundles of two wires each. I wound the electrical tape tightly against the wires while holding them flat to keep them as neatly wrapped as possible. Wrapped in tape, they’re still more protected than if they were bare, and they fit nicely into the channels alongside the windshield.
I chose to run one bundle between the A-pillar and the weather stripping, and the other between the weather stripping and the windshield. A small, flat head screwdriver is useful to gently pry apart the weather stripping and to gently force the wires into place. Be careful not to damage your paint, weatherstripping, windshield, or wires!
Step 9. Wire Relay

Once this was complete, I grounded the black wires coming from the lights to the engine bay.
I also grounded the relay itself in the same location where I drilled into the engine bay. Now, the only wires we have to worry about are the red power wire coming from the relay and the small bundle of wires connected to the switch.
Step 10. Run Power to Switches
I then took some time to neatly route the wires across my engine bay towards the battery. I set the red power wire aside for later and routed my switch wires near the rubber grommet on the driver’s side of the engine bay. Ironman provides a great reusable switch, but I chose to use an OEM-style switch instead, and will not be reusing the provided switch.
In any case, you’ll have to cut the switch off of the Ironman harness, remove some or all of the rubber sleeves around these wires, and tape them to a sharp object, like a metal coat hanger or a long screwdriver. Once secure, route the wires through the rubber grommet that leads into the driver’s side footwell. If you’d like more details about this step, check out my switch panel installation article here.
Step 11. Wire Switches

In my case, I’ll be powering both relays (both sets of two lights) with the same switch inside my cab. You can still follow these steps to wire two lights to a switch. This is possible because the relays handle the load placed on the circuit, greatly reducing the load on your switches. The switches I used can handle 3 amps, but each wiring harness pulls less than 1 amp from the switch thanks to the relays.
Inside the cab, un-tape the wires and get enough length pulled through to work with. Strip the wires back about half an inch on the wiring harness and the switch. The yellow power-in wire will connect to the red power-in wire (or wires) on the switch. My switch has two red power wires; one for receiving power to send out of the switch, and one to light the LED backlighting of the switch. The black ground wire (or wires) connect to the black ground wire on the switch. The white power out wire (or wires) connect to the green power out wire on the switch. I made sure all the connections were crimped tightly and sealed with the heat shrink.
Step 12. Wire Switches & Lights to Fuse Block

The yellow wire can then be attached to any 12V source to receive power depending on your needs. In my case, I routed this wire to my Blue Sea fuse block to receive power at all times with a fuse in place. You can also splice it into an ignition wire or connect it directly to the battery. Note that choosing a 12V source that is only live when your vehicle is running means you cannot turn your lights on or off unless your vehicle is on. This is why I chose to connect it directly to a fuse block, which is always being powered by the battery.
The red connected wires can then be connected directly to the battery to receive power. I again chose to connect this power connector to the Blue Sea fuse block on my auxiliary power kit from Overland Equipped. I’ve been convinced this is the only way to power your accessories safely. For more information on this kit, check out my install and review article here! Ironman has you covered with a 25A in-line fuse if you’re connecting it directly to the battery. I removed this fuse and put it directly into the fuse block.
Now, test your lights and ensure all your connections are secure! Repeat these steps for each set of lights you have if running more than two.
6-Month Review
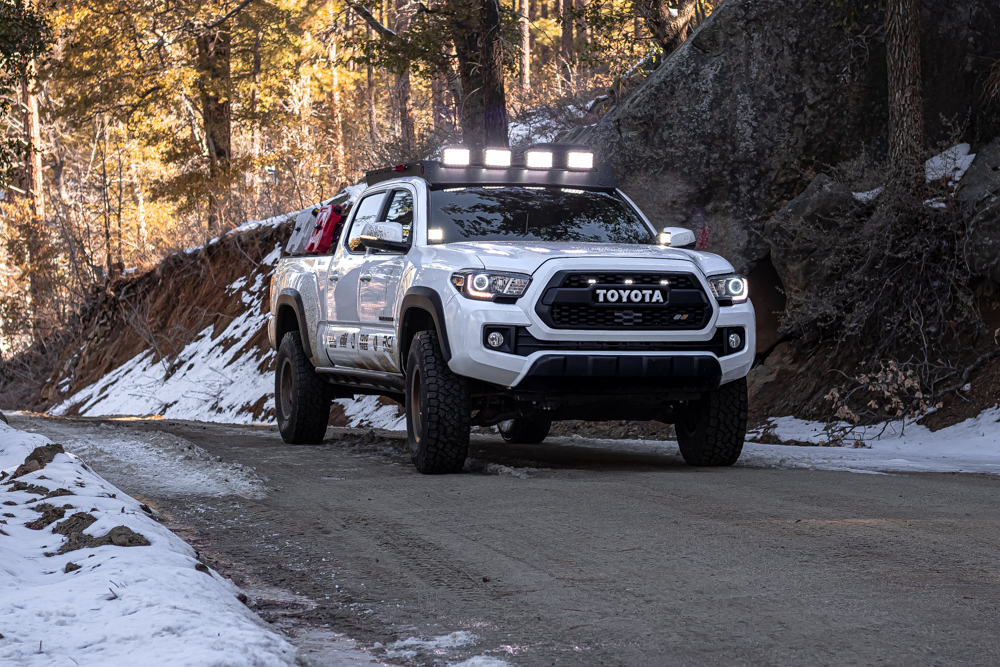
Since installing these lights, I’ve been through just about every condition imaginable. I’ve seen record snowstorms, as well as my fair share of rain and hail. I’ve seen rocks, dust, and even hit tree branches on overgrown trails. Even after wheeling entirely too hard, these lights have not moved an inch, and show no signs of wear or damage.
These lights are the real deal—there have definitely been moments in the last six months where I thought to myself “that’s it, I lost a light.” However, the brackets are plenty strong to hold the lights in place, and they have not moved up or down at all! The wiring has held up nicely in my engine bay, and the wires routed in my weather stripping down my windshield have not come out or been damaged either.
In the wind, these lights do make some noticeable noise. If you’re driving in a strong headwind and they’re mounted in an exposed position, you’ll hear a little bit of noise, but it’s still well within the range of reasonable. I haven’t noticed any decrease in gas mileage, and my cab is already loud enough with my accessories on my roof rack and bed rack, and with my larger tires, these don’t make a huge difference.
I’m also impressed that the lenses have not faded in the weather or the sun. They’ve remained crystal clear so far, and there are no chips or damage in the lenses or the body. The heat sinks on these lights not only look fantastic, but they help keep these lights cool. Even after extended periods of use, the lights were relatively cool, and you run no risk of accidentally burning yourself reaching on top of your roof rack.
Light Output
The most important factor in a good auxiliary light is the output.
So how do these lights measure up? Let’s take a quick look at some output shots.
High Beams Only

Here, you can see the output from my aftermarket low beams and high beams.
They have a good spread and are relatively bright, but they’re no comparison to the amount of light these Eclipse lights throw.
High Beams & Ditch Lights
Here you can see the light output with the Ironman 4X4 3-inch pods is much better than the headlight output.
The ditch lights provide a much wider spread which illuminates everything on the side of the road.
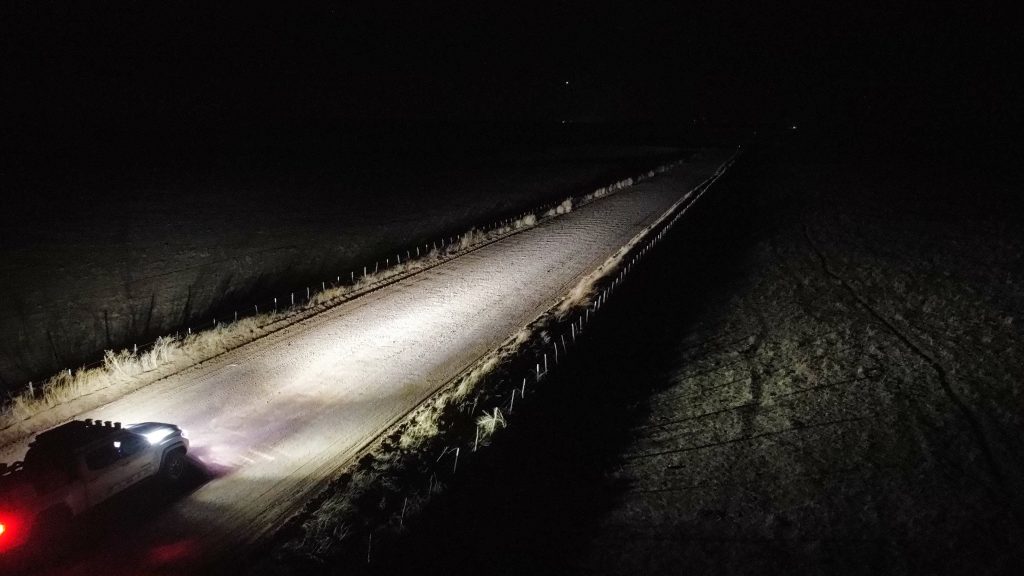
Eclipse Lights + Ditch Lights + High Beams

Here you can see all four lights absolutely flooding the road with light. Just look at that hot spot ahead of my Tacoma.
These lights are aimed slightly downwards on my rack, so they meet the road a good distance in front of the truck. From the driver’s seat, you can see that the beam hits the ground where it matters most, giving the driver a good view of the obstacles up ahead.
First Impressions

The center of the beam is massively bright, but the side shooters are a little easier on the eyes, acting much like my high beams. The 140+ degree spread makes a huge difference in the visibility from the driver’s seat. These lights do a great job of illuminating those dark spots to the sides of your stock headlight, and absolutely drown out the high beam entirely! You can also see the side shooters in action here.
The color temperature is easy on the eyes. At 6000K, the lights mimic natural daylight settings and make the details in the terrain pop out. In these photos, the light thrown on my hood is slightly exaggerated. This reflection is definitely present but did not affect my visibility from the driver’s seat.
I did my best to edit these photos as minimally as possible and did not alter the exposure of the camera at all to give the best idea of how much light is actually produced. I can say, however, that, in person, these lights spread more usable light than the photos let on. I was able to easily see the details further down the road and off to the sides of the trail and into the field beyond.
Final Thoughts

All in all, Ironman continues to impress us all with these top-of-the-line, no corners cut (and reasonably priced) products.
The shipping was fast, customer service was very helpful in answering all my questions, and the lights exceeded my expectations in both build quality and lighting output. I’m left wondering what Ironman 4X4 can’t do.
Thanks for the information