

Ground clearance is very important when off-roading and crossing extremely uneven terrain. The Tacoma has excellent overall ground clearance, but certain components on the drive train, such as the lower control arms (LCAs), slightly compromise it.
The front LCAs on your Tacoma are lower to the ground than anything else on the truck, including the rear differential. Being so close to the tires, there is little obstacle avoidance since the tire is the first point of contact. This is where lower control arm skid plates come into play. Fortunately, Runnin4Tacos (R4T) has the perfect solution.
A quick thing to note – these skid plates also fit the 5th Gen 4Runner!
Table Of Contents
Do You Need LCA Skids?

Once you start wheeling harder and through rougher trails, an LCA skid plate becomes necessary. The control arm can bend and, in some instances, even snap off near the ball joint or bushing mounts. The R4T lower control arm skid plates help reduce and disperse a strike’s impact on an obstacle.

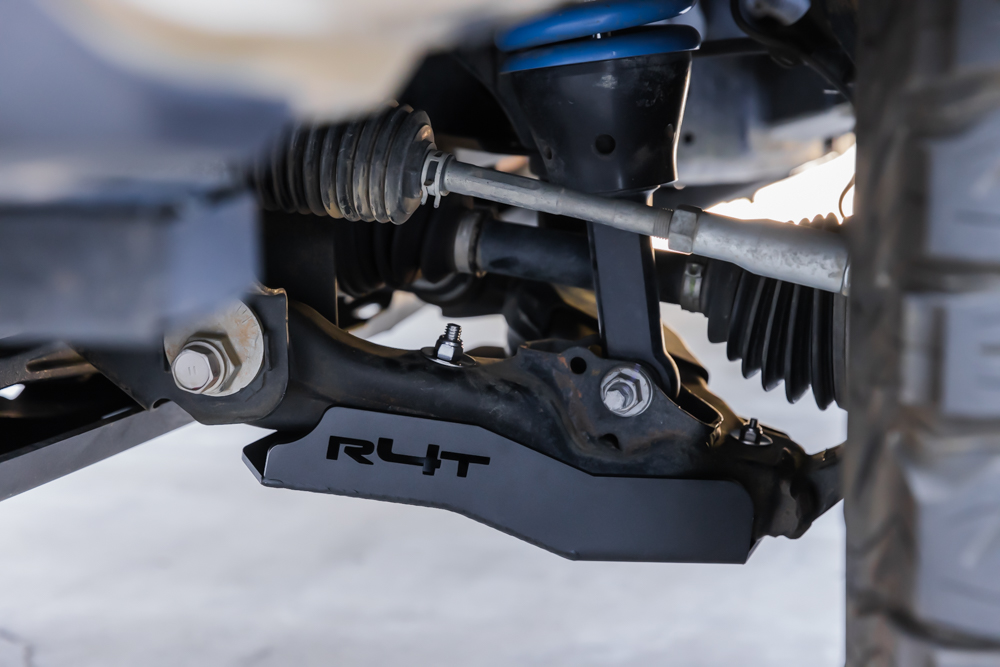
The R4T lower control arm skid plates are made of thick steel with a wrap-around design, protecting the front and back of the LCA. It is compatible with OEM and all aftermarket engine skid plates for the 3rd Gen Tacoma (as far as we know). It is also available in textured black or TRD Pro gray to match the TRD Pro model skid plates.
If you have a TRD Pro skid plate and either an off-road or TRD Pro model Tacoma, R4T also offers a color-matched TRD Pro gray rear differential skid plate for complete front-to-back protection. For more details, check out my install and review for the R4T rear diff skid plate.
Installation

Required Tools:
- 15mm wrench
- x2 11mm wrenches
- Flathead screwdriver
1. Prepare Skid Plate Hardware

Since these skid plates are compatible with certain model 4Runners, along with the 3rd Gen Tacomas, the hardware kit comes with (2) hex bolts for the ball joint mounting position on the skid plates.
Use the shorter of the (2) bolts, paired with (2) washers and a lock nut. Set the longer 4Runner hex bolts aside. Always save your “bonus bolts” because you never know when they can come in handy.

There are two pairs of carriage bolts, four in total. One pair of bolts is shorter than the other. All (4) bolts are paired with a spacer that will be placed between the skid plate and lower control arm, along with a washer and lock nut on the top side of the control arm.
2. Loosely Install Skid Plate Bolts
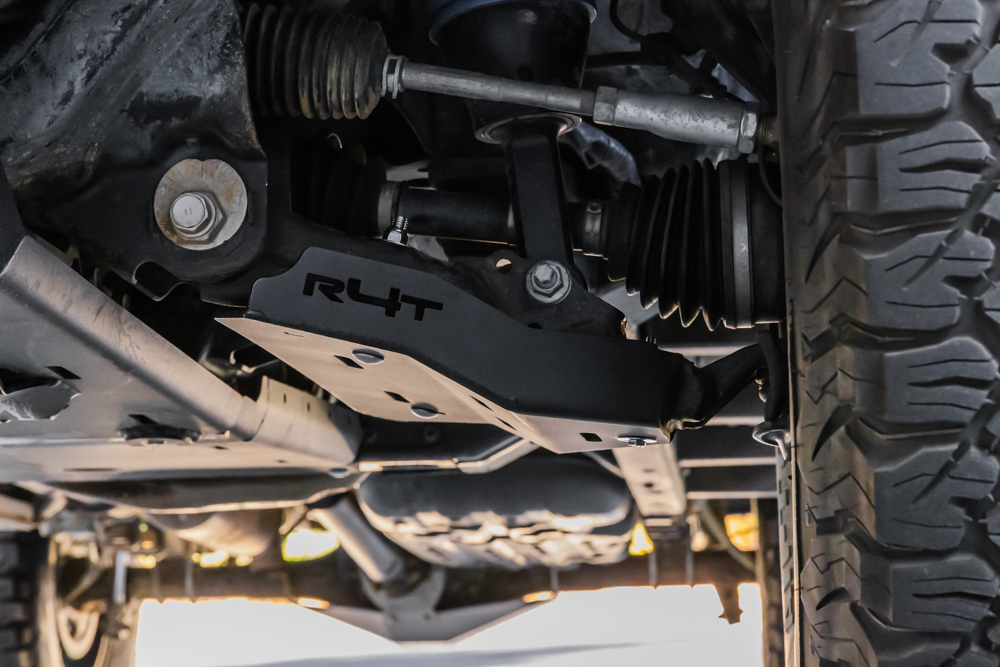
Each skid plate will be mounted to the control arms using (3) bolts: a hex bolt, one long, and one short carriage bolt. The triangular shape of the skid plate’s bottom has a mounting location at each point: near the ball joint, forward bushing, and rearward bushing.
The LCA skid plates have the R4T logo cut into them with the logo facing out the front of the truck. The “A” shape of the plates is oriented like an airplane’s wings on either side of the engine skid plate.

Flatten out the box where the skid plates were shipped and crawl under the truck with one of them. On the bottom side of the control arms, some plastic covers may be over the holes near the control arm bushings that the carriage bolts need to be inserted into. Remove those covers with a flathead screwdriver before skid plate installation.
You can use a jack to hold up the skid plate, but I just used my hands. Install the hex bolt first on the ball joint end. Use a washer on both sides and hand-tighten the lock nut. Let the skid plate hang from the ball joint side while supporting the other end near the front and rear bushings.
Before the bolts go into the bottom of the control arm, add the spacer over each bolt and then insert the bolt through the control arm.
Insert the longer carriage bolt on the rear side of the arm and the shorter bolt on the front side through the holes that held the plastic covers. The spacer should be sandwiched between the skid plate’s top and the control arm’s bottom. Use a washer and lock nut above the arm and hand-tighten the lock nut.
Move to the other side of the truck and install the second skid plate in the same way as the first.
3. Tighten All Hardware

The slots in the skid plates for the bolts allow for some adjustability. Ensure the skid plate is centered under the control arm and the bolts are straight.

Check that the carriage bolts are seated flush against the surface of the skid plate. There are no torque specs for how tight all these bolts need to be. Use your best judgment, and don’t over-tighten! Start wrenching each bolt until everything is tight. Move to the second control arm and tighten everything like the first. If your washers start to bend, you don’t need to tighten them anymore. Try to find the sweet spot right before the washers begin to bend.
Final Thoughts

Overall, I think the skid plates look great on the truck, and the price point is very affordable. Plus, they add critical protection to the lower control arms.
The skid plates’ wrap-around design makes the stock lower control arms look extra beefy, adding a more aggressive look to the front end overall. R4T’s skid plate design blends in seamlessly with my RCI engine, trans, and transfer-case skid plates. The TRD Pro gray color is a cool option for pro-model Tacoma owners; however, I chose textured black to match my other black skid plates.

The underside of my truck looks like a tank now! I have not felt any difference in drive quality with all my skid plate armor. Of course, adding more weight to the truck will decrease fuel economy. However, you can remove them if you don’t wheel very often. Although, let’s face it: if you’re reading this and own a Tacoma, you’re not very concerned with fuel economy.
I ran these for awhile, until a hard enough impact destroyed a washer on the top side of the LCA, causing that washer to get pulled into the LCA and the bolt to fall down out of place. Besides the bolts/hardware being subpar, I have serious issues with the spacers that are used for this skid. Instead of sitting flush with the LCA, this skid has 3 metal spacers that not only reduce ground clearance, but also create smaller points of contact for energy to be dispersed over. During a hard hit, the spacer also acts as a leverage point,… Read more »