
Have you been looking for a modern system that covers both the front and rear? Look no further! With it, you get a 4K front, 2.5K rear, noise-canceling audio, a GPS tracker, and a 12″ touch screen. Plus, everything is plug-and-play, making it a perfect upgrade for any vehicle.
Previously, I used a Garmin DashCam Mini, and while it worked great, I wanted a rear camera. With the new setup, the 2.5K can be set up to watch the truck bed, even if the back seat is full. WOLFBOX claims to have improved the “Night Vision” as well.
It has looped recording, so even if the SD card is full, it will begin recording over the oldest saved files. There is also an optional 24-hour parking monitoring feature in the event of an accident while you’re away from your vehicle.
Table Of Contents
Overview
The system comes with the following:
- G900
- WDR Backup
- Car Charger (11.5ft)
- Backup Cable (21ft)
- GPS Module
- 64GB TF Card
- Rear Bracket, In-Car Bracket
- User Manual
- Cleaning Cloth
- Easy Pry Tool
This kit is pretty much universal and compatible with nearly any vehicle. I wanted to hide all of the wires so that I wasn’t left with them dangling down from the mirror to my cigarette adapter, so I chose to go with the Dongar Technologies power adapter. This is the same one I used for my previous Garmin setup.
I also upgraded to a much larger SD card than the 64GB provided. Other than that, this kit is ready to go out of the box.
Rear Install
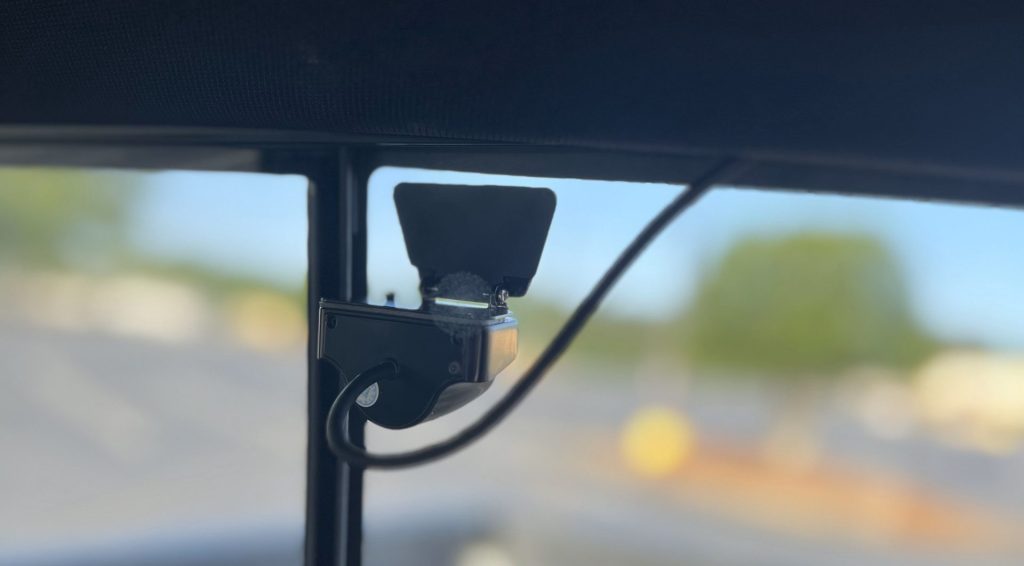
The rear can be installed in several ways. I mounted mine just inside the rear window on the driver’s side. The provided 3M tape holds up well and makes for simple mounting.
I wanted to retain a full view of my truck bed and anything behind me if I had my back seat full. Mounting it on the rear window accomplishes that. Since the provided cable is 21 feet long, I can easily relocate it to my bed rack if desired.
Cable Routing
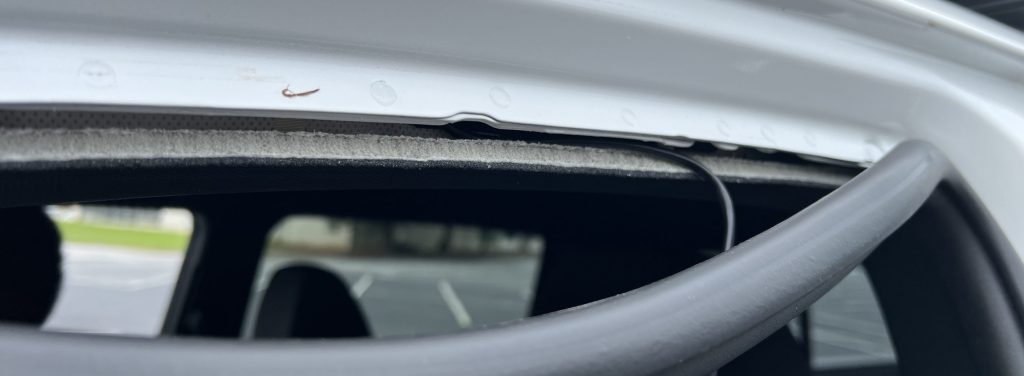
I can be a bit neurotic about hiding cables. Luckily, when routing the rear camera cable, the weather stripping easily slid out of the door jam, and I was able to hide the cables and tuck the excess under the headliner. Up front, I managed to route the cable behind the A-pillar down to my dash.
It may take an extra 10-15 minutes to route all of this cable how you would like, but it is completely worth it. I used a handful of zip ties to keep it rolled up in areas where I had a lot of excess cable.
I do believe zip ties are ranked right up there with sliced bread. You can never have enough!
Front Install
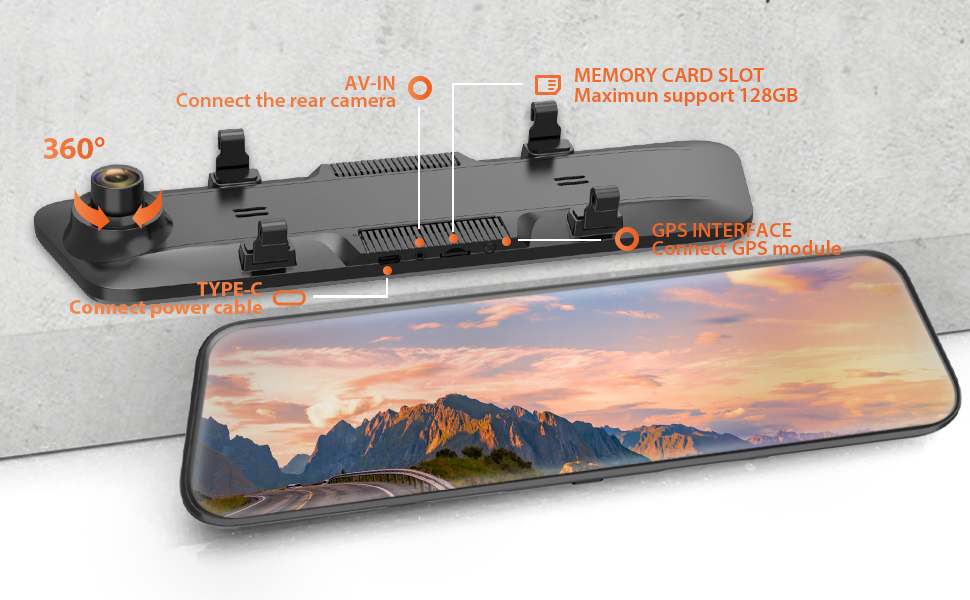
Mounting the 4K front is quite simple. First, make sure the SD card is installed. Now is also a good time to choose a location to mount the GPS module. With the provided tape, I placed it right next to the rearview mirror mount. I was so excited that I had hidden all my wires and lit up on caffeine that I forgot to grab a picture of that.
Wolfbox provides several heavy-duty retainer bands. Simply place the monitor over your existing rearview mirror and attach the bands. They hold it in place very well. Once it is snug, you can plug in the rear and GPS cables. Each has its female-fitting location.
Next is the power supply. Since I went with the Dongar Technologies adapter, I simply plugged the power supply directly into the backside of the rearview mirror.
If you choose to go the traditional route, you can plug your power supply into the 12v cigarette adapter and secure the cable however you would like.
Lastly, this is where you begin using those zip ties and hiding cables for a clean installation. Use as many or as few as you’d like; to each their own.
Top Features
There are a couple of features I would really like to highlight:
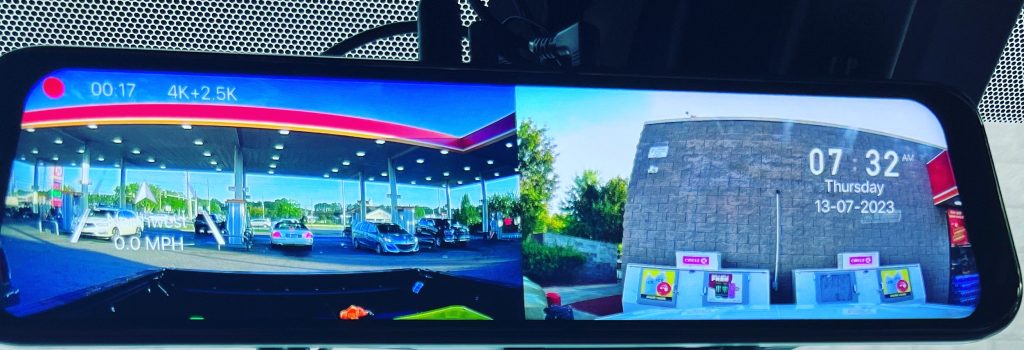
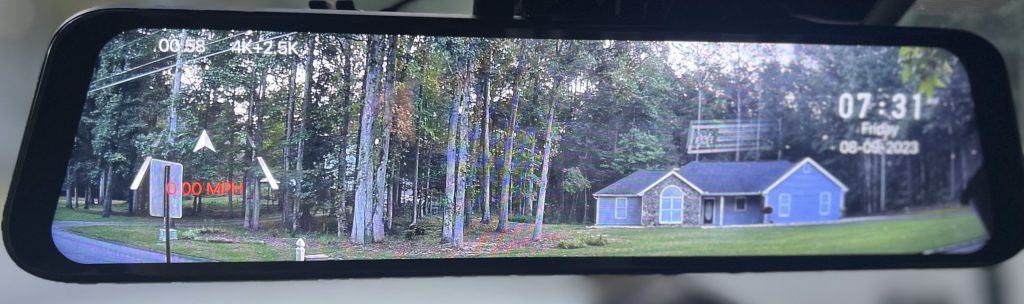
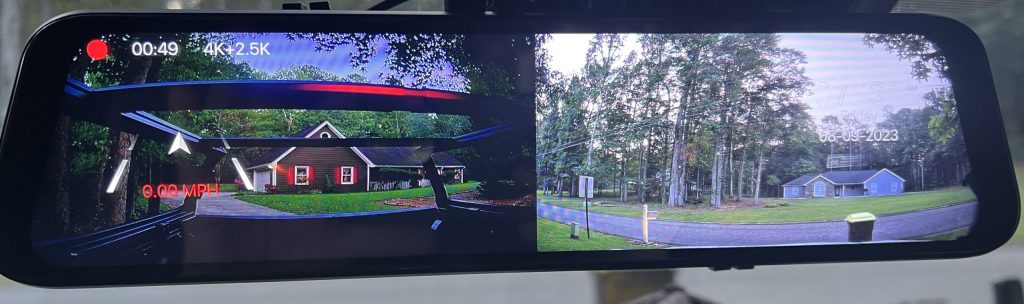
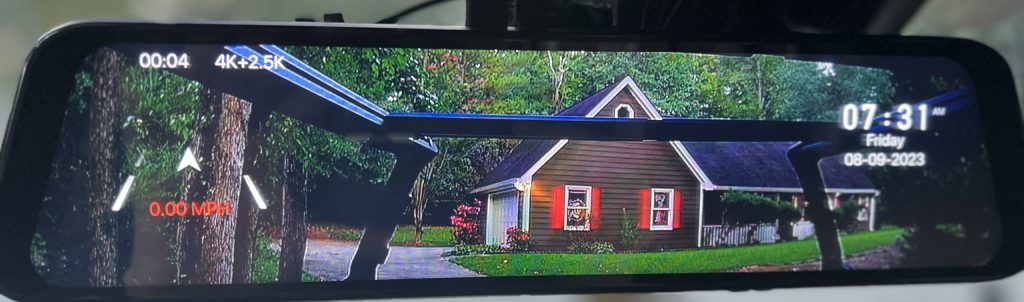
- The main 12″ screen has four settings. You can view the front, the rear, or a combination of both. Switching is simply swiping your finger from right to left. I prefer to drive with the rear one on the left side of the screen and the forward one on the right side.
- The GPS provides and records your approximate speed. For me, this does not start until the system runs for 1-2 minutes.
- You can set the recordings in loops of 1, 2, or 3 minutes.
- The right side of the screen lists the time and date in the owner’s preferred format.
- When using just the forward or rear-facing, the driver can even adjust the field of view.
Final Thoughts
Needless to say, I am completely impressed by and enjoying my new setup. Installation was not too difficult, and it works extremely well. I live in south Georgia, where the heat can be brutal, and this system has held up flawlessly.
Overall, this is a great mod for just about anyone looking to upgrade. I also have several close friends who have this in their 4Runners. With its simple installation, it would work quite well on any vehicle.
Off-road and overlanding vehicles are often lifted and have items mounted that only make blind spots worse. Adding some “insurance” for a safer ride just makes sense. Plus, it’s an excuse to use more zip ties!
Hi, I have also a garmin Mini2 on my TACOMA 3rd Gen powered by a Dongar Technology adapter. Can i use it to powered the Wolfbox 900 ? I do not want extra cable go to the fuse box. Do you know if it works with the 900 Pro ? Thanks you.
Regards
That is exactly what I did. I used the adapter from my Garmin to power the Wolfbox and it worked perfectly. No extra power cables at all.