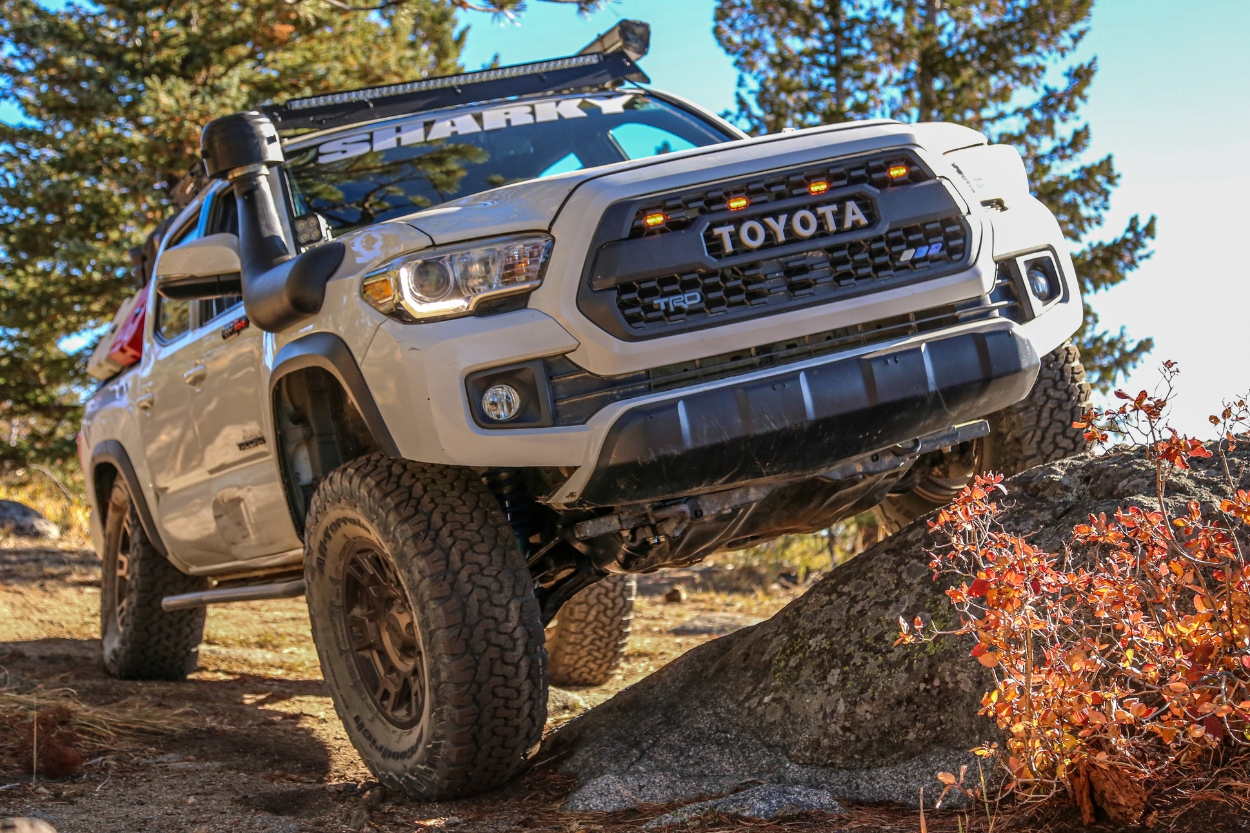
Welcome back to another Taco Tuesday! If you missed last week’s TT, we looked at several awesome Lunar Rock Tacoma builds.
This week we are looking at several Tacomas that have gone to the point of no return; trimming their front bumpers with the increasingly popular viper cut. We asked 11 3rd Gen Tacoma owners why they performed this mod on their Tacomas and if they took the DIY route, or took it to a shop. As you’ll see below, a lot of owners below performed a DIY viper cut.
This week’s featured owners chose to do a viper cut on their Tacomas for a few reasons. The most popular was for an aggressive appearance while also gaining the ability to fit larger tires without rubbing.
Each owner also gives personal tips and tricks for performing the viper cut, if you decide that you want to do it yourself.
As always, feel free to DM the owners on IG to ask any additional questions about their setup if needed.
Enjoy!
Table Of Contents
1. Will Holder: 2019 TRD Off-Road
Did You Do This Mod Yourself?
The viper cut I did to my Tacoma was DIY. I followed the body line on the bumper to the fender flare, so it’s a medium-aggressive cut. It cost me about $40 with renting an angle grinder and buying some edge trim.
Why Did You Do The Viper Cut Mod On Your Tacoma?
I did this to my Tacoma so I could get some extra clearance with the 35s and for the aggressive look. My advice is to measure and tape off both sides to make sure you are cutting them evenly. An angle grinder makes quick work of the plastic so take your time! Also, grab some good-quality edge trim from Amazon to cover up any inconsistencies on the edges.
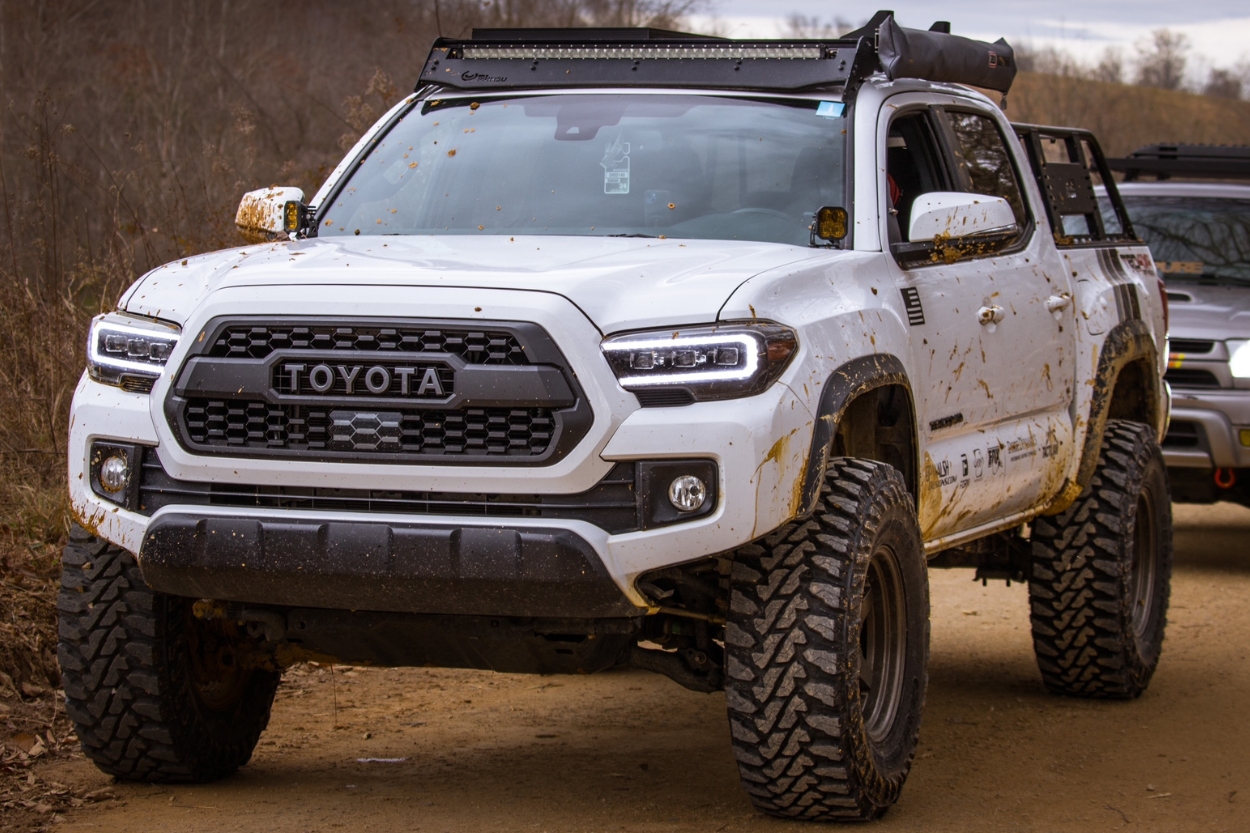
2. Kali Helsel: 2019 TRD Off-Road
Did You Do This Mod Yourself?
My viper cut was DIY. I went with a more aggressive-looking cut rather than a rounded shape. This mod didn’t cost me any money, you just need a few tools and some tape!
Why Did You Do The Viper Cut Mod On Your Tacoma?
At first, I did this to my Tacoma for looks. I really liked the more aggressive look over the stock bumper. After I got more into off-roading and rock crawling, I found the viper cut gives a few more inches of clearance in the front corners.
I recommend drawing out your cut or using tape beforehand because it is a big help. Finish off the cut by using a Dremel to smooth out the edges. This mod took about an hour and was super easy!
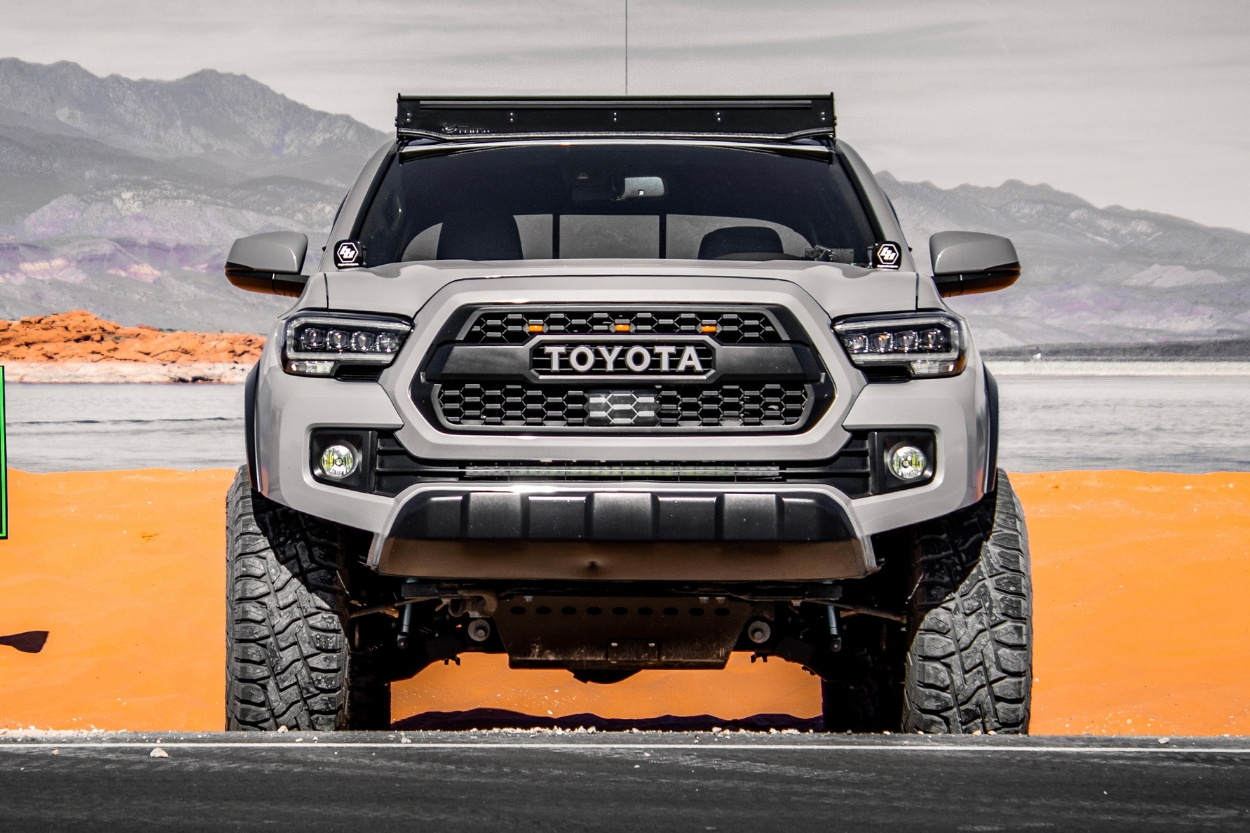
3. Monica Nunez: 2020 SR5

Did You Do This Mod Yourself?
My viper cut was a DIY; I would say my cut isn’t as aggressive compared to other cuts I’ve seen. I used the thick blue masking tape to match up the body lines to make sure my lines were as straight as could be.
The cost to do this modification was about $45-$50. $25 for the Dremel (Harbor Freight) and $10 for the diamond wheel (optional; also from Harbor Freight). I strongly recommend the diamond wheel since the plastic ones that come with the kit often break. I also spent $10-$15 for plastic trimming (O’Reilly Auto Parts) and $5 for safety glasses.
Why Did You Do The Viper Cut Mod On Your Tacoma?
I had a couple of reasons why I did the viper cut. The first is that I love how the cut adds aggressiveness to the Tacoma. Second, I needed to add clearance for bigger tires as I wasn’t sure if this was a must to clear my 295s; and it definitely helped.
The advice I would give to someone wanting to do this to their truck is to measure, measure, measure. Make sure the lines are exactly what you want. Lastly, if you do not have a hole saw to make the turn you want, you can use the edge of the masking tape to make it. Take your time, use safety goggles, and good luck!
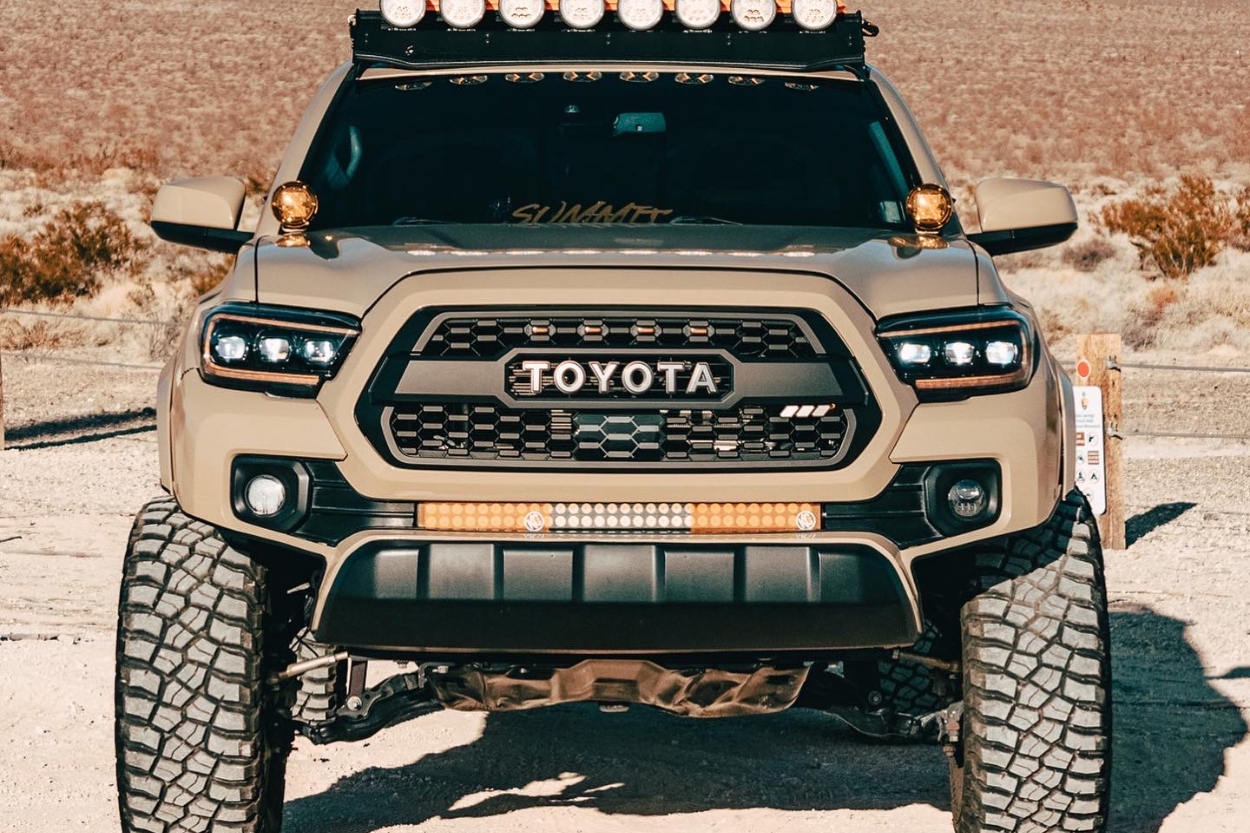
4. Austin Bender: 2019 SR5 Premium
Did You Do This Mod Yourself?
Yep! Mine was DIY! It started very conservatively, but over the years it progressed to a more aggressive cut.
The cost to do this cut is just mainly the tools needed if you don’t have them. Mine involved a Harbor Freight angle grinder, box cutter, Dremel, some Automotive Door edge guard from Amazon, tape measure, and a lot of time to measure.
Why Did You Do The Viper Cut Mod On Your Tacoma?
When I first took a stab at this back in 2019, my main objective was to get a more aggressive OEM look, gain tire clearance, and be able to access places the stock plastic prohibited me from. I had seen something similar to what I liked on social media, but back then there wasn’t much info out there.
I grew up in the car scene with ground effects, body kits, rolling fenders, etc. So, it felt natural to grab an angle grinder, painter’s tape, and measuring tools. I made countless lines with blue painter’s tape to simulate cut lines. I started very conservatively and eventually landed where it’s at today.
The biggest tip I can give is to try to find easy measuring points on the vehicle to match up each side. I used the headlight as my reference point for measuring down. Stand back at different angles and distances to see how it looks to make sure it’s symmetrical. It helps if you find specific body lines to follow. I had to measure three times to cut once.
I used the 4” cutting wheel for 99% of my cutting (make sure to wear a long sleeve and eye protection; the plastic turns to lava!). The Dremel was mainly to go back and smooth everything and clean it up.
Lastly, make sure you get a good durable automotive door edge guard; you can find this on Amazon. This is what will run the length of your cuts to cover it and make it look more OEM and clean. The one I chose has metal reinforcement and a lip to help it catch the edge.
These are the measurements for my cuts:
- From the upper top corner of the bumper cover where it meets the fender and headlight, measure 10 3/4” down.
- Every 6”, move forward to the front of the measurement. It should descend by about an inch.
- Near the fogs, there is a body line about 1” below and this is the line I followed around to meet the other side.
Good luck! I’m definitely looking forward to seeing more unique cuts in the future!
5. Chris Edwards: 2019 TRD Off-Road
Did You Do This Mod Yourself?
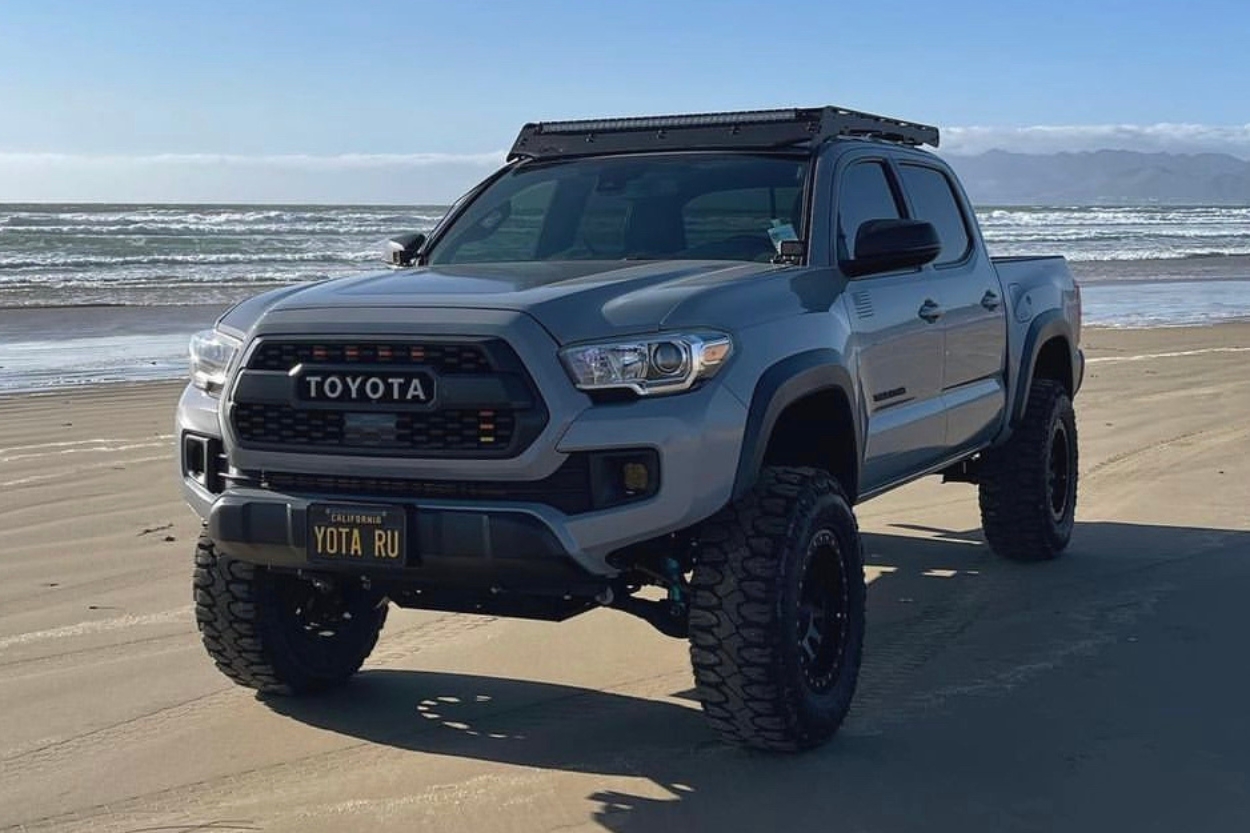
The viper cut was done in my driveway with minimal tools; I used an oscillating tool with 1.5” masking tape. I used the factory body lines with the 1.5” tape for spacing and a 2” hole saw at the corners to get a clean rounded edge.
Why Did You Do The Viper Cut Mod On Your Tacoma?
Having extra clearance was the main reason I did the viper cut. The overall cost was $25-30 if you already have the oscillating tool.
6. Jesse Lujan: 2018 SR5
Did You Do This Mod Yourself?
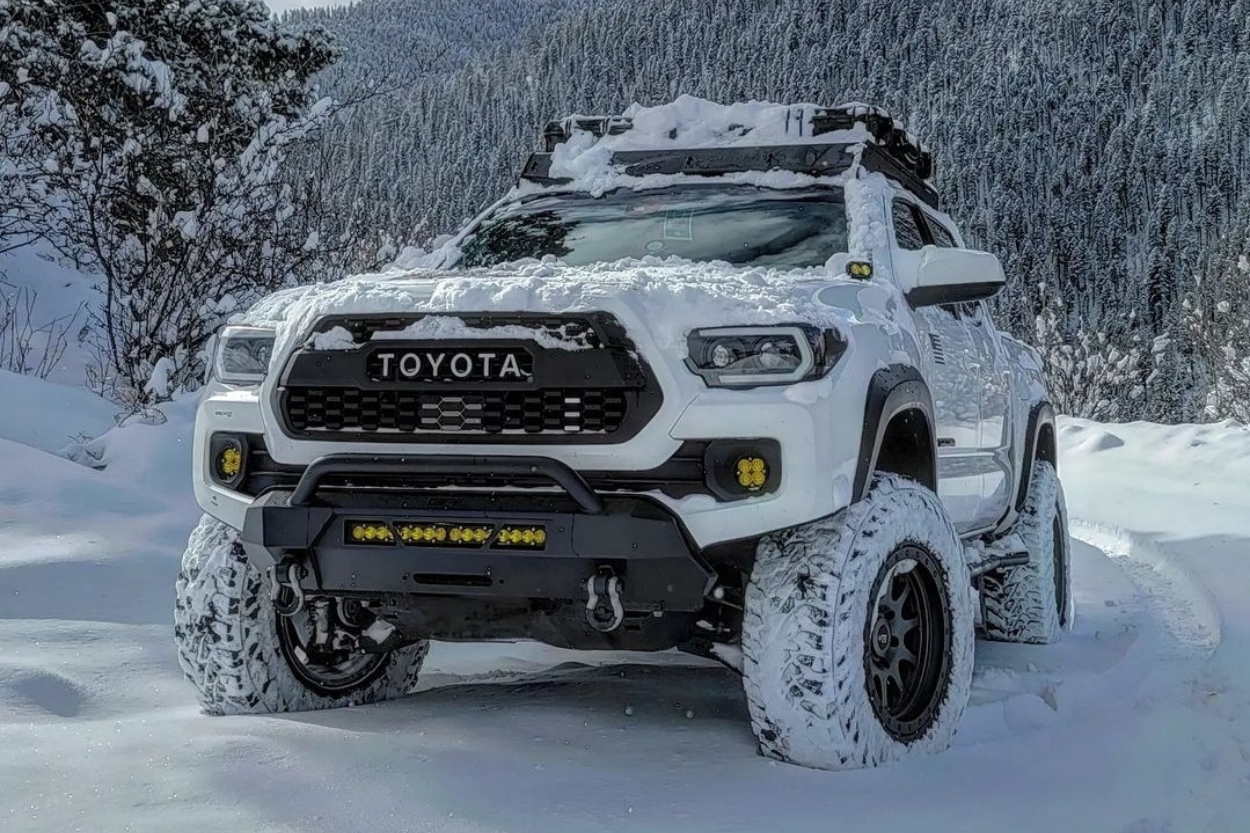
I did the viper cut myself and went with a pretty aggressive trim. This is probably one of the least expensive mods since it only requires using a rotary tool to cut and sand out the edges. The only expense I actually made was buying the trim to cover the edges off Amazon. Otherwise, it’s a fairly cheap and effective modification.
Why Did You Do The Viper Cut Mod On Your Tacoma?
I was looking into fitting bigger tires and knew that without the viper cut, they would definitely rub on the front. I would suggest going with a less aggressive cut at first and cutting more as necessary. All you need is a rotary tool; I used a Dremel and worked perfectly.
7. Maxim Bethurem: 2017 TRD Off-Road
Did You Do It Yourself?
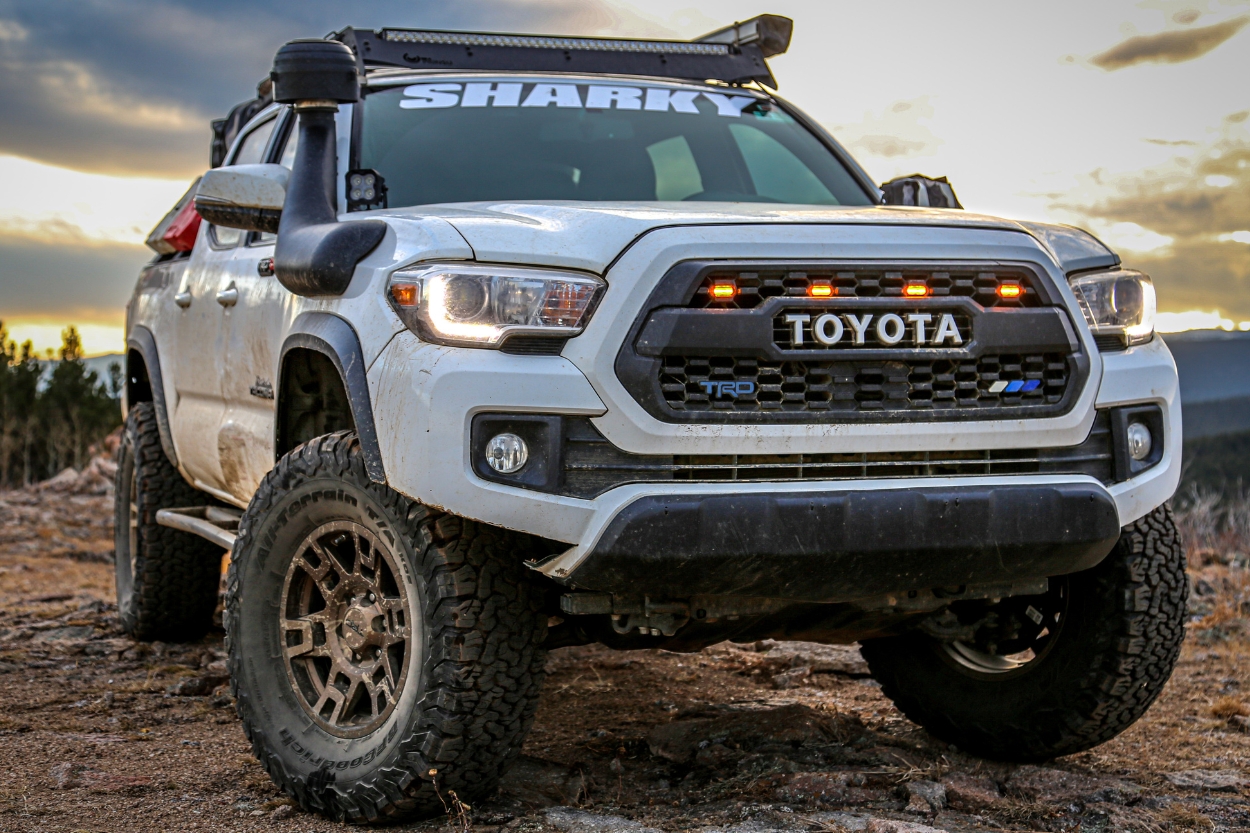
The viper cut is a super simple and easy DIY mod that if you have the tools, comes at no cost. It gives a similar look to adding a bumper without spending the money. I was able to do mine in under 30 minutes with an oscillating tool. You are only cutting plastic so it’s super safe, easy, and you don’t have to worry about dealing with rust.
Why Did You Do The Viper Cut Mod On Your Tacoma?
The viper cut mod was something that caught my eye once I installed my king shocks. I loved the way it reveals more of your tires and shocks. It definitely gives the truck a much more aggressive look and gets rid of the bulky front-end look. In addition, it gives you a bit more clearance when trying to get your tires up on rocks from an angle, so I thought, why not!
The process is super easy, I recommend using painter’s tape and drawing a line with a sharpie to cut. I also recommend that you use an oscillating tool to cut and sandpaper to clean up the edges. It will cut like butter and make the job super easy.
8. Hee Joon Joo: 2021 TRD Off-Road
Did You Do This Mod Yourself?
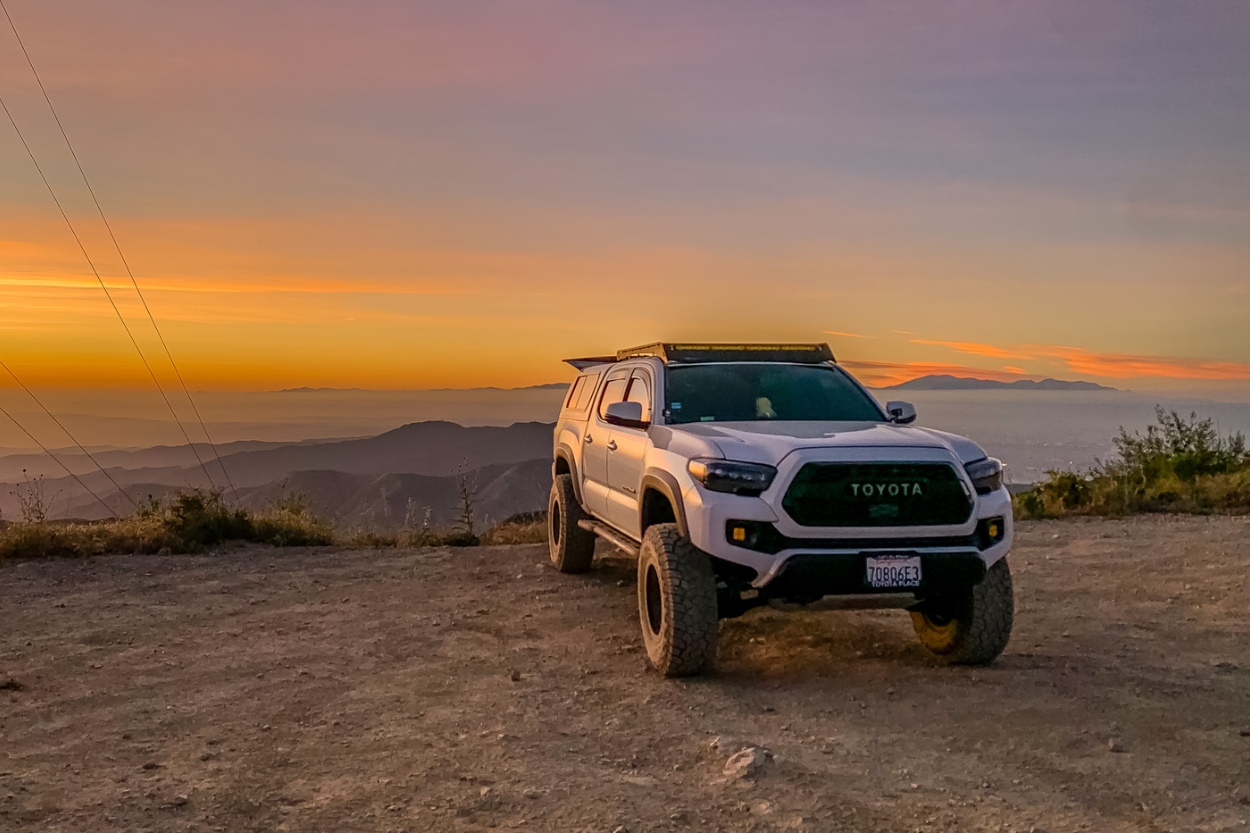
No, I paid Sibi Built to do my viper cut. They are a shop located in Santa Ana, California.
Why Did You Do The Viper Cut Mod On Your Tacoma?
My main reason for getting a viper cut on my Tacoma was to avoid rubbing with my aggressive tire/wheel setup. I have 17×9 -38mm offset wheels with 295/70R17 tires. With such an aggressive viper cut, I was able to avoid rubbing in the front.
That’s not the only benefit of the viper cut, however. It gave the Tacoma such an amazing look from all different angles. If you are itching to get an aftermarket front bumper but don’t want to spend that pretty penny, I highly recommend getting a viper cut.
9. Jake Forrester: 2022 TRD Off-Road
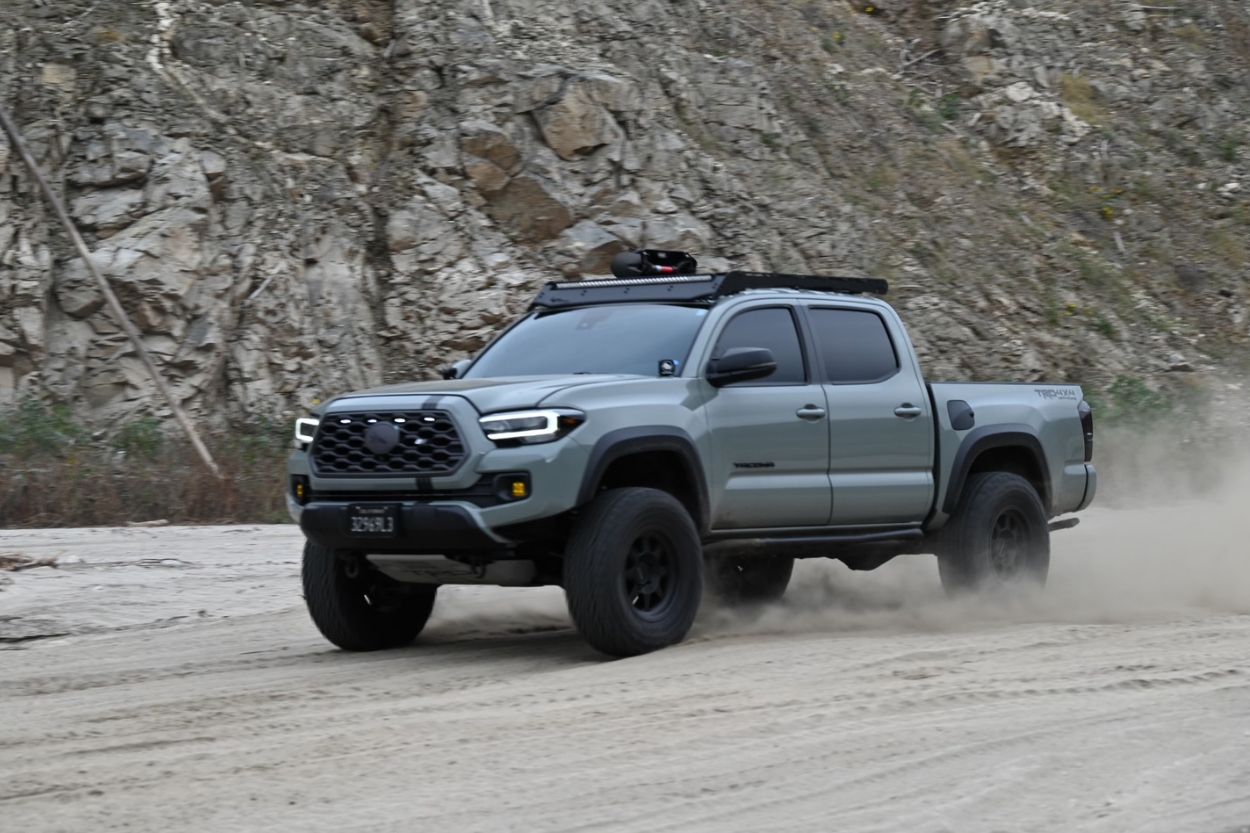
Did You Do This Mod Yourself?
No, I had a local shop handle the viper cut for me since I didn’t trust myself enough to make it even on both sides. I went with the highest cut possible for the most aggressive look. It cost me about $250 which I thought was reasonable.
Why Did You Do The Viper Cut Mod On Your Tacoma?
I don’t plan on adding a new front bumper anytime soon to my Tacoma. I like having the lightest truck possible since this is my daily driver as well as my adventure rig. The viper cut gives me clearance to run bigger tires and added clearance for the trails. I love the aggressive look that the viper cut gave my Tacoma while keeping it slim and light.
10. Nick Salsbury: 2019 TRD Off-Road
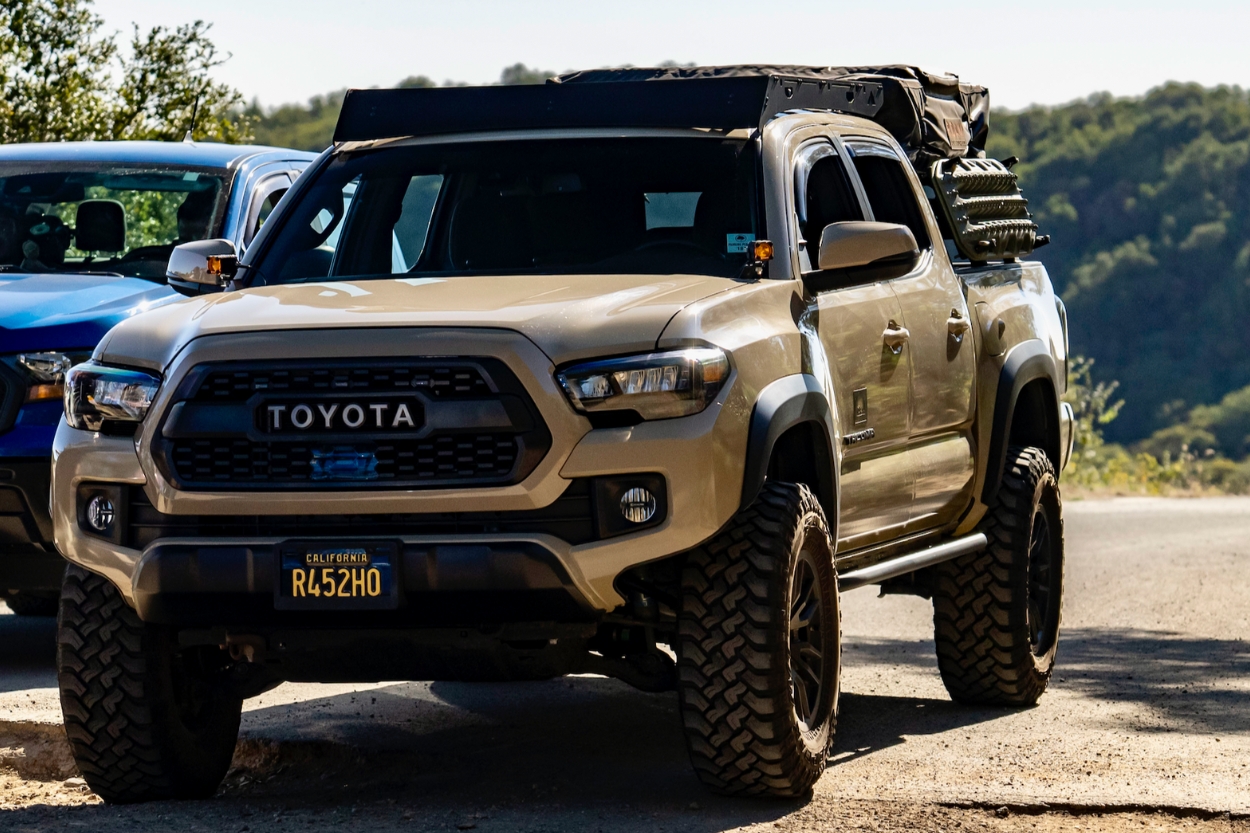
Did You Do This Mod Yourself?
No, I hired a shop to perform my viper cut. I like to think of my viper cut as “tastefully aggressive”. It is cut pretty high up on the fender toward the hood, but not as deep as some I have seen towards the center of the truck, near the front bumper cover.
I opted to have weather trim added to both the bumper portion of the cut and the remaining fender piece for a cleaner look. I don’t remember the exact cost but I think it was in the $250 range, which I think is a great price to have it done right.
Why Did You Do The Viper Cut Mod On Your Tacoma?
Like many, I did this to give myself more tire clearance. I’d love to go up in tire size at some point and honestly, I might have to as I have a lot of miles on my current setup.
I also did it because I know that for my build, I won’t ever (knock on wood) be adding bumpers. So, giving myself clearance without the added weight is a long-term choice. Also, I always thought it gave the truck a more aggressive front facia.
I did not do this myself but I think the biggest takeaway I have is, really think about whether you want it. Don’t just jump in, and have it done or do it. I think looking at examples both online and in person is important, as it’s a permanent change.
11. Grant Shabacon: 2019 TRD Pro
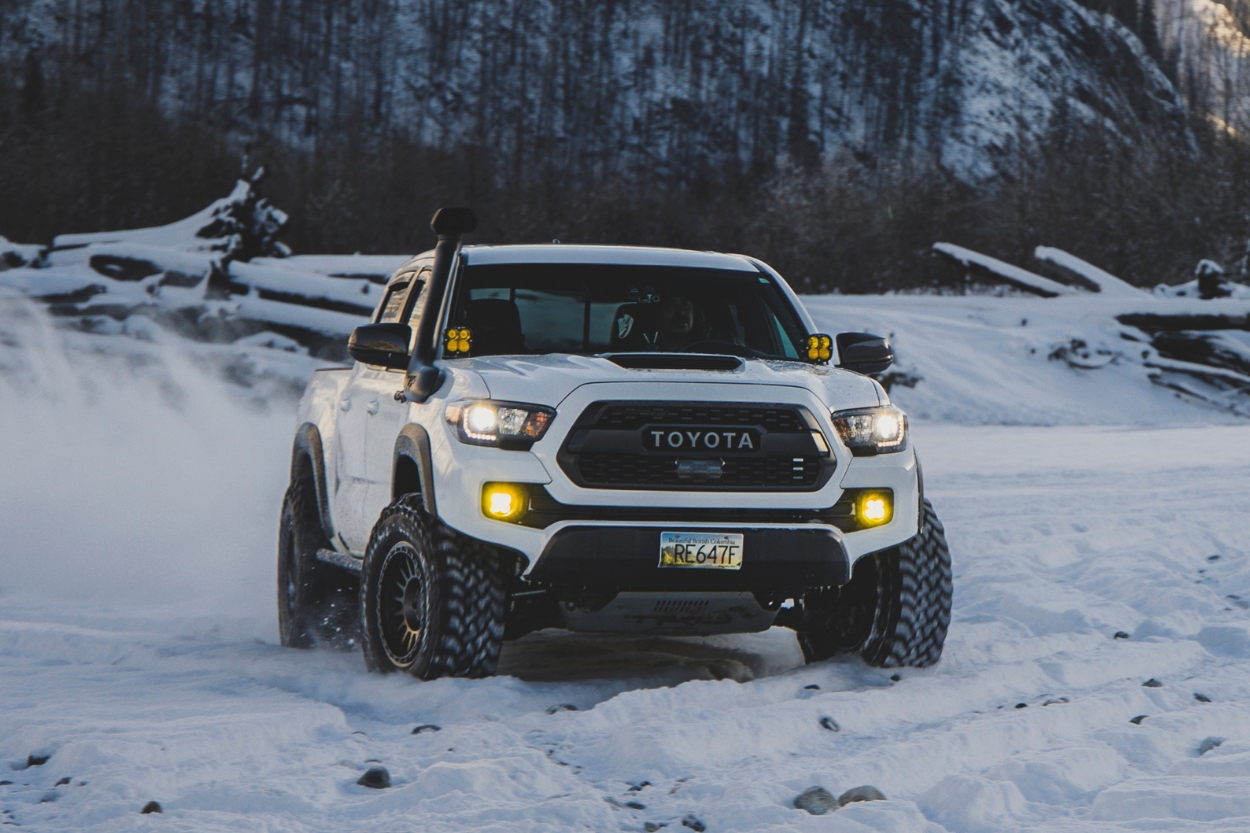
Did You Do This Mod Yourself?
My viper cut on my Tacoma is a DIY job. I’d say the cut that I went with is mid aggressive cut. The only cost was buying the trim liner for $32.
Why Did You Do The Viper Cut Mod On Your Tacoma?
Limited clearance is a big issue for anyone who wants to off-road without an aftermarket bumper. Doing the viper cut provides you with that extra bit of clearance in your wheel wells that you need. As a bonus, you can clear bigger tires as well.
The viper cut wasn’t that hard, it just takes time. I would say just make sure the measurements are even on both sides. I found the easiest way was to use a hole saw to get your lines straight then adding the edge trim just cleans everything up.
Final Thoughts
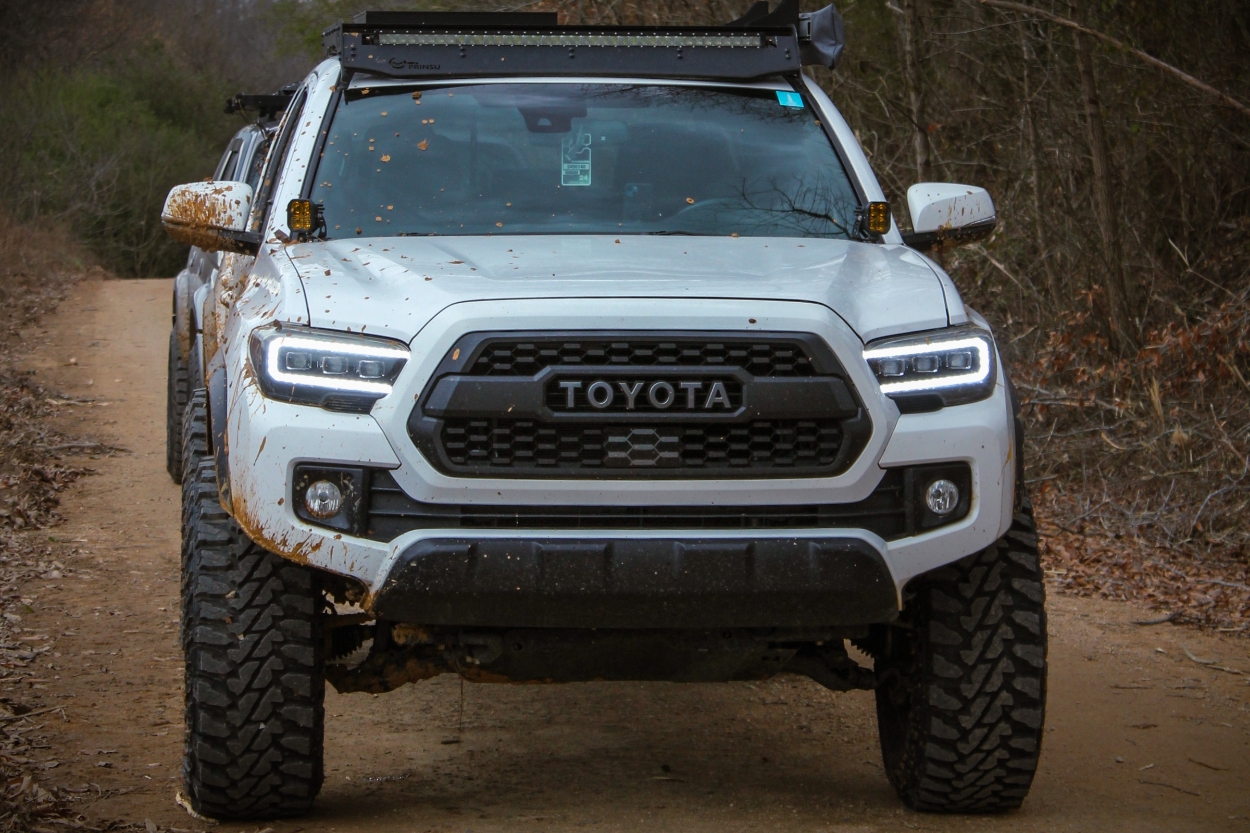
So I only have 285/70R17 on my Tacoma with -10mm offset wheels and still had to trim my Tacoma’s front bumper a bit to help clear the tires. The Tacoma really doesn’t like tires larger than the OEM size.
I am about to get a new Tacoma and am now super inclined to do a high-clearance viper cut paired with the lo-pro bumper. If I go this route, then I may run even larger tires; why not!
If you want to be featured for Taco Tuesday, submit your build through TrailTacoma.com/Feature. Next week’s Taco Tuesday will be featuring Owners’ Top Recovery Gear Items. We’re looking for sweet rides to showcase! If this is you and you love your setup, send in your details because we want to see it.
Thanks for reading guys. I’ll see you next week!


