
Tires are usually the first and possibly the most important mod we do when building a truck. Today, we are going to cover two commonly asked questions when it comes to the Toyota Tacoma and running bigger tires.
- What is the largest size tire I can run?
- Can I fit 33″ tires with no lift?”
The 33″ (285/70R17) tire size is a great tire size for the Tacoma because even if you don’t have a lift kit or leveling kit, it takes very little effort to clear the fender well. If you add a suspension lift into the mix, and it gets even easier to clear this size tire.
Before we jump into a full suspension lift, let’s look at what it takes to clear these tires without a lift.
Table Of Contents
Stock Tire Size

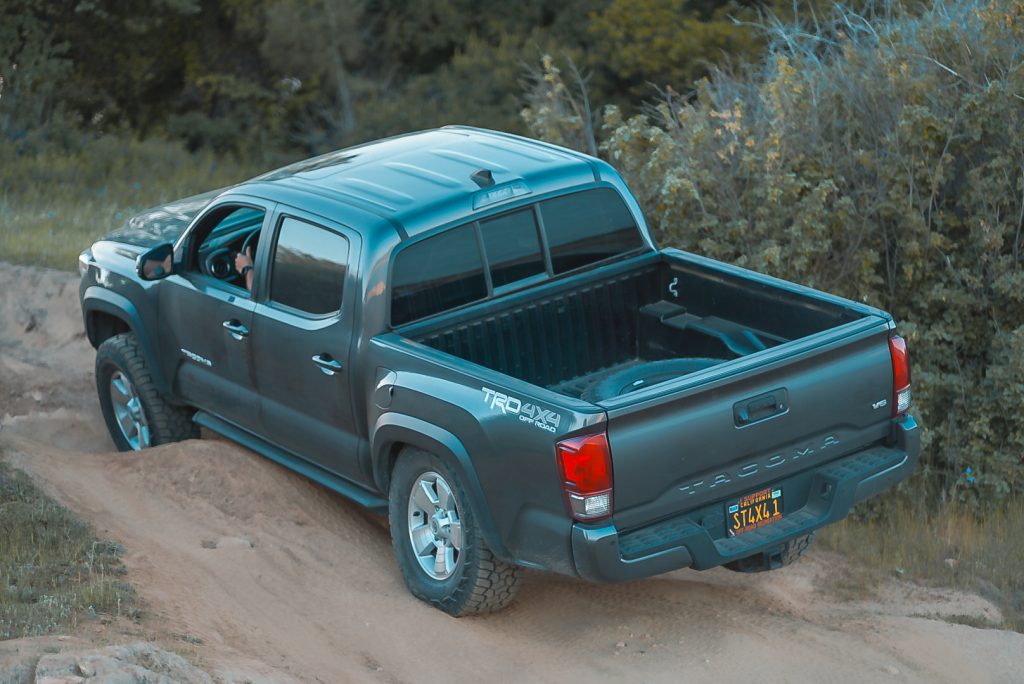
Pictured: @snailtrail4x4 with no lift and 33″ (285/70R17) Yokohama Geolanders
The stock tire size for 3rd Gen Tacos varies on what trim package your Tacoma came with.
2016+ Tacomas have the most tire sizes available out of all the other generations of Tacomas which makes sense considering there are more trim packages available. Today, we will be referencing the 17″ wheel size as that’s what most Tacoma owners move up to from the 16″ wheel on most models. Most aftermarket wheel designs are offered in a 17″ wheel, not 16″ so it’s more relevant for us to cover the 17″ wheel size in depth. If you are running a 16″ wheel, the 33″ equivalent to a 285/70R17 is a 285/75R16.
| Trim Package | Tire Size |
|---|---|
| Base | 245/75R16 |
| SR5 | 245/75R16 |
| TRD Sport | 265/65R17 |
| TRD Off-Road | 265/70R16 |
| Limited | 265/60R18 |
| TRD Pro | 265/70R16 |
Why Run Bigger Tires?

Why would anyone want to cut up a perfectly good Tacoma to fit slightly larger tires?
Not only do bigger tires drop MPGs and cause the Tacoma to feel sluggish on the highway, but also bigger tires require some sort of cutting and/or trimming.
More Ground Clearance
When you add a suspension lift to your truck, you raise the static height, which raises the chassis. Although the control arms act as a link between the chassis and suspension components, the distance from the control arm to the ground stays relatively the same, even with a lift. Bigger tires help bring these components higher off of the ground for increased clearance.
Better Traction
Another helpful benefit of larger tires is more traction. We really notice a difference when we air the tires down when it’s time to hit the trails. If you’re interested in learning more about tire pressures, check out this guide to off-road tire pressures.
By decreasing the PSI of your tires, you increase the width of your tire size, and ultimately, the amount of contact the tire has with the ground – this is also described as a tire’s contact patch. When you go from a stock tire size (~265/70R17) to a 33-inch tire (285/70R17), you increase the width of the tire by about 8% from ~10.4 inches to ~11.2 inches. The change in total tread contact is even more drastic the lower the PSI is.
Balanced Look
If you lift your Tacoma, depending on how much lift you add, it may look like you ‘skipped leg day’ (tires look too small and skinny). Bigger tires will add a more aggressive/balanced look to your Tacoma. The larger the tire, the better the truck tends to look, but not always. If you start getting into the 37″ and 40″ sizes, you demand the need for beefed-up parts; CV axles, stronger control arms, tundra steering rack swap, or even a straight axle swap.
So why do you need bigger tires? Mainly for increased ground clearance, better traction, and a more aggressive stance.
Why Choose 33″ Tires?
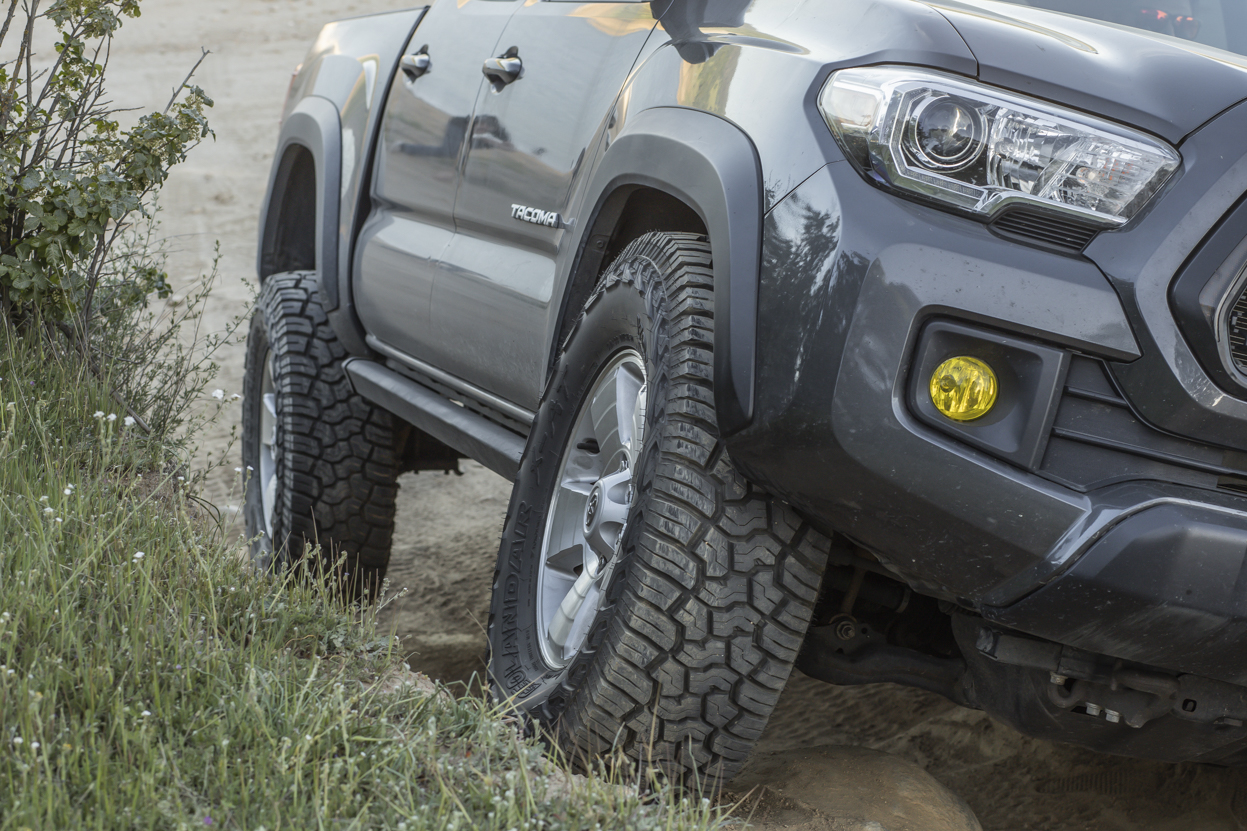
Pictured: @snailtrail4x4 with no lift and 33″ (285/70R17) Yokohama Geolanders
33s are arguably the perfect size for someone who daily drives their Tacoma but likes to hit the trails on the weekend. Technically speaking, for a TRD Off-Road, the next size up (275/70R17s) would only add about an inch to the overall diameter of the tire.
On the other hand, 285/70R17s (33s) are almost a full 2 inches larger than the stock tire size. This not only will be the most noticeable difference when it comes to looks but will give much more ground clearance than the stock size tires. The best part is, they require little to no trimming with a lift. Without a lift, however, it is a bit of a different story.
Re-Gearing
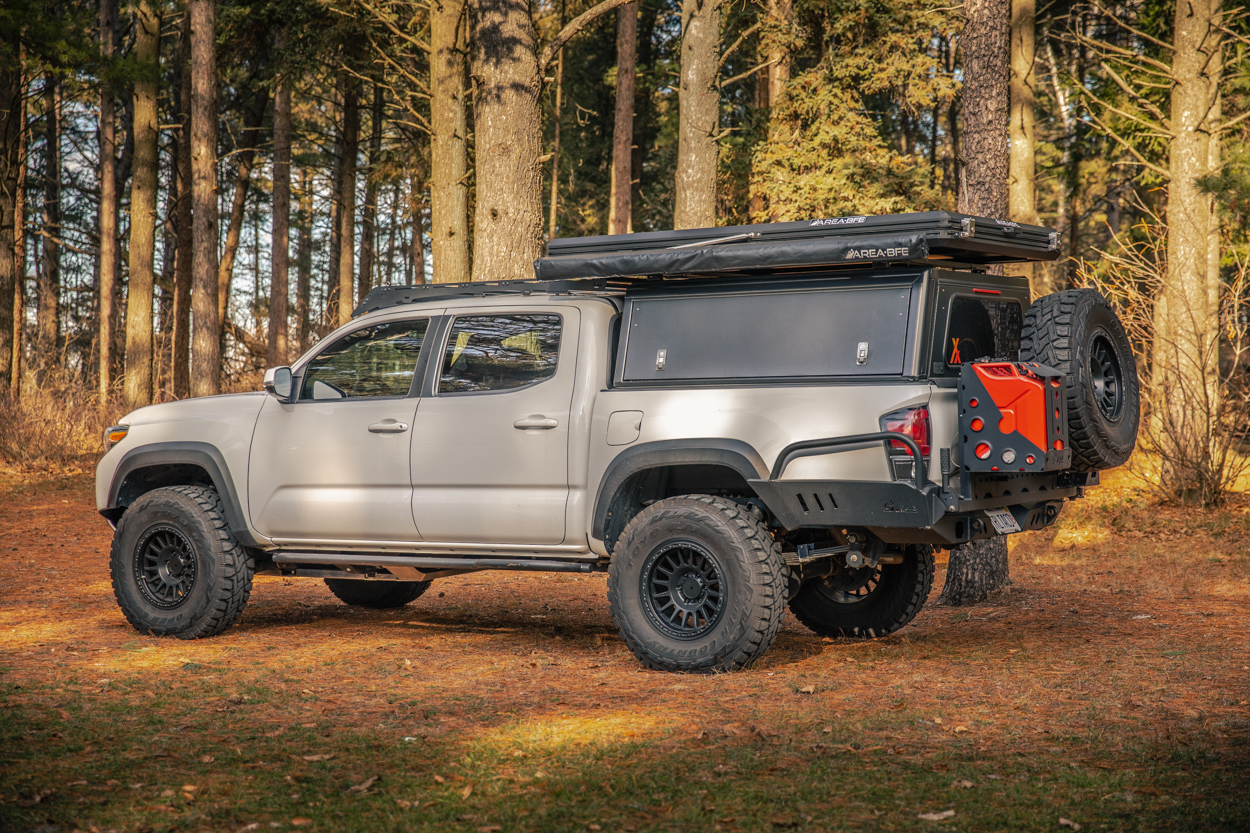
Re-gearing with 33s may not be necessary, but it is also not a bad idea. 3rd Gen Tacoma with the 3.5L came with two different ratios from the factory: 3.909 for the auto trans and 4.30 for the 5spd and 6spd manual trans. 4.88s would be the perfect ratio for anyone running them. Although, the guys at Nitro Gear have argued that even a stock Tacoma would benefit from the largest gear ratio upgrade they offer for the Tacoma, the 5.29s.
To put things in perspective, most people don’t usually re-gear until they get into 34″ and 35″ tires. Even so, some people choose to pass on re-gearing due to the cost and general labor involved ($1000 for gears, $1000+ for labor, add an air locker and you’re at $3000+). I can assure you though, you don’t want to pass on re-gearing.
If you go up to 33″ tires, you should re-gear your Tacoma in order to regain your factory speedometer accuracy, reduce or eliminate that dreaded gear-hunting, all the while putting less stress on the drivetrain. If you go with anything above; 285/75s, 295/70s, 305s 315s, 35X12.5s, etc. – you should consider upgrading your ring and pinion.
A good shop we go to for Re-Gearing is Stellar Built in Sacramento, CA. They re-gear differentials, provide part installs along with custom fabrication, and much more.
33s No Lift?
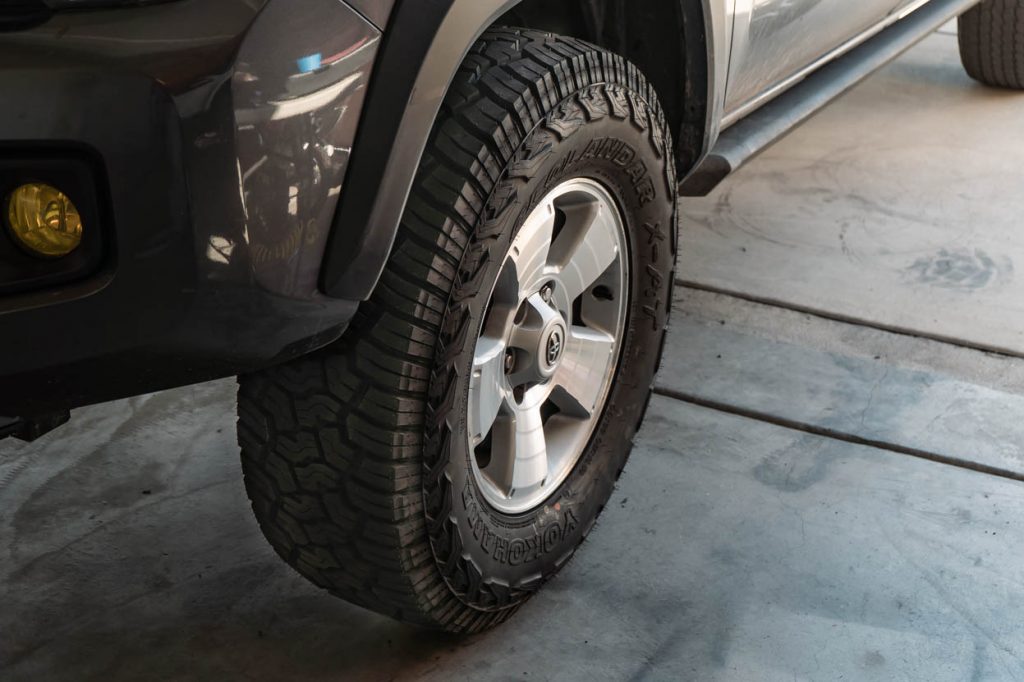
Can you fit 33″ Tires on a Stock Tacoma?
Yes and no. Without doing any modifications you can install 33s on and drive in a straight line without any issues. Problems arise when you turn. To fully clear 33″ tires with no lift, minimal trimming is required, and you need spacers to clear the UCAs.
We first fit the 33s on our 3rd Gen Tacoma without the use of wheel spacers. The rubbing on the body actually wasn’t that bad and you can drive on them with minimal contact on the fender plastics; however, once you turn, the tires rubbed incredibly bad on the upper control arms.
We ran into the same issue when we put 33s on our lifted 2nd Gen Tacoma – even with aftermarket control arms and a lift. The rubbing on the body was virtually non-existent, but the rubbing on the control arm was unbearable. With this issue alone, the truck is un-driveable and definitely not fit to go off-road.
After we added a 1.25″ spacer to the 3rd Gen Tacoma – the rubbing on the UCAs was eliminated but the rubbing on the body was very bad since we increased our scrub radius by moving the tire outward.
Can you fit 33″ Tires on a Tacoma without a lift and no mods?
No, you can’t fit 33s on a Tacoma without doing any modifications; trimming the fenders & fender well plastics and wheel spacers.
The only way to fit 33s without a lift is to spend some time clearing space for that size tire. This should include testing for both on and off-road scenarios.
33s With A Lift?

Pictured: @snailtrail4x4 testing off-road stuffing tires with no lift and 33″ (285/70R17s)
Yes, you can fit 33s with a lift. Although lifts don’t always clear tires, they definitely help. When it came to fitting them on our lifted 2nd Gen vs the stock 3rd Gen, it was much easier to get them to comfortably fit on the lifted truck. After we fixed the rubbing on the upper control arm, we barely rubbed on the inner fender coming off of curbs.
If we pushed the caster on our adjustable SPC upper control arms forward 1 degree, we would be free and clear 100%. This is a good example of even though lifts don’t clear tires, they definitely help. Just by lifting the chassis, you gain much more clearance than if you were to not lift the truck at all.
UCA Clearance

Without wheel spacers, we rubbed pretty bad on the upper control arm. The tire makes contact with the control arm even while driving straight, and gets much worst during turns. This will definitely cause problems if you were to leave the tires rubbing on the control arms and not address it.
Clearing the UCAs
Luckily there are two easy fixes to clear the control arm. Wheels with more aggressive (negative) offset, or hub-centric wheel spacers.
Although there aren’t many downsides to running aftermarket wheels or spacers, there are some things that should be taken into consideration. For starters, anytime you move the outside edge of the tire away from the hub, you decrease the life of your wheel bearing and other hub components. The difference won’t be huge, but it’s worth noting the increased wear.
Additionally, when you move the tire away from the hub, you increase your scrub radius. The reason we were barely rubbing on the body without spacers, and rubbing extremely bad with spacers is due to scrub radius. The farther you bring the tire and wheel out, the worse the scrub radius will get. Ideally, you would want to find a happy medium; enough offset or spacer to just barely clear the upper control arm. This will solve the rubbing issue on the control arms all while keeping your scrub radius to a minimum.
Changing Wheels
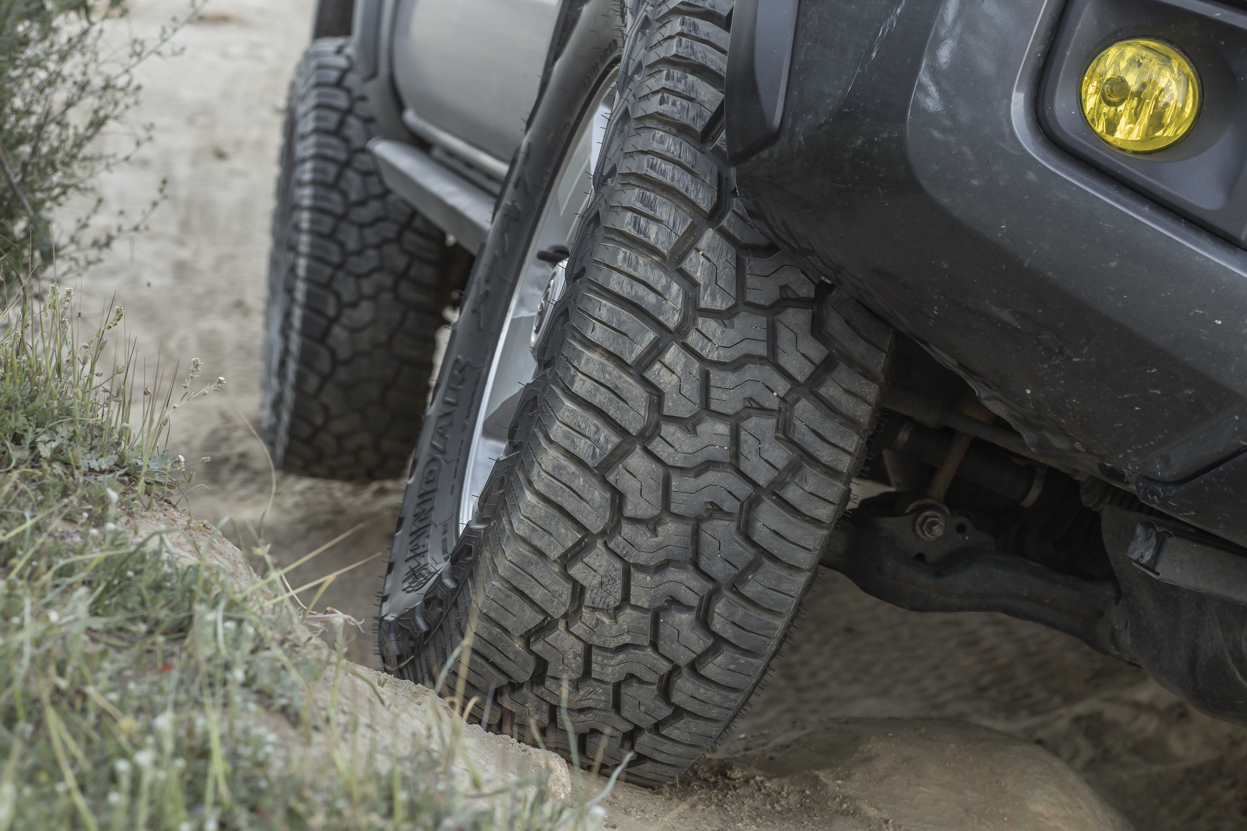
One way to clear the upper control arms is to buy aftermarket wheels with a more negative offset. This method requires that you purchase a new set of wheels, but a lot of us are going to be buying new wheels at the same time we get new tires anyway.
The reason the 33s rub so bad on the upper control arms is due to the positive offset in the wheels. The stock TRD Sport wheels we mounted the 33s on, have +30 offset which means the inside of the tire is 30mm towards the inside of the wheel well from where the tire mounts to the hub.
How Much Offset is Needed to Clear the UCAs?
To clear the control arms you would need a wheel with at least +16 offset. If you want to stay with factory wheels, the TRD Beadlock wheels have +10 offset and the TRD Pro wheels are close to 0 with +4 offset.
While aftermarket wheels are not always the most budget-friendly option, they definitely make your truck stand out in a good way.
Offset for stance?
A good mild offset is around -6mm or even -12mm.
For guys that want that ” wheel poke” you should consider the -25mm (1″) or even -38mm (1.5″) offset wheel. That will push the wheels outside the wheel well big time. Alternatively, you can run wheel spacers and wheels with offset, just do your math.
For reference, I run a -12mm wheel and 1.25″ wheel spacers. Which technically gives me a total of 1.75″ of “space” not necessarily offset. Offset and wheel spacers are not the same but they both reach the same end goal; giving the truck a meaner, more aggressive stance.
Spacers
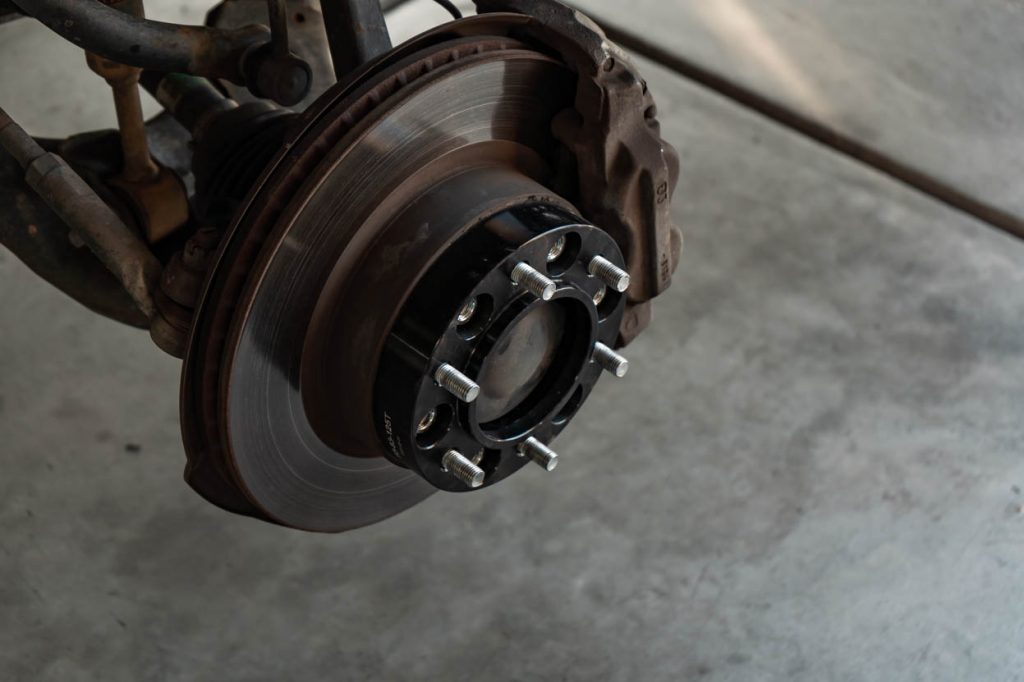
Another option to clear 33s on upper control arms without a lift is to install wheel spacers. Wheel spacers are a pretty controversial topic in automotive circles. But with companies like Spidertrax, who make a hub-centric wheel spacer right here in the US, as long as they are installed correctly, they are perfectly safe.
Much like finding a happy medium with a 0 offset wheel, the same can be achieved with wheel spacers. We initially installed 1.25″ spacers after we found that the tires rubbed on the upper control arms. Although they did indeed clear the upper control arms, the scrub radius made the rubbing much worse, just in a different area.
How Big of a Spacer Do You Need to Clear UCAs?
Later on, we mocked up a 1/2″ spacer with some cheap shims off Amason, which even though it cleared the upper control arm, the spacer itself was pretty sketchy since it was not hub-centric and very universal. Something you definitely would not want to drive on long-term, let alone go off-roading with. But what the 1/2″ spacer showed us is that we really don’t need much to clear the upper control arms.
The 1/2″ spacer converts to +16 offset wheels, which is where got that number from up above which is the minimum amount offset or clearance to completely clear the upper control arms. We ended up buying a 3/4″ hub-centric spacer and that fixed our rubbing issue on the control arm, as well as keeping the scrub radius down.
Where Do They Rub?
The four main spots the tires rub on are the firewall, body mount, fender flare, and inner fender.
The worst spot is by far the fender flare, we literally had to hold it back while testing fitting the tires so it wouldn’t break off. Other than that, the rest of the rubbing is tolerable.
These are the spots they would rub if we were to lift it, take it off-road, and stuff the tire into the wheel well.
Firewall
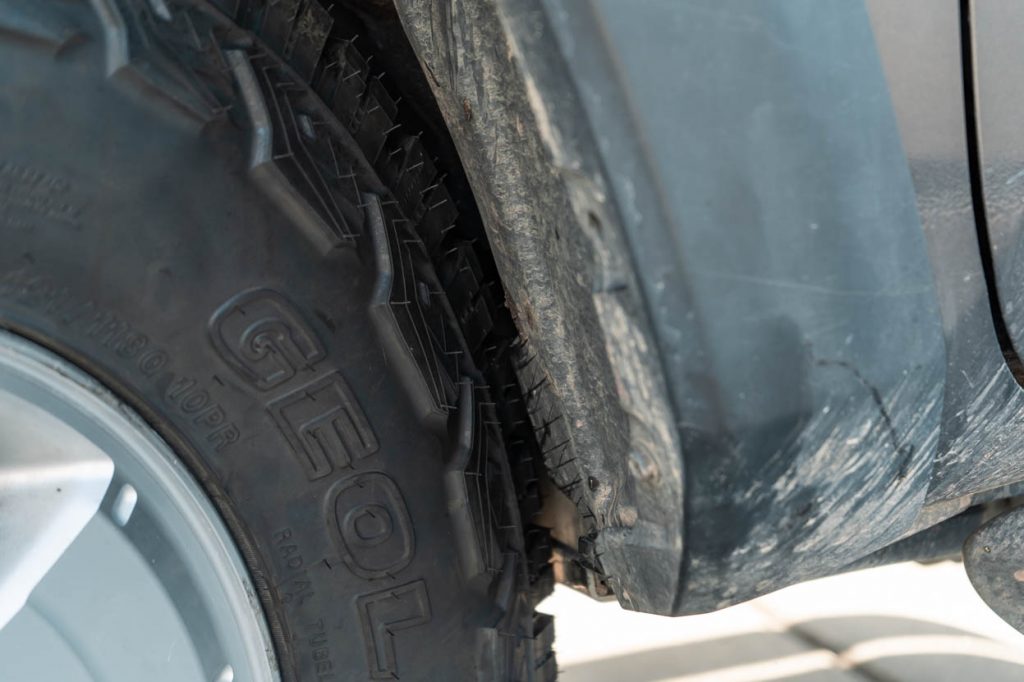
Naturally, we rubbed pretty bad on the back of the inner fender that touches the firewall. This back section is where we did 75% of our rubbing, especially while turning.
Fixing Rubbing on Firewall?
- Hammer back the pinch weld
- Trim the inner fender and slightly trim spots on the firewall
- Use a heat gun and a hard rounded object to push everything back
- Adjust the caster with aftermarket upper control arms
- Tub the firewall (very extreme measure, much easier to lift the vehicle)
While the previous solutions will work, the work is really not worth the effort. There are plenty of 32″ tires that will fit without major modification (no lift), and if you’re serious about running larger tires, we recommend that you upgrade your suspension to save yourself the headache.
Body/Cab Mount

The rubbing on the body mount with 33s was not that bad.
With the 1.25″ spacers, the tires barely touched the end of the body mount, but if we were to take it off-road, the rubbing would get worst as we flexed the suspension even farther into the wheel well.
Fixing Rubbing on Body Mount?
- Body/cab mount chop (BMC)
- Body mount relocation
- Adjust the caster with aftermarket upper control arms
Lower Rear Fender

Without a doubt, the worst place we rubbed was on the bottom part of the fender flare. In the photo above, if we turned hard driver, the tire would glide right past the plastic piece on the fender flare. On the way back, the tire tried to rip that plastic piece off. This is not something you want happening to you while cruising around the mall.
Fixing Fender/Flare Rubbing?
- Trim the bottom of the flare
- Adjust the caster with upper control arms
Front Inner Fender
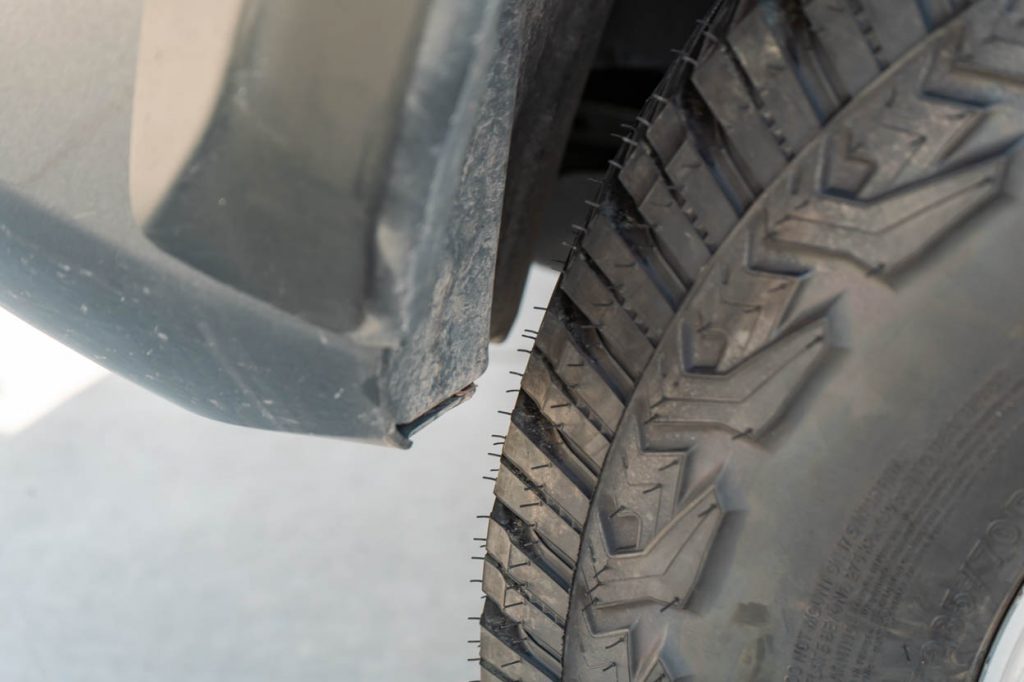
The tires just barely contacted the front inner fender liner at full lock.
They just slide past it and don’t get hung up as bad as the rear fender flare.
Fixing Front Fender Rubbing?
- Trim the inner fender/liner
- Fender liner push back mod
Driveability

Pictured: 33s (285/70R17) in the front and stock tires (265/70R16) in the rear
The question “can you fit 33s with a no lift?” really translates to “will my Tacoma be driveable with 33s and no lift?”
Big tires are awesome and provide a lot of benefits on and off the road, but none of that matters if you can only drive in a straight line.
On-Road
33s with no lift and little modification (no cutting) will work if you never leave the pavement. After doing the minimal trimming and pushing back the inner fender, we were able to get the tires to turn with slight rubbing. At full lock, the tires barely come in contact with the firewall and the body mount, and both of those can be addressed. Parking lots and really anywhere on-road you will be fine. As I said, the tires still barely rub near the firewall, but that rubbing should definitely be addressed before you take the Tacoma off-road.
Off-Road
To comfortably take your Tacoma off-road without a lift and 33s, you would have to do some more aggressive clearance. The first thing I would do is a body mount chop or relocation to help clear the body mount. Next, you would have to do some work to clear the tire better on the firewall. For clearing the firewall and fender plastics off-road, just take a razor blade and cut out the portions of the fender liner until you can fully stuff your tires without rubbing.
The reason for all of that is when you go off-road, you’re going to be tucking the tire into the fender well and most of the time you’re going to have to turn the wheel while you’re tucked. You do not want any rubbing to keep you from being able to maneuver around an obstacle correctly. Not to mention the more you rub, the bigger the chance is you’re going to break parts or chew your tires up.
How To Clearance
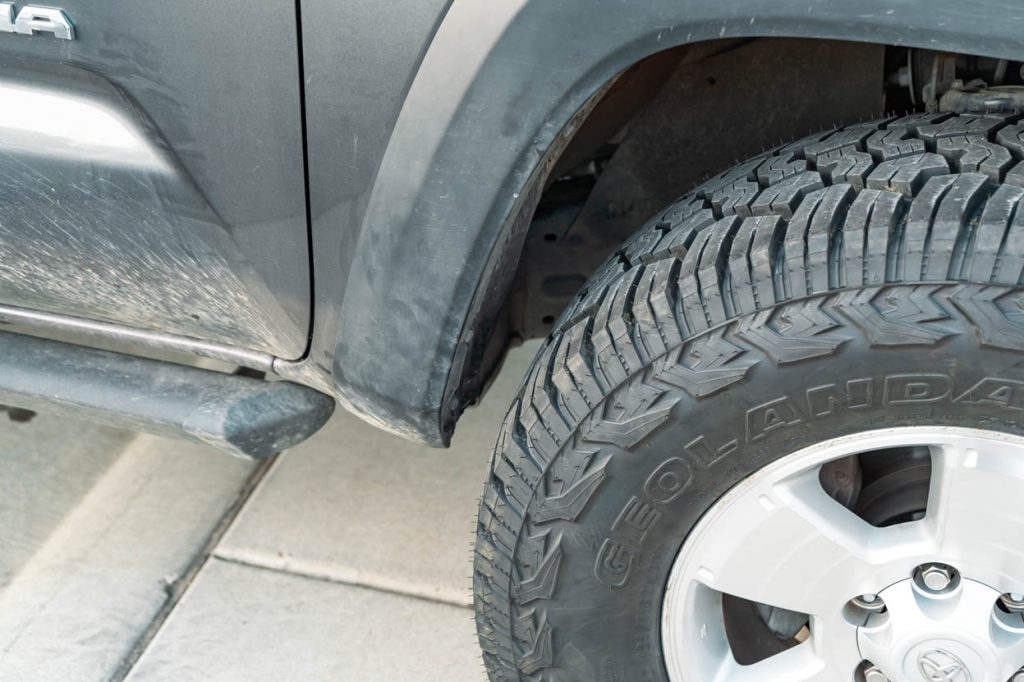
The overall process to getting them to become drivable was fairly straightforward and much less work than we thought it was going to be.
This process took about an hour of work with one person doing all the work and another person behind the camera.
Step 1. Jack Truck Up

First things first, take the tires off and safely place the truck on jack stands.
Toyota provides a jack point right in the middle of the truck so you can jack up both sides at the same time.
Step 2. Remove Hardware

We decided to start by doing a fender line pushback on the front part of the fender liner.
The first step here is to free the fender liner from the front bumper. Two 10mm bolts hold it into place with plastic clips.
Step 3. Push Liner Forward

We used the existing holes on the outer part of the fender liner.
We simply pushed the liner forward, lined up holes in the bumper and fender liner, and moved a clip so we would be able to thread a bolt through.
Step 4. Drill New Hole In Liner
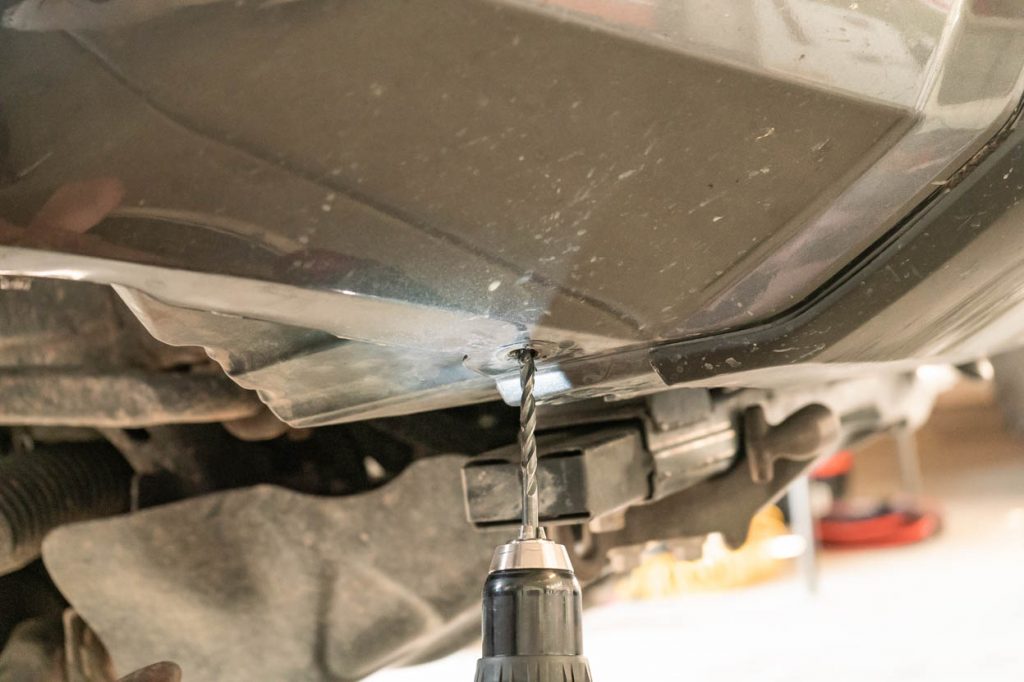
The part of the inner fender that is closest to the midline of the truck did not require any drilling to push it forward.
We pushed the fender liner forward to where we wanted it, held it in place, and drilled through the hole in the bumper to ensure that both holes line up.
Step 5. Reinstall Orange Clip

We then put this OE clip back into place in the bumper.
This clip helps hold the inner fender to the bumper and goes through the hole we just drilled in the inner fender.
Step 6. Heat Rear Liner

After we finished the front fender liner pushback, we started to work on the rear of the fender liner, closest to the firewall. Our goal for this truck was to be as minimally invasive as possible, but achieve enough clearance to daily drive the truck and not rub.
One method we tried was using a heat gun to heat the inner fender, then use some sort of hard object (in our case a kettlebell) and pressed it into the heated inner fender really hard.
Step 7. Push Back
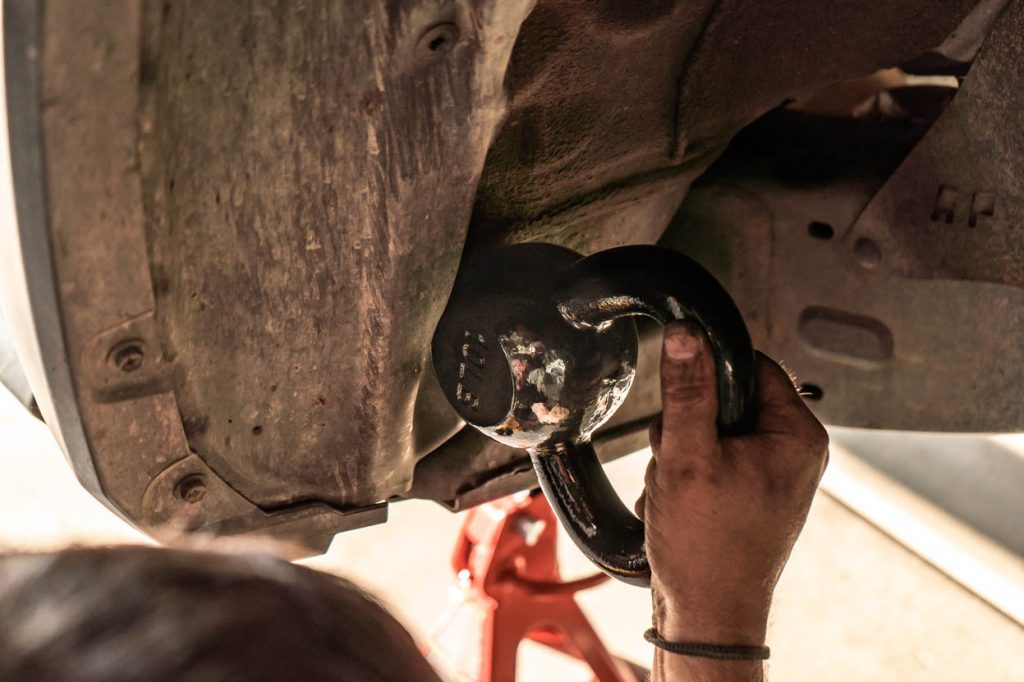
Once the inner fender plastic is nice and hot, firmly press whatever you’re using to create an indent into the inner fender.
This will take a couple of tries before the inner fender flexes into the position you want it.
Step 8. Trim Lower Flare

Next, we cut off the bottom cap of the fender flare. The 33s rubbed very bad here and the cap would have definitely broken off if one of us didn’t catch it during our initial test fit.
We only cut the end of this cap that wrapped up into the inner fender. Be sure not to hit any of the hardware like we did (hence the sparks).
Step 9. Push Back Front Liner
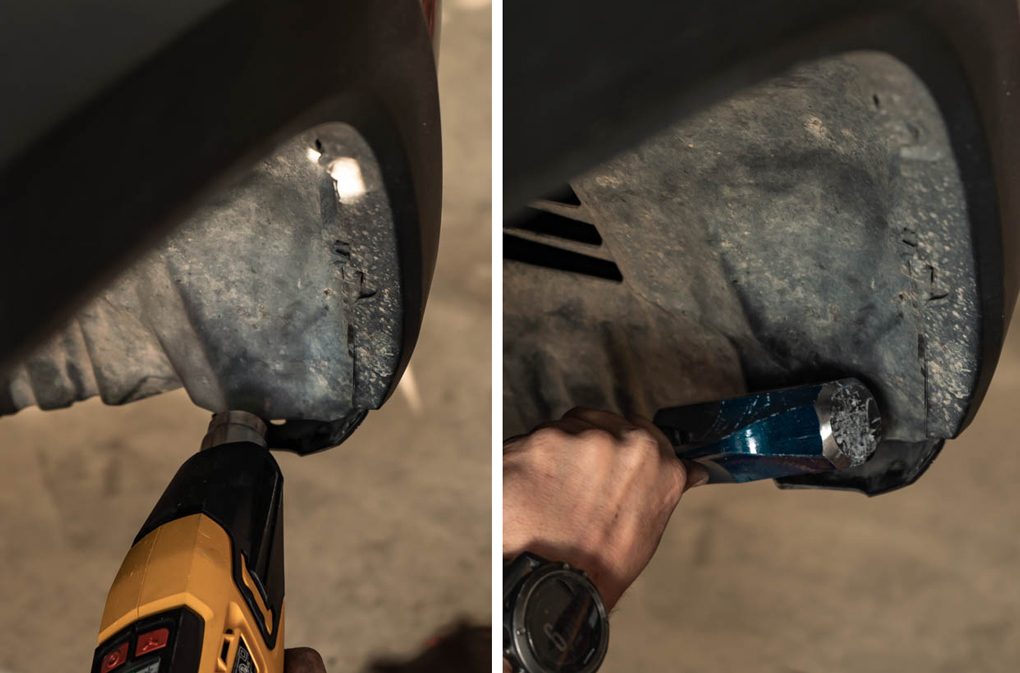
After we buttoned up the back part of the inner fender, we decided to jump back to the front. After we did the fender liner pushback, we thought we could get even more room out of the front of the inner fender.
Since the heat gun and hard object worked so well on the back end, we gave it a shot up front. We ended up getting quite a bit more clearance out of the inner fender.
Step 10. Trim Front Bumper

After we pushed the inner fender farther forward, there was a big chunk of the front bumper hanging past the inner fender.
The simple solution was to take a Dremel to the bumper.
Step 11. Reinstall Hardware
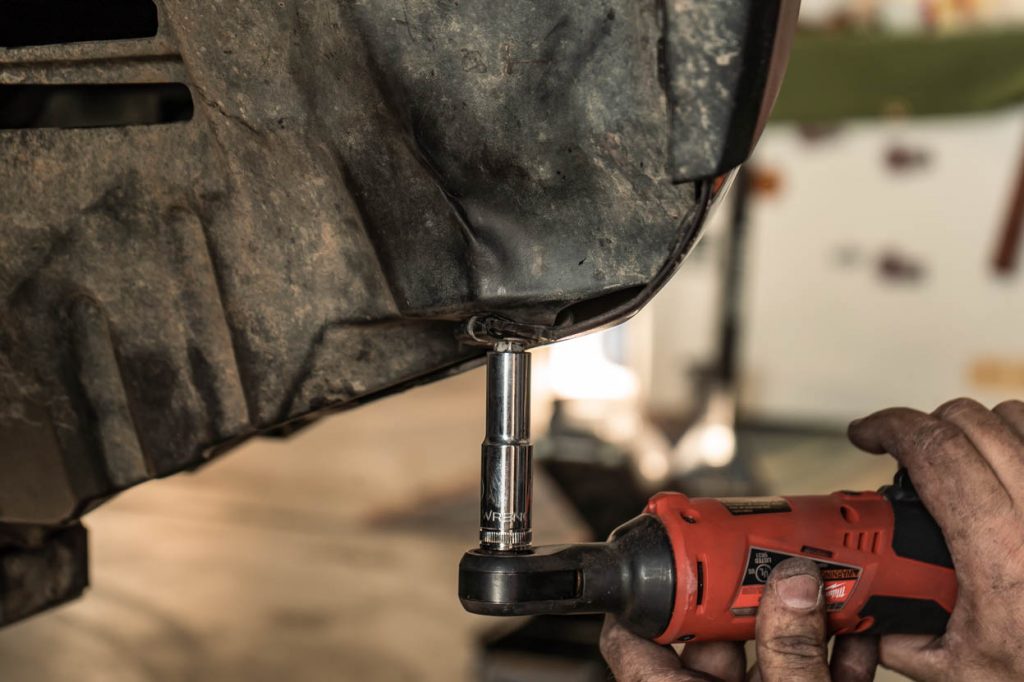
Once everything is wrapped up, reinstall the hardware back into the bumper and inner fender.
If you have an extra set of hands, have the other person hold the fender liner into place while you put the hardware back in.
Final Thoughts
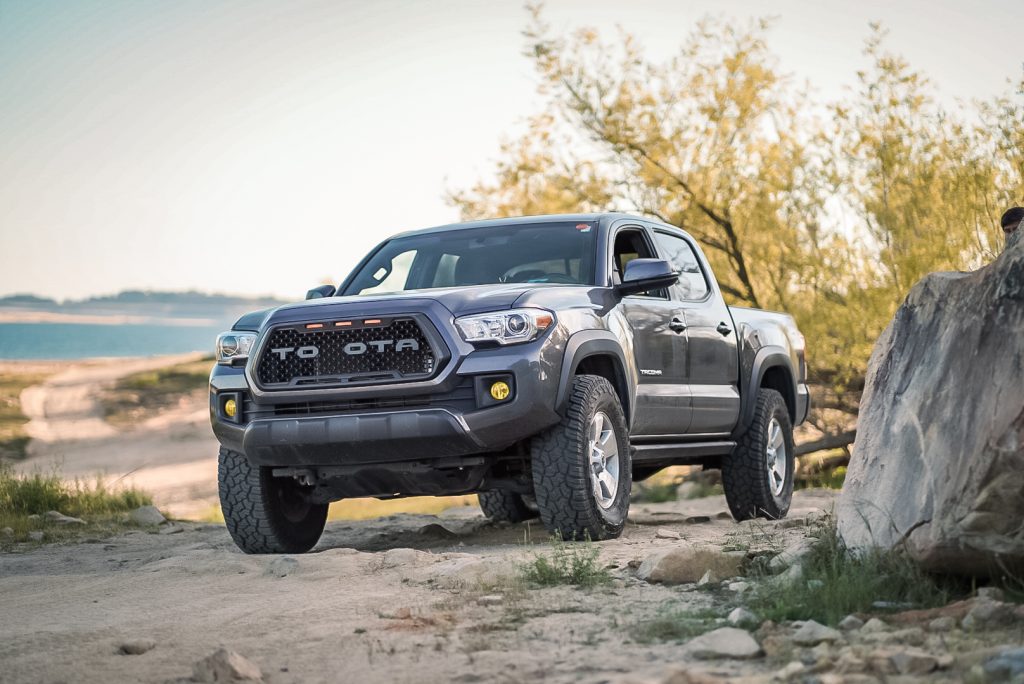
To answer the infamous question, you can fit 33s without a lift with some modification. Without any modification, they won’t be drivable.
They are a great all-around sized tire. They are bigger than stock so they perform much better off-road, and they aren’t too big so they require minimal trimming and have very little noticeable power loss. They are also the biggest-sized tires I would install without a lift.
We installed these on Jimmy’s – @snailtrail4x4 – 2016 TRD Off-Road Tacoma. After pushing the inner fender forward, heating the inner fender, and cutting the fender flare we got the truck ready for street driving. Since his truck is a 6-speed, his gear ratio is 4.30 so the power loss was not that noticeable.
After all of this we still barely rub on the plastics near the firewall, primarily on the driver side. After pushing the plastics back even further with a heat gun and running a 3/4″ spacer, the rubbing is almost non-existent. While the front took a little bit of work to get the tires to be drivable, the rear tires do not rub at all without the use of wheel spacers.


[…] 33″ Tires (285/70R17) On Stock 3rd Gen Tacoma? […]
Stop describing 285s as 33s they are not close to the same size. They are more similar to a 31. A 295 or 305 would be much more comparable to a true 33” tire.
You’re critical of their tire diameter measurements, but you’re using a width measurement to denote diameter?
I have a 2022 sr5 which I decided to lift to fit 33” tires. I went with adjustable struts in the front and they put a 1 inch spacer in the back. I’m finding that even with the front struts fully maxed out my truck is still sitting higher in the back. I’m wondering if I should just take the back spacers out but I’m not sure what notch to move my front struts to or if I’ll have the clearance. I just want the damn thing to sit level. Any help would be greatly appreciated. Thanks
Hello all, I currently own a TRD Sport 21 and I am running the stock tires for now. Looking to upgrade wheels and tires. With that being said the wheels are the 4runner TRD pro style wheels at 17″ and looking to get to 33″ tires. The wheels run with a +5 offset. Would this cause any trouble in clearing the UCA’s?
2020 TRD Sport Taco here. I just put Bilstein 5100’s and 33” Toyo ATIII, did no trimming or “fab” work. Still using my stock rims, got some rubbing on UCAs at about 80% to lock. I wanted to figure out exactly what it would take to clear UCA’s, so I went out and got a 5/16 spacer, and now rubbing is nearly fixed. Can now go full lock but the knobs on the inside of the tire are just kissing the UCA. Still not there, so my next step it offset rims. My friend and I figured it would take… Read more »
Will 33″ tires work on 18″tundra trd wheel and putting on a 2017 tacoma w/3 inch lift will it rub.
Do 33’s fit on the stock trd off-road rims.
Yes, they should.
Hey so I have an 18 sport. I have the stock tires on it now but looking at getting 33’s. I just did my eibach stage 1 lift which gave me 2.5″ of lift in the front. I also did jba uca’s when I did the lift. Wheel setup is 17×9 +1mm fuel rebels. Do we think 33’s will clear? I don’t mind trimming and moving plastic around but I’m concerned about the body mount. The stock tire is about 2″ from the uca. What are your thoughts on 33’s fitting?
Depends on how hard you wheel. The street shouldn’t be too bad, but off-road, it will rub on mount. You should be okay outside some fender/liner trimming. Might need to bang pinch weld flat if you wheel as well.
How would regearing improve the speedometer accuracy?
Alex, You need to find the ratio between the Ring (R) and Pinion (P) and Tire (T) size. My truck has 4.30 R/P and 30.6 in T. 30.6/4/3=7.12
Now that I have 33’s Tires I need to find a R/P set that gets me close to 7.12.
33(T)/4.56(R/P)=7.24 <— This is close enough
33(T)/4.88(R/P)=6.76 <— This is to low
Correct gear ratio per your tire size will set your added unsprung rotational mass back into closer spec/weight/rotation metrics for the number of driveshaft rotations in relation to actual tire rotations.
I agree that 33’s are arguably the best choice for a 3rd gen tacoma owner, which is why I went that route. Just curious, since I don’t plan on re gearing my truck, what issues might I run into as far as wear and tear in the long run? I plan to keep going with this tire size indefinitely.
Larger Tires will add more stress on the steering and drivetrain components. With larger tires, it will also affect your brakes. All that said we are talking fractions here and besides a little more load on the engine to get moving you won’t notice a thing.
Do you know if 33s would fit better with the new Toyota TRD Lift Kit?
I would feel pretty confident in clearing 33″ tires on the new TRD Pro suspension with minimal work. You never know until you get your hands on one but with 1.5″ in the front, and new UCAs I bet they planned for clearing a bigger tire. But, you still may need wheels with negative offset or spacers to clear those UCAs so it’s hard to say right now.
The TRD Lift Kit does not include new UCAs.